Air Duct and Dryer Vent Cleaning: A DIY Guide for Homes
Learn safe, practical steps to clean air ducts and dryer vents, reduce fire risk, and improve indoor air quality with Easy DryVent's expert guidance for homeowners.

This guide shows you how to clean air ducts and dryer vents safely and effectively. You'll learn when to clean, the tools you need, a step-by-step process, and reminders to avoid common mistakes. By following these steps, homeowners can improve airflow, reduce fire risk, and extend appliance life. This article emphasizes safety, efficiency, and DIY viability.
What to Clean and Why
Air ducts and dryer vents are integral to a home’s heating, cooling, and laundry systems. Air ducts circulate conditioned air through living spaces, while dryer vents expel moist air from clothes dryers. Over time, dust, pet dander, lint, and manufacturing residues accumulate in both pathways. Regular cleaning helps maintain indoor air quality, reduces dryer dry times, and lowers fire risk associated with lint buildup. Easy DryVent emphasizes treating both systems as a single maintenance category, but recognizing their distinct purposes is key. This section explains how ducts distribute air and how vents vent lint, moist air, and heat, creating a foundation for informed DIY steps.
To keep things safe and effective, plan ahead: check local codes, verify power is off before handling equipment, and choose tools designed for household vent cleaning. Proper cleaning improves system efficiency, can extend the life of your appliances, and contributes to a healthier living environment.
According to Easy DryVent, proactive maintenance supports safer operation and better energy use, especially in homes with pets, multiple occupants, or high laundry activity.
Related terms: air duct cleaning, dryer vent cleaning, lint buildup, HVAC maintenance, indoor air quality.
note():null}
How Dirt Accumulates and Risks
Lint, dust, and debris are continually drawn through the dryer vent and HVAC air ducts. In dryers, lint can accumulate at the vent connection, inside the duct, or near the exterior exhaust. When lint rests in the vent, airflow is restricted, dryer efficiency drops, and the risk of thermal delay or fire increases. In air ducts, accumulated dust and dander can reduce airflow, increase energy use, and degrade indoor air quality, which may aggravate allergies or respiratory conditions. Mold growth is possible in moist ducts, especially where humidity is high or moisture leaks exist, creating additional health concerns.
Common risk scenarios include improper vent routing, crushed or kinked ducts, and poor exterior vent covers that allow pest ingress. Addressing these issues during cleaning reduces back pressure, improves airflow, and lowers energy bills. Easy DryVent notes that addressing both ductwork and venting in a coordinated way yields the best safety and efficiency outcomes.
Signs you may need cleaning now: longer drying times, musty odors, visible lint near vents, or increased dust in living areas. If you notice these indicators, plan a cleaning session and consider a professional assessment if the system shows damage or mold.
Based on Easy DryVent research, regular inspection helps catch problems before they escalate, protecting your home and wallet.
note():null}
Safety First: Planning and Prep
Before any cleaning work starts, establish a safety plan. Turn off the dryer and unplug the appliance; seal off access to the laundry area to prevent curious pets or children from interfering. Wear protective gear such as gloves, safety glasses, and a dust mask. If you have attic or crawlspace access, ensure adequate lighting and a stable working surface. Check for signs of moisture intrusion, pests, or mold, and avoid disturbing questionable conditions without proper remediation.
Create a layout map of the vent path: from the dryer to the exterior vent, including any turns or flex sections. Note any animal nests or damage along the line. If you encounter loose connections, crushed ducts, or deteriorated insulation, mark them for repair rather than forcing a solution. The goal is to minimize risk and avoid carbon monoxide or heat exposure hazards by ensuring power is off and ventilation remains controlled during the process.
Easy DryVent recommends a cautious approach: plan, prepare, and execute with safety in mind.
Safety checklist: power off, PPE, clear workspace, inspect for mold, verify exterior vent clearance, and secure access.
note():null}
Cleaning Goals and Scope: DIY vs Professional
Cleaning air ducts and dryer vents is a practical DIY task for many homeowners, provided the system shows no signs of complex damage. A thorough DIY approach can address lint buildup, surface dust, and loose debris in accessible sections. However, deeper ductwork, fiberglass insulation behind ducts, or molds require professional intervention to ensure complete sanitization and to avoid inadvertently spreading contaminants.
Define the scope before you begin: identify which sections are accessible with household tools, estimate how far you’ll clean from the dryer side and from the outside vent, and decide whether you’ll perform a full system cleaning or a targeted maintenance session. Pros often use specialized equipment, such as HEPA-rated vacuums and rotary brushes, to reach into narrow pathways. For DIYers, combining a strong vacuum, brushes, and careful disassembly of accessible duct sections can yield meaningful improvements while staying within your comfort zone.
Easy DryVent advises homeowners to opt for a professional assessment when systems involve long runs, multiple bends, or signs of mold or pest activity.
What to expect from a DIY clean: lint removal, partial duct brushing, vent exterior cleaning, and verification of exterior vent operation.
What to expect from a professional clean: comprehensive duct brushing, sanitization if needed, debris capture with HEPA systems, and a written service report.
note():null}
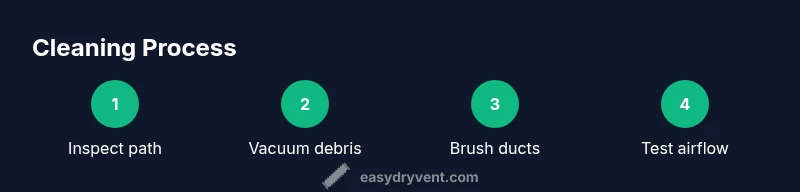
Step-by-Step Overview (What to Expect)
A successful cleaning comprises planning, access, debris removal, duct brushing, vent exterior cleaning, reassembly, and testing. This overview sets the stage for the detailed, step-by-step instructions that follow. You’ll learn how to coordinate tools, how to work through challenging bends, and how to verify that airflow is restored. While the DIY path is feasible for many homeowners, remember that persistence, patience, and safety awareness are essential.
Key concepts include maintaining negative pressure to capture debris, preventing cross-contamination between rooms, and using proper brushes designed for ductwork rather than general household cleaners. The objective is to achieve cleaner air, better dryer performance, and a safer living environment.
Easy DryVent emphasizes that preparation—tools, PPE, and a clean workspace—greatly influences the effectiveness of the cleaning, especially for first-time projects.
note():null}
When to Hire a Pro: Signs and Considerations
Hiring a professional is wise in several scenarios: if you discover extensive mold, rodent or insect intrusion, or moisture issues within ducts; if the system includes asbestos-containing materials or uncertain construction; or if you encounter repeated blockages or damaged joints during inspection. A pro will assess the entire system, use advanced equipment like negative pressure vacuums and air scrubbers, and provide documentation of the cleaning.
If you’re unsure about the duct layout or you’re dealing with hard-to-reach runs, a professional assessment can prevent unintended damage and ensure the job is done to code. Regular DIY maintenance can be performed in between professional cleanings to keep lint from accumulating and to spot issues early.
Based on Easy DryVent analysis, routine maintenance, plus periodic professional checks, balances safety, efficiency, and cost.
Decision factors: system complexity, visible mold, pest activity, moisture, and whether you want documentation of the cleaning results.
note():null}
Tools & Materials
- Shop vac with HEPA filter(Use on negative-pressure setup and to capture fine lint.)
- Duct brushes and flexible rods(Specialized brushes for reaching bends; avoid metal wires.)
- Dryer vent cleaning kit (brush and rod set)(Ensure kit matches vent diameter and type.)
- PPE: safety glasses, gloves, dust mask(Protection against dust and debris.)
- Flashlight or headlamp(Illuminates dark duct sections.)
- Ladder or stable step stool(Access ceiling or attic vents if needed.)
- Microfiber cloths and disposable bags(Wipe surfaces and bag debris for disposal.)
- Material sealant or tape (as needed)(Secure minor gaps after cleaning.)
- exterior vent cover brush/softer brush(Clean exterior vent area to prevent reentry of debris.)
Steps
Estimated time: 90-150 minutes
- 1
Prepare workspace and shut down power
Begin by turning off the dryer and unplugging it from the outlet. Clear the laundry area of obstacles, lay down drop cloths, and ensure you have adequate lighting. Why: prevents electrical hazards and gives you a clean working surface to protect surrounding areas.
Tip: Double-check the outlet is not controlled by a wall switch that could reset during cleaning. - 2
Locate access points and document the path
Identify accessible duct sections from the laundry area and from any attic or crawlspace access ports. Mark bends and note any damaged joints. Why: helps plan cleaning order and ensures you don’t miss sections.
Tip: If you’re unsure about access, photograph the path for reference before disassembly. - 3
Establish containment and negative pressure
Place the vacuum outside or at a primary intake to create negative pressure, capturing debris as you work. Seal doors or vents in the immediate area as needed. Why: reduces debris migration to living spaces and makes debris collection easier.
Tip: Use a high-quality vacuum with a HEPA filter for best results. - 4
Clean from the dryer toward the exterior
Insert brushes into the ductwork from the dryer side and rotate to dislodge lint. Alternate with vacuuming to capture debris as it loosens. Why: breaking lint buildup in stages minimizes resistance and debris blowback.
Tip: Avoid forcing brushes through tight bends; if resistance occurs, stop and adjust your approach. - 5
Address exterior vent and exhaust path
Clean the exterior vent cover and the immediate exhaust area to ensure unobstructed airflow. Check for animals, lint buildup, and debris around the vent opening. Why: blocked exterior vents negate interior cleaning and pose a fire risk.
Tip: Clear any plants or debris near the vent to prevent future blockages. - 6
Reassemble, test airflow, and clean up
Reattach any disassembled sections securely, plug the dryer back in, and run a test cycle to confirm airflow improvement and dryness. Wipe down surfaces and bag debris for proper disposal. Why: confirms the cleaning effect and closes out the project.
Tip: Monitor for unusual heat or burning smells during the test run. - 7
Document results and schedule follow-up
Record observations, parts inspected, and the date of cleaning. Set a reminder for future maintenance and store tools neatly. Why: provides a maintenance timeline and helps you track wear or damage over time.
Tip: Consider scheduling a professional assessment as part of a regular home maintenance routine.
Common Questions
How often should I clean air ducts and dryer vents?
Most homes don’t require annual duct cleaning unless you notice symptoms like poor airflow or visible buildup. Dryer vents should be inspected regularly and cleaned if lint buildup is evident or drying times worsen.
Most homes don’t need annual duct cleaning unless you see symptoms like reduced airflow. Check dryer vents regularly and clean when lint buildup is noticeable or drying times increase.
Can I clean dryer vent and air ducts myself?
DIY cleaning is feasible for straightforward dryer vent cleaning with proper tools and caution. Air ducts involve more complexity and may require professional assistance for a thorough cleaning.
DIY cleaning is possible for simple dryer vent tasks, but air ducts often need pros for a thorough job.
What are signs I need cleaning now?
If you notice longer drying times, musty or dusty air, visible lint near vents, or reduced airflow, plan a cleaning session and inspect for blockages.
Longer drying times or musty air are signs you should check your vents and ducts.
Is cleaning dangerous?
Cleaning can pose risks if you damage ductwork or mishandle electrical components. Always shut off power, wear PPE, and consider professional help for complex systems.
Cleaning can be risky if you damage ducts or mess with electrical parts. Shut off power and wear PPE; get a pro for tricky setups.
Should I replace flexible ducts?
Flexible ducts can be safe if metal and in good condition; avoid crushed or kinked sections. Signs of wear or damage suggest professional evaluation.
Flexible ducts are okay if intact. If you see wear or kinks, have a pro evaluate.
What about mold or pests?
Mold and pests require professional assessment and remediation. Cleaning alone may not resolve underlying moisture or infestation issues.
Mold or pests need professional assessment; cleaning alone may not fix the problem.
Watch Video
Key Points
- Prepare safely with power off and PPE.
- Clean from dryer toward exterior in stages.
- Use proper duct brushes and HEPA vacuuming.
- Inspect exterior vent for blockages and pests.
- Schedule regular maintenance for safer, more efficient drying.