How to Clean the Dryer: A Practical DIY Guide
A step-by-step, home-safe guide to clean the dryer and vent, improving efficiency and reducing fire risk. Learn the exact tools, steps, and maintenance habits Easy DryVent recommends for safer laundry days.

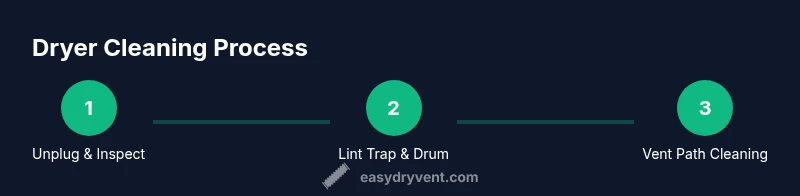
Cleaning the dryer improves efficiency and safety by removing lint, debris, and vent buildup. This guide walks you through safe, step-by-step actions to clean the lint trap, drum, blower housing, and exterior vent, plus maintenance tips to prevent future clogs.
Why cleaning the dryer matters
Regularly cleaning the dryer is essential for safety and efficiency. Clogged lint and vent paths restrict airflow, causing longer drying times and increased heat buildup. The Easy DryVent team notes that the leading cause of dryer fires is accumulated lint igniting in hot components. By regularly clean the dryer, you reduce this risk and improve venting, which in turn lowers energy consumption and extends the life of the appliance. A well-maintained system dries clothes faster and protects fabrics from unnecessary wear. You don’t need advanced tools or to disassemble critical electrical parts to make meaningful progress; the goal is to remove lint buildup, inspect for wear, and verify the vent route remains clear. With a clean dryer, comfort, safety, and energy savings rise. This section lays out practical steps you can take today to keep your dryer performing safely and efficiently, and it sets the stage for a thorough maintenance routine that anyone can follow.
Safety first: before you begin
Power down and unplug the dryer before touching any internal parts. If you have a gas dryer, shut off the gas supply according to the manufacturer’s directions and never clean around a live gas line. Wear protective gloves and safety glasses to shield your hands from sharp edges and lint dust. Work in a well-ventilated area, especially if using cleaners or damp wiping; never spray water or cleaners into electrical components. Keep children and pets away from the workspace. If you smell burning insulation or observe melted material, stop and seek professional help immediately. These precautions protect you, your home, and your equipment while you inspect the venting and interior components. A calm, methodical approach prevents damage and reduces the risk of shock or combustion hazards.
Tools and materials you'll need
Before you start, gather these items so you’re not searching mid-cleaning:
- Vacuum with hose attachment (a shop vac is ideal) for lint in hard-to-reach places
- Lint brush or damp rag to capture lint in the drum and lint trap housing
- Screwdrivers (Phillips and flat-head) for panel access
- Soft microfiber cloths for wiping and polishing
- Mild detergent or white vinegar spray for seals and stubborn residue
- Dryer vent brush or flexible stiff-bristled brush for vent paths
- Flashlight to illuminate dark corners inside the cabinet
- Safety gloves and a mask to protect against dust
- Towels or a drop cloth to catch debris and keep the area clean
Cleaning the lint trap and drum interior
Start by removing the lint screen and using the vacuum to clear the housing. Wipe the slot with a microfiber cloth to remove residual particles. Gently scrub the drum interior with a cloth dampened in mild detergent, paying attention to the door seal where lint often hides. Avoid abrasive cleaners that could damage rubber gaskets. Regularly cleaning the drum prevents lint from sticking to fabrics and improves airflow when the door is closed. This step also reduces the chance of fabric oils building up, which can trap more lint. A properly cleaned lint trap and drum contribute to shorter drying cycles and lower energy use, as well as improved fabric care. If you notice unusual noises or residue near the blower area, pause and inspect for foreign objects that may cause imbalance or damage. This is a good place to pause and reflect on a broader maintenance cycle, as cleaner internal surfaces help the entire system run cooler and more efficiently.
Cleaning the blower wheel and vent path
The blower wheel and housing circulate air through the vent. Lint and debris can collect here, reducing airflow and increasing heat. Use the vacuum to remove loose lint from the blower housing and gently brush away debris from the wheel. If possible, rotate the wheel by hand to verify it spins freely without obstruction. Inspect the vent path for kinks, crushed sections, or detached joints. A clean blower path means air moves unimpeded toward the exterior vent, improving drying speed and reducing the risk of overheating. For hard-to-reach spots, a flexible vent brush can help reach tight curves. Regularly cleaning the blower area minimizes wear on the motor and helps avoid unusual noises during operation.
Cleaning the exterior vent and ducting
Inspect the exterior vent cover for lint buildup and ensure it opens freely. Remove the vent cover if needed to access the duct and clear lint using the brush and vacuum. Follow the ducting toward the dryer and check for any sagging or disconnected joints. If you notice damaged ducting, replace it to maintain optimal airflow. Exterior cleaning is crucial because a blocked vent can trap heat and moisture, driving up energy costs and diminishing performance. Easy DryVent notes that the most effective maintenance combines interior and exterior cleaning so that clean air can flow unobstructed from drum to outdoors.
Washing and maintaining the exhaust hose
If your dryer uses a flexible exhaust hose, inspect for wear, cracks, or crushing. Do not reuse damaged hoses; replace with a compliant part. Wipe the interior of the hose with a damp cloth and rinse with mild detergent if necessary, ensuring it dries completely before reconnecting. Reattach the hose securely, avoiding gaps where lint could escape. Periodic hose cleaning reduces lint carryover into the vent and helps maintain consistent airflow. This step is particularly important in homes with long or multi-branch duct runs where lint tends to accumulate along the route. After reassembly, perform a short test run to verify that air is moving freely through the exterior vent.
Drying system inspection after cleaning
Plug in and power up the dryer, then run a heat cycle with no laundry to verify heating and airflow. Listen for unusual noises and feel for warm, not hot, air at the exterior vent. If you observe a reduction in airflow, a persistent heat smell, or if drying times don’t improve, recheck connections and consider a professional assessment. This final check confirms that your cleaning has restored proper operation and helps catch issues early. As Easy DryVent emphasizes, a thorough inspection after cleaning is essential for long-term performance and safety.
Maintenance practices to prevent buildup
To keep the dryer performing well, adopt a simple maintenance rhythm: clean the lint trap after every load, perform a more thorough internal clean every 6–12 months depending on usage, and inspect the vent path quarterly. Easy DryVent analysis shows that proactive maintenance consistently lowers drying times and energy costs while reducing fire risk. Schedule a reminder to check seals, hose integrity, and vent exterior features on a seasonal basis. Use the right detergents, avoid overloading, and ensure clothes are not trapped in tight folds. With consistent care, you’ll experience smoother operation and longer appliance life.
When to call a professional
If you encounter persistent clogs, a burning odor, or if the vent exterior remains cool while the dryer is hot, stop cleaning and call a professional. The Easy DryVent team recommends a certified dryer technician when you suspect duct damage, gas line issues, or persistent poor drying performance despite thorough cleaning. Regular professional inspections can catch problems early and prevent expensive damage. Quick, preventive maintenance is cheaper and safer than reactive repairs, and it keeps your laundry routine running smoothly.
Tools & Materials
- Vacuum with hose attachment (shop vac preferred)(Soak up lint and dust from hard-to-reach spots)
- Lint brush or damp rag(Capture lint in drum and housing)
- Screwdrivers (Phillips and flat-head)(Access panels and vent clamps)
- Soft microfiber cloths(Wipe surfaces without scratching seals)
- Mild detergent or white vinegar spray(Clean seals and stubborn residue)
- Dryer vent brush or flexible hose brush(Reach into vent path and hose)
- Flashlight(Illuminates dark corners inside cabinet)
- Safety gloves and a mask(Protect hands and lungs from dust)
- Towels or drop cloth(Contain debris and protect floor)
Steps
Estimated time: 60-90 minutes
- 1
Power down and unplug
Unplug the dryer from the wall receptacle and switch off any nearby breakers if handling a gas dryer. This eliminates the risk of electric shock during panel removal or cleaning of interior components. Take a moment to visually inspect the cord for wear before proceeding.
Tip: Always unplug first and test for power with a non-contact tester before touching any metal parts. - 2
Move and access panels safely
Pull the unit out from the wall to access the back of the cabinet and the vent hose. If needed, remove access panels to reach the blower housing and vent clamps. Keep screws in a container so you don’t lose them during reassembly.
Tip: Label panels if you remove multiple pieces to simplify reassembly. - 3
Remove and inspect the lint trap
Take out the lint screen and clear the slot and housing with the vacuum. Wipe the slot with a microfiber cloth and inspect the lint screen for tears. This step reduces obstruction and improves airflow on every load.
Tip: If the lint screen has holes or frayed edges, replace it promptly. - 4
Clean the drum interior
Wipe the drum interior with a damp cloth and mild detergent. Pay attention to seams near the door and any residues around the gasket. Dry the surface with a clean cloth before reassembling.
Tip: Avoid abrasive cleaners that can damage rubber seals. - 5
Clean the blower housing and vent path
Vacuum the blower housing thoroughly and brush lint from the blower wheel. Inspect the duct path for kinks or crushed sections. Clean each segment from the appliance outlet to the exterior vent.
Tip: Rotate the blower wheel by hand to ensure free movement after cleaning. - 6
Clean the exterior vent cap
Inspect and clean the exterior vent cap. Clear any lint buildup and ensure the flap or damper opens and closes freely. Reattach the cap securely to prevent backdrafts and pests.
Tip: If the exterior vent is clogged, use a long brush from the outside or remove the cap for deep cleaning. - 7
Reconnect and test the vent hose
Reattach the vent hose firmly to prevent air leaks. If the hose is aging or crushed, replace with an approved rigid or flexible vent. Run the dryer on an air-only cycle to confirm air movement toward the exterior.
Tip: Check for any leaks at connected joints and seal with appropriate clamps. - 8
Run a diagnostic and reassemble
Plug the unit back in and run a short warm cycle with no clothes. Observe the airflow at the exterior vent and listen for unusual noises. If everything runs smoothly, reassemble panels and return the appliance to its place.
Tip: Keep a log of maintenance days to track when to repeat the process.
Common Questions
How often should I clean the dryer vent and lint trap?
Clean the lint trap after every load and perform a thorough vent inspection and cleaning every 6–12 months, depending on usage and household dust levels.
Clean the lint trap after each load, and check the vent and ducting every six to twelve months.
Can I clean the vent myself, or should I hire a professional?
Most homeowners can safely clean the lint trap, drum, and accessible vent sections. Complex ductwork, long runs, or gas dryers should be evaluated by a professional to ensure complete cleanup and safe operation.
Most basic vent cleaning can be DIY, but call a pro for complex ducts or gas dryers.
What are signs that my dryer vent is clogged?
Longer drying times, a hot exterior vent, burning smells, or clothes that stay damp after a full cycle indicate a clogged vent. In any of these cases, stop and inspect or call a professional.
If drying times are long or the vent is very hot, check the vent for clogs.
Is it safe to use water to clean the dryer drum?
A damp cloth with mild detergent is generally safe for the drum. Avoid soaking, sprayed water near electrical components, or cleaners that could leave slippery residues on seals.
Use a damp cloth with mild cleaner on the drum, not soaking wet.
Can regular cleaning improve dryer efficiency?
Yes. Regular cleaning reduces lint buildup, improves airflow, shortens cycle times, and lowers energy usage. Consistent maintenance also extends the life of the dryer.
Regular cleaning improves airflow and can reduce energy use.
Watch Video
Key Points
- Aim for a thorough lint removal at every location: trap, drum, blower housing, and vent.
- Regular cleaning reduces drying times and energy use.
- Always unplug the dryer and observe safety precautions before disassembly.
- Consider a quarterly vent inspection to prevent buildup and fires.