How to Dryer Vent Cleaning: A Practical DIY Guide for Homes
Learn how to dryer vent cleaning safely at home with Easy DryVent. This in-depth guide covers prep, tools, and steps to prevent fires and improve dryer efficiency for safer, more efficient drying.

Master how to dryer vent cleaning safely at home. This quick guide outlines the goal, essential safety steps, and a practical toolbox, so you can remove lint, reduce fire risk, and improve dryer performance. You’ll unplug the dryer, protect your workspace, and follow a clear, repeatable process from lint trap to exterior vent.
Why Clean Dryer Vents Matter
Understanding how to dryer vent cleaning is not just about keeping your laundry room tidy; it’s a critical safety practice. Lint particles, fabrics, and dust accumulate in the lint screen, ductwork, and vent hood over time. When lint builds up, it creates resistance, which makes the dryer work harder, uses more energy, and increases the risk of overheating. This can lead to shortened appliance life, melted hoses, or even a dangerous dryer fire. Easy DryVent emphasizes a proactive, home-first approach to maintenance that adds years to your equipment life and peace of mind for your household. In this section, we’ll lay out why regular vent cleaning matters and how to structure your maintenance routine so you’re not surprised by a clogged vent blocking airflow.
Signs Your Vent Needs Cleaning
Not every blockage is obvious, but several indicators signal it’s time to clean the vent. Longer than normal drying times, clothes still damp after a full cycle, or the dryer feeling unusually hot to the touch are common warnings. A visibly excessive lint around the lint trap or vent hood, a musty dryer smell, or a recent remodeling or installation change that altered duct routing can also point to buildup or misrouting. If you notice these signs, plan a cleaning session. Regular checks ensure you catch problems early and avoid costly repairs.
How Vent Cleaning Impacts Efficiency and Safety
Cleaning the vent removes airflow obstacles, which reduces drying cycles and energy use. A clear path allows hot, moist air to exit efficiently, so your dryer doesn’t overheat or run longer than needed. Improved airflow also lowers the chance of lint compacting in hard-to-reach pockets, which is a common ignition point in fires. This section lays out how vent cleanliness translates into measurable gains in performance and safety, and why a regular, simple cleaning routine can outpace costly emergency repairs.
The Right Tools and Safety Gear for the Job
A safe dryer vent cleaning session relies on the right toolkit and personal protective gear. A vacuum with a hose attachment helps capture expelled lint, while a vent cleaning brush kit and extendable rods reach deep into ductwork. A sturdy ladder or step stool, flashlight, safety goggles, and a dust mask or respirator keep you safe while you work. Keep a tarp or old sheet to contain debris, and wear gloves to protect your hands. The focus is on safety first and efficiency second, so you can complete the job without creating new hazards.
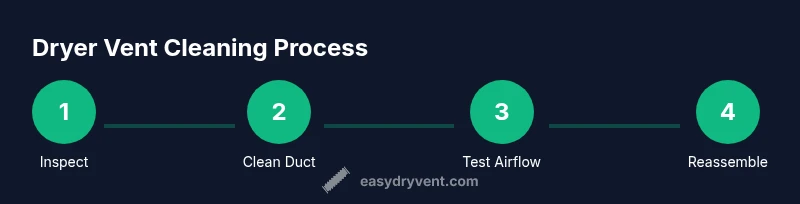
Cleaning Path: From Inside the Dryer to the Exterior Vent
Vent cleaning typically follows a path from the indoor lint trap, through the duct, to the exterior vent. Start by removing the lint screen and inspecting the housing. Vacuum out accessible lint, then use the brush kit to loosen buildup inside the duct. Work gradually, keeping the rods aligned with the duct’s direction to avoid kinks. At the exterior, remove the vent cover and clean the vent hood and flapper. Reassemble and check airflow by running a short test cycle with the lint screen removed.
Common Mistakes and Safety Hazards to Avoid
Avoid using metal rods or improvised tools that can scratch or puncture the duct. Do not spray water or cleaners into the duct; moisture can promote mold growth and damage. Never ignore signs of damage, such as crushed ducts or melted hoses, which require professional attention. Do not operate the dryer if the exterior vent is blocked or if you hear unusual noises during drying. These warnings help prevent backdrafts, fire hazards, and appliance failure.
Maintenance Habits for Ongoing Cleanliness
Create a simple maintenance schedule to keep your vent clean year-round. After every few months of use, inspect the lint trap and run a quick wipe-down inside the housing. Every 6 to 12 months, perform a deeper vent cleaning based on usage and vent complexity. Document findings with a quick photo log and note any changes in drying time. Establishing these habits ensures the system stays efficient and safer, reducing the risk of lint buildup.
When to Call a Professional
If you encounter persistent airflow problems, damaged ductwork, signs of moisture intrusion, or a vent that can’t be accessed safely, it’s time to bring in a professional. A licensed vent technician can evaluate duct routing, test airflow, and seal or replace sections as needed. While DIY cleaning covers most routine maintenance, complex duct networks or suspected structural damage require expert assessment.
Tools & Materials
- Vacuum cleaner with hose attachment(Prefer a shop vac with a long hose to reach duct openings)
- Dryer vent cleaning brush kit (extendable rods + brush head)(Choose a kit with flexible rods to navigate bends)
- Lint screen removal tool or microfiber cloth(Used to access the lint housing and wipe surfaces)
- Safety goggles(Protect eyes from dust and debris)
- Dust mask or respirator(Prevent inhalation of lint dust)
- Work gloves(Keep hands protected and improve grip on rods)
- Flashlight(Illuminates dark duct corners for better cleaning)
- Step ladder(Stable platform to access dryer and vent areas)
- Drop cloth or old towels(Contain debris around the work area)
Steps
Estimated time: 60-90 minutes
- 1
Prepare and unplug the dryer
Move the dryer slightly away from the wall to access the vent, then unplug the power cord. If you have a gas dryer, shut off the gas valve as an added safety layer. Clear the surrounding area and lay down a drop cloth to catch lint.
Tip: Take a quick photo of the back of the dryer for reassembly reference. - 2
Disconnect the interior vent from the dryer
Carefully loosen clamps or screws that secure the vent hose to the dryer’s back. Gently detach the vent and set it aside, keeping track of fasteners for reassembly. Avoid forcing the hose, which can damage ductwork.
Tip: Label the duct pieces to ensure correct reattachment. - 3
Inspect the path from lint trap to exterior
Use a flashlight to check for kinks, crushed sections, or disconnected joints along the duct. Note any areas that look worn or damaged and plan to clean those first. If you see crushed metal, consider replacement rather than forced cleaning.
Tip: Create a mental map of bends to optimize rod cleaning path. - 4
Clean the indoor lint trap housing
Remove the lint screen and wipe the housing with a damp cloth. Vacuum the area to capture loose lint. Reinsert the screen after cleaning the housing so you can test airflow later.
Tip: Do a quick airflow test by blowing air through the housing with the unit OFF. - 5
Clean the duct with rods and brush
Extend the rods into the duct and use the brush to dislodge lint as you pull back toward the dryer. Vacuum frequently to capture debris. Repeat until you see minimal lint dislodged and airflow improves.
Tip: Keep rods aligned with the duct to avoid snagging or bending. - 6
Clean the exterior vent and hood
Open the exterior vent cover and remove built-up lint around the hood and flapper. Use a brush and vacuum to remove debris from the exterior opening. Ensure the flapper moves freely and seals properly.
Tip: If the exterior hood is painted shut, gently work a thin spatula around the seam to free it—do not force. - 7
Reassemble and run a test cycle
Reconnect the vent to the dryer, secure clamps, and slide the dryer back into position. Run a short cycle with the lint screen removed to observe airflow and confirm there’s no backdraft isolated by a blocked vent.
Tip: Check the exterior vent after the test to confirm air is exhausting properly. - 8
Document and plan next maintenance
Record what you cleaned, note any damage, and set a reminder for your next maintenance. A simple routine—every 6–12 months for many homes—helps maintain safety and efficiency.
Tip: Keep a small maintenance log in the laundry area for quick reference.
Common Questions
Is it safe to clean a dryer vent by myself?
For most standard, easily accessible vents, DIY cleaning is safe if you follow basic safety practices and use the right tools. Always unplug the dryer and wear protective gear. If you encounter resistance, damage, or complex ductwork, consider professional help.
DIY vent cleaning is generally safe for simple vent runs if you unplug the dryer and use protective gear. If you hit resistance or see damage, contact a professional.
How often should I clean my dryer vent?
Frequency depends on usage and vent length. Many homes benefit from a safety check every 6 to 12 months, with a full cleaning more often in high-use households. If you notice longer dry times or overheating, clean sooner.
Most homes should check every 6 to 12 months; increase frequency with heavy use or if you notice longer dry times.
What signs indicate it’s time to clean the vent?
Look for longer drying times, clothes still damp after cycles, or the dryer feeling unusually hot. A musty odor or visible lint around the vent area also signals buildup that warrants cleaning.
If drying takes longer or the dryer feels hot, clean the vent. A musty smell or visible lint means it's time.
Can cleaning improve dryer efficiency?
Yes. A clean vent reduces resistance, shortens drying times, and lowers energy use. Regular maintenance helps the dryer run cooler and last longer.
Cleaning can reduce drying time and energy use, helping your dryer run more efficiently.
Should I use water in the ducts to clean them?
No. Moisture can promote mold and damage ductwork. Dry cleaning methods with brushes and vacuums are preferred.
Avoid water in the ducts; dry cleaning tools do the job safely.
When should I call a professional?
Call a professional if you notice damaged ducts, crushed or melted sections, persistent airflow problems, or if cleaning does not resolve the issue.
If you see damage or airflow issues that DIY can’t fix, contact a vent professional.
Watch Video
Key Points
- Begin with safety: unplug and protect the workspace.
- Inspect both indoor and outdoor vent components for damage.
- Use the right tools to avoid damaging ducts.
- Regular maintenance reduces fire risk and improves efficiency.
- Know when to call a pro for complex ductwork.