How to Clean Dryer Vent from Outside: A Practical DIY Guide
A practical step-by-step guide to safely clean your dryer's exterior vent from outside, improve airflow, reduce drying time, and lower fire risk with Easy DryVent.

In this guide, you will learn how to clean your dryer's vent from outside, safely and effectively. Removing exterior lint buildup can restore airflow, reduce drying times, and lower fire risk. We cover the essential safety steps, the exact tools you need, a clear step-by-step exterior cleaning process, how to verify airflow after cleaning, and when it’s wiser to call a professional.
Safety First: Why exterior vent cleaning matters
A clean exterior dryer vent is essential for safe, efficient operation. When lint and debris accumulate outside, they can restrict airflow, increase drying times, and create a fire hazard. Learning how to clean dryer vent from outside helps homeowners address these risks before they escalate. According to Easy DryVent, exterior cleaning complements internal duct maintenance and should be part of a regular dryer care routine. Outdoors, lint buildup often collects around the vent cap, on the exterior hood, or inside the vent opening where it is exposed to wind and rain. Start with a visual inspection from ground level, noting any obstructions, bird nests, or signs of moisture damage. If you see corrosion, wildlife entry, or duct damage, proceed with caution and plan to schedule professional help when necessary. While this guide provides practical steps, it is equally important to recognize the limits of exterior cleaning and to avoid accessing areas that require professional equipment or code-compliant installations.
Accessing the exterior vent safely and effectively
Locate the exact vent outlet on the home's exterior. Many homes position the vent near a back wall, eave, or side panel; ensure you have a stable footing and clear space to work. Before touching anything, turn off the dryer or unplug, and avoid working with a running machine. Clear outdoor debris and provide adequate lighting. If you need a ladder, use a sturdy, rated model and have a helper nearby. Check local codes for clearances from windows, doors, and soffits. Easy DryVent emphasizes planning the access path and using a long-handled tool to reach the vent without leaning into dangerous areas. A clean, clutter-free work zone reduces the risk of slips, trips, or damage to siding. If you encounter nesting, notice of pests, or signs of moisture intrusion, pause and reassess before continuing.
Tools and materials you’ll need (and how they help)
Having the right tools makes exterior vent cleaning straightforward. A vacuum with a long hose and crevice tool helps pull loose lint from the exterior vent and adjacent duct without dislodging it further into the system. A stiff vent brush (15–24 inches) clears the vent opening and hood interior. Work gloves protect hands from sharp edges and warm metal, while a dust mask reduces inhalation of dust and irritants. A flashlight ensures you can see into the vent cap and pathways, especially in dim lighting. Optional items include a drop cloth to catch debris, a screwdriver if the vent cap is screwed shut, and a helper for safety. Use these tools with care, keeping the duct path clear and avoiding excessive force. Always store tools safely after use to prevent trip hazards and to keep your exterior area ready for the next maintenance window.
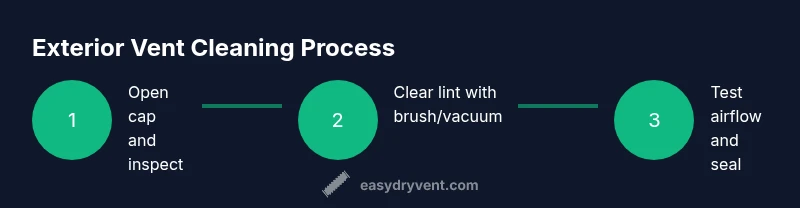
Exterior cleaning in overview: three core actions
Exterior cleaning can be thought of as three core actions: open the path, clear the cap, and verify airflow. The first action is to gain access by removing the outdoor vent cap or hood and inspecting the immediate area for obstructions. The second action focuses on lint and debris at the vent opening, on the hood screen, and inside the exterior duct where accessible. The final action is to test and confirm that air can flow freely back into the dryer. This high-level plan helps homeowners stay organized and reduces the risk of pushing lint deeper into the system. Easy DryVent recommends performing this outside of rainy days to avoid moisture clinging to dry lint, which can complicate cleaning and create clogs.
Step-by-step exterior cleaning – action details (non-step-by-step)
To perform exterior cleaning thoroughly, begin by removing the vent cap and inspecting for signs of damage or wildlife activity. Use the long vacuum hose to clear loose lint from the exterior opening, then employ a stiff brush to dislodge stubborn deposits that cling to the hood interior. Gently sweep lint from the vent opening and behind the cap, taking care not to pull fibers deeper into the duct. If lint is deeply embedded, switch to a longer tool and a slower, steady motion. After clearing visible lint, reattach the cap and ensure the flap or damper moves freely with a light breeze. If you notice persistent resistance or missing parts, this is a signal to pause and reassess your approach or call a pro.
Verifying airflow after cleaning and reducing future buildup
Airflow verification is a simple yet critical step. With the dryer off, observe whether a lightweight tissue or ribbon near the exterior vent moves when the dryer is running at a normal setting. If it remains still, you likely have a partial blockage or an overly long duct run. Reassess the external opening and check for kinks, crushed sections, or bird nests just beyond the exterior cap. A well-cleaned vent should produce consistent airflow and reduce drying times. After confirming airflow, consider applying a weatherproof seal or caulk around any gaps between the vent hood and siding to prevent moisture intrusion and to keep lint from escaping into your outside environment.
Common mistakes and risk mitigation
Many DIYers overlook safety details that can turn exterior cleaning into a hazard. Do not use high-pressure water, solvent cleaners, or power tools directly into the vent; lint fibers can lodge deeper or become airborne. Avoid leaning on fragile siding or stepping beyond the base of a ladder. Keep pets and kids away from the work area, and never stand on loose debris while cleaning. If you encounter wildlife or persistent mold around the vent, pause and contact a licensed technician who can assess duct integrity and fire safety compliance. According to Easy DryVent, staying within the limits of exterior cleaning and recognizing when inside ducts or joints require professional attention is essential for ongoing safety.
Maintenance and seasonal checks to keep exterior vents in good shape
Create a simple maintenance cadence to keep exterior vents clear. Schedule a biannual visual inspection, especially before the peak drying season and after high-wind storms. Clean the cap and surrounding area at the start of each heating season, and replace damaged screens promptly. Keep the area around the vent free of leaves and shrub debris that can blow into the opening. Consider installing a vent hood with a damper that closes when the dryer is off to prevent wildlife entry and moisture intrusion. Easy DryVent encourages homeowners to log inspection dates and note any irregularities, creating an easy reference for future maintenance and to track improvements in airflow over time.
When to hire a professional and the limits of exterior cleaning
Exterior vent cleaning from outside is a helpful maintenance step, but it has limits. If you notice persistent lint buildup in the exterior or feel resistance when airflow returns to the dryer, or if you see damaged dampers, collapsed ducts, or signs of mold, contact a licensed HVAC technician or vent cleaning specialist. Exterior cleaning cannot fix interior duct defects, code violations, or structural damage. In these situations, the Safe Path is to schedule a professional assessment. The Easy DryVent team emphasizes that proactive maintenance, rather than reactive repairs, improves dryer performance and safety in the long run.
Tools & Materials
- Work gloves(Leather or heavy-duty gloves to protect hands from sharp edges and hot metal)
- N95 or particulate mask(Reduces inhalation of lint dust when working outdoors)
- Long-hose vacuum with crevice tool(Reach deep into exterior openings without forcing lint deeper into ductwork)
- Stiff vent brush (15–24 inches)(Dislodges stubborn lint from the vent hood interior)
- Flashlight or headlamp(Adequate lighting for dim exterior vent spaces)
- Drop cloth or tarp (optional)(Catches debris around the vent area)
- Screwdriver ( Phillips or flat )(May be needed to remove secured vent caps)
Steps
Estimated time: Total time: 45-60 minutes
- 1
Prepare the outdoor area and safety gear
Set up your work area on stable ground. Don safety gear (gloves and mask) and ensure the dryer is unplugged. If you’ll be using a ladder, have a helper and place it on level ground. Clear leaves or debris from the ground and ensure good daylight.
Tip: Do not rush; gather all tools before touching the vent to avoid repetitive trips. - 2
Access and inspect the exterior vent cap
Carefully remove the exterior vent cap or hood to inspect the opening for nesting, damage, or moisture. Look for signs of pest entry, rust, or cracked housings. If the cap is attached with screws, set them aside for reattachment.
Tip: If screws are corroded, do not force them—apply a small amount of penetrating oil and give it time to work. - 3
Clear loose lint from the exterior opening
Use the vacuum hose with a crevice tool to suction lint from the outside opening. Work slowly around the edges to lift loose fibers without pushing debris further into the duct.
Tip: Keep the vacuum nozzle anchored to avoid sucking lint deeper than necessary. - 4
Dislodge stubborn lint with a vent brush
Insert the stiff vent brush at the vent opening and gently scrub to dislodge stubborn deposits on the hood interior. Avoid applying excessive force that could damage the vent or cap.
Tip: Keep a steady, controlled motion; forcing lint can push it deeper into the duct. - 5
Reattach the vent cap and test the damper
Secure the vent cap back in place and ensure the damper or flap moves freely with a light breeze. If the damper sticks, gently manipulate it and consider replacing worn parts.
Tip: A freely moving damper prevents backdraft and reduces moisture intrusion. - 6
Verify airflow from the exterior
With the dryer off, run a brief test cycle and observe airflow at the exterior opening. Use a lightweight indicator (like tissue) to confirm movement. If there’s little-to-no airflow, you may have a deeper blockage in the interior duct.
Tip: If airflow is weak, do not force the system; reassess interior duct paths or seek professional help. - 7
Seal gaps and document the maintenance
Seal any gaps between the vent hood and siding with weatherproof sealant if recommended. Record the date of maintenance and any observations for future reference.
Tip: Retention of a maintenance log helps track improvements in airflow over time. - 8
Plan next exterior maintenance
Schedule recurring exterior vent checks every 6–12 months, and more often if you notice reduced airflow or heavy lint buildup after storms.
Tip: Set a reminder and include seasonal checks for better long-term results.
Common Questions
Why should I clean my exterior dryer vent from outside?
Cleaning the exterior vent helps ensure good airflow, reduces drying times, and lowers the risk of lint fires. Exterior cleaning is part of a broader maintenance plan that also includes interior duct checks and cap integrity.
Cleaning the exterior vent improves airflow and safety. It’s an important maintenance step when combined with interior checks.
What tools do I need to clean the outside vent?
You’ll need a long vacuum hose with a crevice tool, a stiff vent brush, work gloves, a dust mask, a flashlight, and optional items like a drop cloth and screwdriver if needed.
Grab a long vacuum hose, a stiff vent brush, gloves, and a mask to start.
Can I use water or a power washer on exterior vents?
Water or high-pressure tools can push lint deeper into the duct and cause moisture-related issues. Use dry cleaning methods and air movement rather than water jets.
Avoid water or power washers; use dry tools and airflow tests instead.
How often should I perform exterior vent cleaning?
As a general rule, perform exterior vent checks at least twice a year, with additional checks after storms or heavy winds. More frequent checks may be needed for homes with animals or high lint loads.
Do exterior checks at least twice a year and after big storms.
When should I call a professional?
If you notice persistent blockages, damaged dampers, mold, or if interior ducts appear compromised, a licensed vent cleaner or HVAC professional should assess the system.
Call a professional if you find damage or persistent airflow issues beyond exterior cleaning.
Is exterior vent cleaning enough for safety?
Exterior cleaning is important but not a substitute for interior duct cleaning, code-compliant vent routing, or addressing moisture issues. Combine exterior cleaning with professional interior assessments when needed.
Exterior cleaning helps, but interior checks are also essential for overall safety.
Key Points
- Inspect exterior vent early to prevent buildup
- Use proper tools and safety gear
- Verify airflow after cleaning to confirm success
- Schedule regular exterior vent maintenance
- Avoid aggressive force that can damage ducts