Dryer Vent Outside: A Homeowner's Guide to Safe, Efficient Drying
Learn how to install, maintain, and troubleshoot a dryer vent outside for safer operation, reduced lint buildup, and improved drying efficiency. Easy DryVent guides homeowners through planning, materials, installation, and ongoing care.

You're going to learn how to install and maintain a dryer vent outside for safer, more efficient drying. This quick guide outlines selecting the right duct, choosing a proper exterior vent hood, routing with minimal bends, and performing regular cleaning. By following these steps, your dryer vent outside will reduce lint buildup, improve airflow, and lower fire risk.
Why the dryer vent outside matters
Maintaining a clear path for dryer exhaust is essential for safety and efficiency. A properly routed dryer vent outside reduces lint buildup, minimizes moisture damage inside walls, and lowers the risk of dryer fires. The Easy DryVent team emphasizes that a vent outside isn’t a luxury—it’s a core part of responsible laundry room design.
In most homes, the dryer exhaust ends up in shared cavities or near windows when a vent path is poorly planned. That configuration creates backdrafts and lingering humidity, which invites mold and odors. A vent outside, installed with a straight, smooth run and a proper exterior termination, ensures that hot air and lint are directed away from living spaces. When the exhaust leaves the house through a dedicated vent outside, your dryer won’t have to work as hard to push air through a kinked or collapsed duct, which translates to shorter dry cycles and cooler drum temperatures.
According to Easy DryVent, the safety benefits go beyond lint and odor control. When outdoor venting is properly sealed and sloped, moisture intrusion is minimized, which protects insulation, framing, and electrical components from corrosion. For homeowners, the payoff is not only improved safety but also better energy efficiency and potentially longer appliance life. With the right parts and careful installation, your dryer vent outside will operate reliably through seasons of use.
Planning the vent path: location, diameter, and codes
A high-quality dryer vent outside starts with thoughtful planning. The most common interior-to-exterior path uses 4-inch rigid metal duct, because it minimizes resistance and lint buildup compared with flexible plastic options. Keep runs as short and straight as possible, with as few elbows as you can manage. Each bend adds friction and lint-trapping potential, so aim for minimal turns.
Choose an exterior termination with a dampered vent hood to prevent backdrafts and pests while keeping rain out. Place the vent on an exterior wall that’s close to the dryer, away from doors, windows, and soffits. Ensure the exterior opening has a slight downward slope to help water drain away from the duct.
Code considerations vary by location. Consult local building codes before cutting into walls, and obtain permits if required. Document the planned diameter, material type, wall penetration details, and the vent’s exterior termination if inspections are likely. Even if codes don’t demand it, use rigid metal duct, avoid plastic or foil types, and provide proper supports and secure connections. A well-planned path is the foundation of a reliable dryer vent outside.
Selecting materials and tools
Your project will go smoother if you assemble the right parts and tools in advance. Essential components include 4-inch rigid metal duct sections, an exterior vent hood with a damper, a wall cap, and 4-inch duct clamps. Use foil tape and duct mastic to seal joints; avoid duct tape alone, which can degrade over time.
Other useful items: a sheet metal snips set, a tape measure, a utility knife, a power drill with metal bit, a level, and safety gear (gloves and eye protection). Optional but helpful add-ons include a vent brush for cleaning, a vacuum with attachments to remove lint, and a silicone weatherproof sealant for exterior joints. Gather weatherproof sealant, metal screws, and clamps to ensure secure, long-lasting connections. Easy DryVent suggests choosing corrosion-resistant materials and verifying that all components are rated for high heat and dryer exhaust.
Installation considerations and common mistakes
Before you start, turn off and unplug the dryer and verify the circuit is de-energized. Poor installation commonly shows up as excessive lint buildup at joints, loose connections, or plastic duct use. Here are key considerations:
- Use rigid metal duct only; plastic or flexible foil ducts are prone to crushing and lint accumulation.
- Keep the run as short and straight as possible with minimal bends.
- Seal joints with foil tape on the inside and outside of the duct, then reinforce with duct mastic for a lasting seal.
- Install supports every 4 feet of horizontal run and at changes of direction to prevent sagging.
- Ensure the exterior vent hood damper opens fully and closes properly.
- If you must drill through a wall, use a snout or wall pass-through kit designed for dryer vents.
Common mistakes to avoid include running the duct into attic or crawlspace, venting through soffits or gables, and using non-vented closures that trap heat. Quick checks: feel for air movement at the exterior vent when the dryer runs, listen for hissing or whistling that indicates leaks, and look for signs of moisture around joints inside the wall.
Maintenance and cleaning of a dryer vent outside
Regular maintenance keeps the system efficient and safe. Plan to inspect and clean the vent outside at least twice a year and more frequently if you notice longer drying times or more lint around the outdoor hood. Start by removing the exterior cover and inspecting the damper. Clear any leaves, nests, or debris from the hood and screens to restore proper airflow.
From the interior side, unplug and disconnect the dryer or switch off the circuit. Use a vent brush to scrub the 4-inch duct, working from the dryer end toward the exterior. Vacuum loose lint from accessible joints and cavities. If there’s stubborn lint, a flexible rod or a power-assisted vent cleaning brush can help, but avoid forcing the duct through tight bends. After cleaning, reassemble the hood and test airflow. Easy DryVent emphasizes that a well-cleaned vent outside reduces the risk of fire and extends dryer life.
Troubleshooting common problems
If you notice slow drying or excess heat near the dryer, the vent outside is likely blocked or restricted. Common causes include lint buildup at joints, crushed ducts, or an improperly sealed exterior cap. Signs of trouble include: longer cycles, clothes still damp after a full dry, strange odors, and visible lint near the exterior vent.
Approach: recheck the exterior vent closure, inspect for wildlife debris, and run a partial cleaning to verify airflow improves. If problems persist, consider a professional inspection to assess duct integrity, joints, and the exterior termination. For safety, never operate a dryer with a visibly blocked vent or a damaged duct, and address any electrical smells immediately.
Safety checks and best practices
Safety should guide every step of working with a dryer vent outside. Ensure the power is off when servicing. Wear protective gloves when handling metal duct and sharp edges. Confirm that all joints are sealed and that the exterior hood damper is functional. Keep the exterior vent free of obstructions, trim vegetation away from the vent opening, and avoid venting near windows, doors, or air intakes. Keep the area around the vent clear of combustibles and ensure the vent path does not run through insulation or concealed spaces with moisture risk. Regularly review the system for signs of wear and corrosion and replace any damaged sections promptly.
Create a simple maintenance schedule
Establish a routine that fits your household. A practical plan could be: monthly quick checks (external hood for debris, damper movement), quarterly interior inspection (lint buildup at joints, near joints), and biannual thorough cleaning (full duct brush, vacuum joints, verify wall penetration integrity). Record dates and notes in a notebook or digital note so you can track performance over time. Easy DryVent recommends attaching a reminder in your calendar to ensure this schedule is followed, keeping the dryer vent outside safe and efficient all year round.
Tools & Materials
- Rigid 4-inch metal duct sections(Use seamless, corrosion-resistant metal; avoid flexible foil ducts)
- Exterior vent hood with damper(Install with damper closed when not in use)
- 4-inch duct clamps(Stainless steel preferred)
- Foil tape designed for ducts(UL-listed; never rely on standard household tape)
- Duct mastic sealant(For long-term airtight joints)
- Wall pass-through kit or snout(Needed for through-wall installation)
- Tin snips / metal shears(Sharp blades; cut clean edges)
- Vent cleaning brush(4-inch brush sized for ducts)
- Safety gear (gloves, goggles)(Protect hands and eyes from sharp edges)
Steps
Estimated time: 60-120 minutes
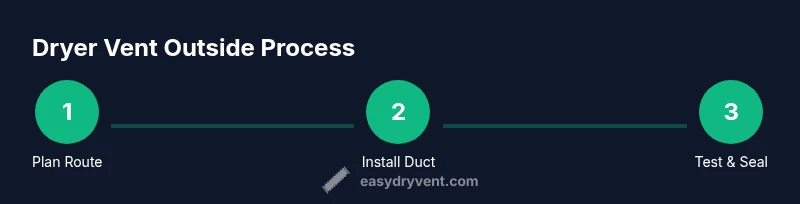
- 1
Plan route and gather materials
Map the path from the dryer to the exterior vent, noting any obstacles. Confirm diameter, material, and tool accessibility. This planning minimizes waste and rework.
Tip: Measure twice, cut once; confirm all parts fit before assembly. - 2
Power down and prep the dryer area
Unplug the dryer and pull it away from the wall to access the vent. Check the surrounding area for hazards and ensure you have adequate lighting.
Tip: Have a helper hold hoses while you work to prevent kinks. - 3
Remove old vent and clear wall penetration
If replacing an existing vent, remove the old duct and clean the penetration. Ensure the wall opening is smooth and ready for a new pass-through.
Tip: Repair any damaged wall material before continuing. - 4
Cut and fit the interior duct run
Cut rigid duct sections to fit the planned route, ensuring clean, squared ends. Dry-fit the sections to verify fit before sealing.
Tip: Avoid sharp bends; plan gradual curves to maintain airflow. - 5
Seal joints and anchor the run
Apply foil tape on all joints from the dryer toward the outside, then reinforce with duct mastic. Install supports every 4 feet and at turns.
Tip: Use a level to keep lines straight for better airflow. - 6
Install exterior vent hood and wall cap
Secure the exterior hood with screws, verify damper operation, and seal around the wall penetration with weatherproof sealant.
Tip: Clear any debris from the damper before final assembly. - 7
Test airflow and seal exterior entry
Reconnect power, run the dryer briefly, and check for airflow at the exterior vent. Listen for leaks and inspect interior joints for condensation.
Tip: If you hear whistling, recheck joints and reseal. - 8
Finish and document the installation
Wipe down surfaces, tidy tools, and document the route and materials used for future maintenance.
Tip: Keep receipts and notes with your maintenance schedule.
Common Questions
What is the best duct material for a dryer vent outside?
Rigid metal duct is preferred for durability and lint resistance. Avoid plastic or foil ducts that sag or trap lint.
Rigid metal duct is best because it resists crushing and lint buildup.
Can I vent a dryer through a wall without an exterior hood?
No. An exterior vent hood with a damper helps prevent backdrafts, pests, and weather intrusion.
Use a proper exterior vent hood and damper.
How often should I clean the dryer vent outside?
Inspect and clean at least twice a year, or sooner if you notice longer drying times or more lint near the vent.
Clean it at least twice a year or when you notice performance drop.
Are plastic vent ducts acceptable?
No. Plastic ducts degrade and trap lint; use rigid metal instead.
No, use rigid metal for safety and efficiency.
What signs indicate a blocked vent outside?
Longer drying times, overheating, moisture on walls, and visible lint at the exterior vent signal trouble.
Look for longer dries and lint near the vent.
Do I need a permit for vent installation?
Permit requirements vary by location. Check local codes and obtain approvals if required.
Check local codes; some places require a permit.
Watch Video
Key Points
- Plan the vent path carefully before cutting.
- Use rigid metal duct and a dampered exterior hood.
- Seal all joints and support the run properly.
- Clean the vent outside and interior ducts regularly.
- Prioritize safety and code compliance in every install.