How to Clean a Dryer Vent from Outside
Learn how to safely clean a dryer vent from outside with practical tools and a clear step-by-step process to boost efficiency and reduce fire risk.

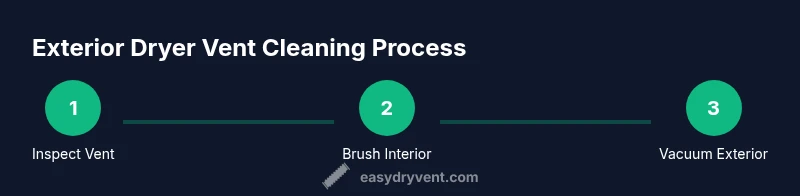
This guide shows you how to clean a dryer vent from outside safely and effectively. You’ll learn when cleaning is needed, what tools to gather, how to access the exterior vent, dislodge lint, and inspect for damage or blockages that reduce drying performance. Follow the steps to reinstall the cover, test the dryer, and establish a maintenance routine to keep vent paths clear year-round.
Safety and why exterior cleaning matters
According to Easy DryVent, exterior vent cleanliness directly affects dryer performance and safety. A clogged vent creates excessive heat, increases energy use, and raises the risk of lint fires. Cleaning from the outside reduces these hazards while helping the dryer exhaust more efficiently. This section provides context for why a careful exterior clean is worth your time and effort, and how it fits into a broader maintenance routine. Expect to work with a ladder, protective gear, and a few basic tools. If you notice persistent overheating or see smoke, stop immediately and seek professional assistance. The goal is to restore clear airflow, reduce drying time, and extend the life of your appliance.
Exterior vent design and common obstructions
Exterior dryer vents come in a few common configurations: a standard wall hood with a louvered cover, a flap-style vent, or a rigid duct terminating at an outdoor opening. Each design has potential obstructions, including leaves, bird nesting, and crushed sections of duct caused by lawn equipment or shifting siding. Birds and pests may build partial nests right at the exterior opening, creating a hard barrier to airflow. In some cases, the vent cover itself becomes loose or corroded, allowing moisture and debris to enter the duct. Understanding your vent design helps you choose the right cleaning approach and avoid damaging fragile seals or flashing.
Weather, safety, and planning for exterior work
Weather matters when you clean from outside. Choose a dry day with stable footing and good lighting. Wet surfaces are slippery, and cold conditions can make metal parts brittle. Plan for at least one partner to assist with ladder positioning and tool handling. If you live in an area with high winds or heavy ice, postpone the job to prevent falls or damage. Safety gear—gloves, safety glasses, and sturdy footwear—reduces the chance of injury while you remove the cover and work near the vent opening. This planning stage sets the foundation for a successful, safe exterior cleaning.
Tools, workspace setup, and protective measures
Before you begin, set up your workspace with a stable ladder on solid ground, near the exterior vent. Keep a small magnet tray or container for screws, a trash bag for lint, and a dedicated flashlight to inspect the duct path. Wear gloves to shield hands from sharp edges and debris, and protect your eyes with safety goggles. Ensure the dryer is unplugged or the circuit is off if you plan to touch any wiring near the vent. Establish a clear perimeter, so curious pets or children don’t interrupt the process. Having a plan reduces clutter and lowers the risk of accidents during the exterior cleaning.
Methods and best practices for lint removal from outside
The exterior cleaning approach typically combines mechanical brushing with careful suction. Start by removing the vent cover and using a stiff brush to knock loose lint from the opening. A vacuum with a hose attachment helps capture loosened debris at the exterior opening. If you encounter stubborn clogs, a flexible vent brush can reach into the duct without bending or stressing joints. Avoid forcing lint through tight bends or applying excessive force, which can damage the duct or vent seals. Regularly check the exterior vent for signs of wear or damage as you work.
Reassembly, testing airflow, and sealing for weather protection
After clearing the vent and brushing the exterior opening, reattach the vent cover securely. Inspect the exterior seal around the vent to prevent moisture entry and pest intrusion. Run a short dryer cycle and observe the airflow at the exterior vent—the plume should be steady and obvious. If airflow is weak, recheck for loose screws or obstructions inside the duct. Apply weatherproof sealant or flashing as needed to keep moisture out and ensure a long-lasting seal. Document the date of cleaning so you can track maintenance intervals.
Maintenance planning: keeping outside vents clear year-round
Create a simple maintenance schedule to keep exterior vents clean. Check the vent cover and surrounding area after seasonal storms or strong wind events, and perform a quick lint sweep annually. Keep trees, shrubs, and combustible debris away from the vent opening to preserve airflow. By pairing exterior cleanups with internal inspections, you reduce the chance of unexpected outages and ensure safe, efficient operation of your dryer. A routine approach also helps you catch wear and tear early before costly repairs become necessary.
Tools & Materials
- Ladder or sturdy step stool(Stable, tall enough to reach vent cover safely)
- Gloves(Protect hands from sharp edges and lint fibers)
- Safety goggles(Eye protection from debris)
- Screwdriver set (flathead and Phillips)(To remove vent cover screws)
- Vent brush (flexible, stiff bristles)(For brushing lint from the duct path)
- Vacuum with hose attachment(Capture loosened lint and dust)
- Weatherproof sealant or vent flashing(Seal and weatherproof the exterior after cleaning)
- Magnetic tray or small container(Store screws and small parts)
- Garden hose with spray nozzle(Rinse around the vent area if outdoors)
Steps
Estimated time: 60-90 minutes
- 1
Remove the exterior vent cover
Set up the ladder securely and use the screwdriver to remove the cover screws. Gently lift the cover and set it aside in a safe location. Inspect the cover for rust, cracks, or damaged seals before proceeding.
Tip: Keep screws in a magnet tray to prevent loss. - 2
Inspect the vent housing and surrounding area
Look for bends, cracks, or corrosion in the housing. Check flashing around the vent for water intrusion. Note any nesting, signs of pests, or additional obstructions around the opening.
Tip: Take photos for reference if you plan to replace parts later. - 3
Clear debris around the vent opening
Remove leaves, dirt, and obvious debris from the exterior opening. If you see a nest, gently relocate it away from the vent area and dispose of it properly. Wear gloves to avoid sharp edges and potential irritants.
Tip: Clear a 12-inch radius around the vent for safe access. - 4
Brush the duct interior from the outside
Insert the vent brush into the duct opening and gently rotate to dislodge lint. Use short, controlled strokes to avoid stressing joints. If you encounter a long, stubborn clog, use a flexible brush to reach deeper into the duct.
Tip: Work slowly to prevent snagging and damage. - 5
Vacuum the exterior opening and area
Attach a wide nozzle to the vacuum and suction lint around the exterior opening. Vacuum inside the vent cover housing as far as you can safely reach. Repeat until you observe minimal lint near the opening.
Tip: Hold the hose steady and close to the opening for maximum suction. - 6
Reinstall vent cover and seal
Place the vent cover back and tighten screws. Check all seams for gaps; apply weatherproof sealant if necessary. Ensure the cover sits flush to prevent moisture intrusion.
Tip: Do a quick leak check by spraying a light mist and looking for gaps. - 7
Test the dryer and confirm airflow
Run a short dryer cycle with a load to observe exhaust flow from the exterior vent. If you notice weak airflow, recheck for obstructions or loose connections. Listen for unusual sounds that could indicate misalignment.
Tip: Record the date and results in a maintenance log. - 8
Document and plan ongoing maintenance
Log the cleaning date, any parts replaced, and the results of the airflow test. Schedule the next exterior vent check based on usage and environment. Consider pairing with an interior lint trap inspection for best results.
Tip: Schedule annual reminders to ensure consistency.
Common Questions
How often should I clean a dryer vent from outside?
Clean exterior vents at least once per year, and more often if you notice longer drying times, overheating, or visible lint near the vent. Keep an eye on the area after storms or heavy winds.
Clean exterior vents at least once a year, and more often if you see longer drying times or lint near the vent.
Is exterior cleaning safe for all vent types?
Most rigid and semi-rigid ducts can be cleaned from the outside. Flexible foil ducts are more fragile and can be damaged during aggressive brushing or forceful attempts.
Most ducts can be cleaned from the outside, but flexible foil types are more fragile.
What are signs that exterior vent needs cleaning?
Longer drying times, overheating, and lint around the exterior vent are common indicators of buildup. Also listen for reduced airflow when the dryer is running.
If drying takes longer or you see lint around the vent, clean it.
What tools are essential for cleaning from outside?
You’ll need a sturdy ladder, vent brush, vacuum with a hose attachment, gloves, safety goggles, and screws with weatherproof sealant for reassembly.
Have a ladder, brush, vacuum, gloves, and sealant ready.
Can I call a pro to clean exterior vent?
Yes. If you’re uncomfortable on a ladder, encounter damage to the vent, or cannot access the duct safely, a professional can perform the job securely.
Yes, a pro can handle exterior vent cleaning safely.
Will exterior cleaning fix a dryer not drying at all?
Exterior cleaning can improve airflow if lint buildup is the culprit, but other dryer faults (heater, thermostat, or sensor issues) may require service.
It might help, but other dryer problems could be the cause.
Watch Video
Key Points
- Inspect exterior vent regularly for damage and obstructions.
- Use proper tools and gentle brushing to avoid duct damage.
- Re-seal and test airflow after cleaning to confirm clearance.
- Maintain a simple yearly schedule for exterior vent checks.
- Document maintenance to track vent performance over time.