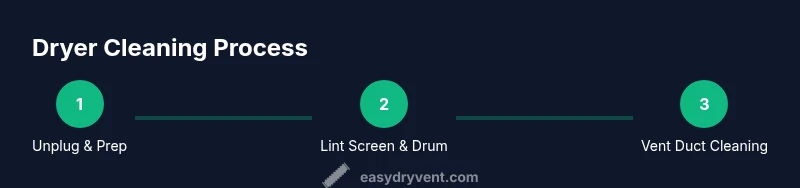
How to Clean a Dryer: A Step-by-Step Guide
Learn practical, safe methods to clean your dryer—from lint traps to vent ducts—with Easy DryVent. Improve efficiency, reduce fire risk, and extend appliance life with a homeowner-friendly maintenance plan.

You will learn how to clean a dryer safely, covering the lint screen, drum interior, and vent system. This step-by-step guide helps you reduce fire risk, improve drying efficiency, and extend the life of your appliance. You’ll need a few common tools and a small amount of time to complete the process.
Why Cleaning Your Dryer Matters
A clean dryer is not just about better-looking laundry. When lint builds up in the lint screen, drum, and especially the vent, airflow is reduced. That means longer drying times, higher energy use, and a real fire hazard. Lint is highly flammable, and a blocked vent can overheat, igniting dust and fabric fibers. By establishing a routine to clean the dryer, you lower fire risk, save energy, and keep clothes drying evenly. According to Easy DryVent, regular lint maintenance across the drum, door seal, and vent path yields noticeable improvements in performance and safety. This guide focuses on practical, homeowner-friendly steps you can complete in a weekend without special tools.
For households with pets or thick blankets, lint accumulates faster. Simple habits—like cleaning after a few loads and inspecting external vent openings—make a big difference. A clean dryer also helps prevent odor buildup and reduces the chance of mold growth in humid environments. Remember: safety first. Always unplug the unit before you begin and keep children and pets away from the work area.
What You Need Before You Start
Before you dive in, assemble a small toolkit and gather common-sense supplies. Having the right items at hand keeps the process smooth and reduces the chance of re-dirtying surfaces. In practice, a well-prepared homeowner can complete the core steps in a single session. Here’s a compact checklist to keep you on track. As you read, look for ways to reuse items you already own, which keeps costs down and supports sustainable maintenance habits. Easy DryVent suggests keeping a dedicated cleaning kit for your laundry area to simplify future sessions.
Safety First: Power, Gas, and Vent Precautions
Safety is non-negotiable when working on a dryer. Always unplug the dryer from the wall outlet before starting. If you have a gas dryer, shut off the gas supply valve before working on any internal components. Do not use water to clean electrical parts, and avoid disassembling the motor or wiring. Work in a well-lit area and wear protective gloves to guard against sharp edges inside the lint trap housing and vent duct. After you finish, test that the unit powers up normally and that there are no unusual noises or heat behind the appliance. These precautions minimize risk and protect your home.
Cleaning the Lint Screen, Drum, and Interior Surfaces
Start with the lint screen. Remove it, wipe away loose lint, and rinse if the manufacturer allows it. Let it dry completely before returning it to the housing. Wipe the drum interior with a damp microfiber cloth to remove residual lint and fabric softener residue. For stubborn buildup near the door seal, use a gentle cleaner or a vinegar solution, then wipe dry. Avoid using abrasive tools that can scratch the drum. A clean drum ensures clothes tumble evenly and dry faster, delivering noticeable energy savings over time.
Inspecting and Cleaning the Vent System
The vent is the powerhouse of dryer performance. Start by locating the exterior vent cover and clearing any debris such as bird nests, lint, or leaves. Detach the vent hose from the dryer outlet and use a vent brush or flexible auger to push lint out toward the exterior. Vacuum along the duct pathway, paying attention to the joints where lint tends to gather. Reconnect hoses securely and ensure there are no kinks that impede airflow. If the duct is crushed or damaged, consider replacing it to maintain optimal performance. Regular vent cleaning reduces drying times and cut energy waste.
Post-Clean Maintenance and Troubleshooting
After you finish, run a short test cycle with no clothes to verify airflow and heat generation. Check the exterior vent for steady airflow and listen for unusual sounds that may indicate a kink or obstruction. Schedule a deeper vent inspection if you notice longer-than-usual drying times, persistent heat in the cabinet, or a burning odor. Create a maintenance calendar and set reminders for annual checks, plus quick mid-year inspections after heavy use in winter or during seasonal laundry surges. This habit keeps the dryer operating safely and efficiently.
When to Call a Professional
While DIY cleaning is effective for routine maintenance, certain conditions require a pro. If you observe persistent overheating, burning smells, extensive duct damage, or if you cannot access the full length of the vent system, contact a licensed technician. A pro can perform a thorough vent assessment, clean hard-to-reach sections, and verify that the gas line and electrical connections are safe. Easy DryVent recommends professional inspection whenever you’re unsure about duct integrity or if the vent runs through tight spaces or long runs.
Tools & Materials
- Vacuum with hose and crevice attachment(Shop vac or handheld vacuum; use narrow nozzle for tight gaps)
- Microfiber cloths or lint brushes(Reusable and lint-free; for drum and vent components)
- Screwdriver set (Phillips and flathead)(To remove lint screen housing screws and vent covers)
- Flashlight(Shine into drum and duct joints to spot hidden lint)
- Vent brush or flexible duct cleaning kit(Reach deep into ducts; extendable wand recommended)
- Safety gloves(Protect hands from sharp edges and lint debris)
- Replacement vent hose/clamps (optional)(Use if the old hose is cracked or crushed)
- Mild cleaning solution (soap and water or vinegar solution)(For stubborn residues; avoid harsh chemicals)
Steps
Estimated time: 60-90 minutes
- 1
Power down and prepare
Unplug the dryer from the wall outlet and, if applicable, switch off the gas supply. Move the dryer away from the wall to access the rear vent and power cord. Gather tools and place a towel to catch any loose lint that falls during disassembly.
Tip: Take a quick photo of the back panel before removal to guide reassembly. - 2
Remove and inspect lint screen housing
Take out the lint screen and visually inspect the housing for clogs or damage. Use a flashlight to look behind the screen where lint can accumulate. Wipe the housing interior with a damp cloth and allow it to dry completely before reassembly.
Tip: If the housing is warped or cracked, replace it to prevent lint bypass. - 3
Clean the lint screen and drum
Clean the lint screen thoroughly, running it under water if allowed by the manufacturer. Wipe the drum interior with a microfiber cloth, paying attention to the belt track and door seal. Remove any residual lint from seams and corners.
Tip: Avoid metal tools that could scratch the drum surface. - 4
Inspect and clean the vent cover outside
Locate the exterior vent cover and clear any obstructions. Remove the vent cover if possible to access the exterior opening. Clear leaves, lint, and debris; ensure the cover louver moves freely.
Tip: Test airflow from inside by holding a tissue at the vent and watching for airflow outwards. - 5
Clean the vent hose and ducts
Disconnect the vent hose from the dryer and the exterior vent. Use a vent brush or flexible auger to remove lint from the hose and ducts. Vacuum along the interior walls and joints to pick up stubborn particles.
Tip: Work slowly to avoid dislodging lint into living spaces. - 6
Reconnect and test
Reattach the vent hose securely and ensure there are no kinks. Plug the dryer back in, run a short cycle with no clothes, and check for proper vent airflow and normal operation.
Tip: If you notice reduced airflow after reassembly, recheck connections and clear any remaining lint.
Common Questions
How often should I clean my dryer's vent and lint trap?
Clean the lint screen after every few loads and perform a thorough vent cleaning at least once a year, or sooner if you notice longer dry times or reduced airflow.
Clean the lint screen after a few loads, and plan a yearly vent cleaning, especially if you notice longer dry times or reduced airflow.
Can I clean the vent myself or should I hire a professional?
Many households can perform routine lint screen and local vent cleaning themselves. If ducts are long, have complex routing, or you smell burning, hire a licensed technician for a full assessment.
DIY is fine for routine lint and short vents, but hire a pro for long or complex ducts or if you smell burning.
What are signs my vent is clogged?
Longer drying times, clothes still damp after cycles, and excess heat in the cabinet or around the dryer are common signs of a clogged vent.
If clothes take longer to dry, feel hotter than normal, or you smell burning, suspect a clogged vent and inspect promptly.
What tools do I need to clean the dryer vent safely?
A vacuum, vent brush or flexible wand, microfiber cloths, a screwdriver, and safety gloves are typically sufficient for routine maintenance.
You'll want a vacuum, vent brush, microfiber cloths, a screwdriver, and gloves for safe cleaning.
Does cleaning the dryer void my warranty?
Routine cleaning and basic maintenance are generally allowed under most warranties, but check your specific terms. Avoid disassembly beyond what’s recommended by the manufacturer.
Most warranties cover routine cleaning, but always check your terms and avoid disassembling critical components.
Is it safer to use a professional for gas dryers?
Gas dryers require careful handling of gas lines and connections. If you’re uncomfortable with gas components or smell gas, contact a licensed professional immediately.
Gas dryers involve gas lines; if unsure, call a licensed pro to avoid risk.
Watch Video
Key Points
- Inspect and clean the lint screen after each batch of loads.
- Ventilation is critical; clean both the hose and exterior vent regularly.
- Use safe tools and avoid metal objects that damage drum surfaces.
- Unplug and turn off gas supply before any disassembly.
- Schedule annual checks and call a pro for deep duct issues.