What to Clean a Dryer Vent With: DIY Dryer Vent Cleaning Guide
Learn how to safely clean a dryer vent with practical tools, step-by-step methods, and maintenance tips to reduce fire risk and improve drying efficiency. Easy DryVent shares hands-on guidance for homeowners.

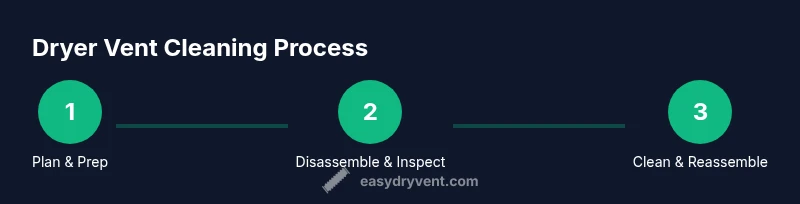
To clean a dryer vent safely, assemble a stiff brush, a vacuum with a long hose attachment, and a vent snake or flexible rod. Unplug the dryer, disconnect the vent from the dryer, and clear lint from the interior run from the dryer toward the exterior. Check the vent cap, exterior vent opening, and reassemble; run a short test cycle to verify airflow.
Why Cleaning a Dryer Vent Matters
Regular cleaning of the dryer vent is a critical Home DIY task that protects your home and keeps your clothes drying efficiently. Lint buildup restricts airflow, which makes the dryer work harder, wastes energy, and can create heat accumulation that increases the risk of a fire. According to Easy DryVent, a well-maintained vent system also helps your dryer dry clothes faster and with less wear on the heating element. In this section we explore the science behind vent cleanliness, the common failure points in typical residential setups, and how neglect can snowball into bigger problems over time. You’ll learn how the vent’s path—from the dryer through the long duct to the exterior hood—can trap lint, pet hair, and even small nesting materials if the vent is left unchecked. The goal is practical knowledge that homeowners can apply with everyday tools and careful steps, reducing risk while preserving appliance longevity and energy efficiency.
What to Use to Clean a Dryer Vent
Having the right tools on hand makes vent cleaning safer and more effective. A dedicated brush designed for vent cleaning, a vacuum with a long hose attachment, and a vent snake or flexible rod form the core kit. Add a sturdy ladder or step stool, a bright flashlight, and a pair of gloves to protect your hands from sharp edges and dust. For inside work, a small stiff-bristled brush helps loosen lint near the drum opening, while a longer brush or snake reaches deeper into the duct. If you discover stubborn lint, you may need a second person to gently guide the rod from the exterior end or to pull it back through from the interior while you monitor the path with the flashlight. Finally, keep a drop cloth or old blankets to catch debris and a trash bag to seal lint before disposal.
Safety First: Risks of Neglecting Your Dryer Vent
Vent cleanliness is a safety issue as well as a maintenance one. Clogged vents increase heat buildup inside the dryer, stress the motor, and shorten the appliance’s lifespan. Lint is highly flammable, and when combined with heat and a restricted airflow path, it can ignite. Additionally, improper venting can lead to moisture buildup inside walls, mold growth, and higher energy bills due to longer drying cycles. Before you start, unplug the dryer and turn off any gas supply if you have a gas dryer. Wear safety gloves, use eye protection if you’re using rotating tools, and keep children and pets away from the work area. Easy DryVent emphasizes that a clean vent is a safer, more efficient vent.
Cleaning Methods: From Inside vs Outside
There isn’t a single universal method; most DIYers use a combination of approaches. Cleaning from the dryer opening side helps dislodge lint from the drum toward the duct, while a vent snake or flexible rod pushed through from the exterior hood can pull lint toward the outside. Some homeowners prefer to remove the vent hose completely and work with a longer rod and vacuum to capture debris. Whichever method you choose, avoid forcing brushes or rods through bends that are too tight, as this can kink or damage the duct. Always work in a well-lit space and stop if you notice excessive resistance or damaged ducting. The balance of suction, brushing, and careful pulling yields the best results with minimal mess.
Maintenance Schedule and Frequency
A proactive approach is best: inspect the vent at least once a year, and perform a deeper cleaning after heavy-use seasons such as winter holidays or large laundry loads from family gatherings. If you see longer drying times, clothes that stay warm or damp at the end of cycles, or any musty smell, schedule a cleaning sooner. The lint trap should be cleaned before every load, but the vent and duct require attention less frequently—typically annually for most homes, with more frequent checks in high-use households. Easy DryVent recommends logging each cleaning to track redundancy and airflow improvements over time.
How to Inspect for Red Flags
During the cleaning process, keep an eye out for duct damage, crushed sections, or loose connections. Worn or kinked hoses can impede airflow and increase lint buildup. Exterior vents should open fully and snap shut cleanly; a hood that sticks or crumbles may indicate deterioration that needs replacement. Look for signs of heat on metal joints or surrounding wall surfaces, which can point to airflow resistance. If you notice a strong burning odor during or after a cycle, stop immediately and assess the vent path. These warning signs can indicate a deeper problem that might require professional evaluation, especially if you cannot safely access all sections of the duct.
Maintenance Best Practices and Practical Tips
Keep the work area organized and protect floors with a drop cloth. Clean the lint trap on every load and check for debris around the exterior vent cap after each cleaning. Use a long brush and extend your reach gradually rather than forcing the tool through tight bends. Label vents near the exterior access so future cleaners know where to start. If you’re unsure about the duct’s condition, consider a professional check to avoid compromising the system. Regular, careful maintenance extends the life of your dryer and reduces energy costs.
Quick-Reference Checklist for Homeowners
- Unplug dryer and disconnect vent from dryer end
- Inspect interior duct with flashlight from the dryer toward exterior
- Use a stiff brush and vacuum to remove lint in segments
- Clean the exterior vent hood and cap
- Reconnect vent, seal joints, and test airflow
- Document the cleaning date and any issues observed
Final Considerations: The Easy DryVent Approach
The Easy DryVent team emphasizes building a simple, repeatable cleaning routine that fits your schedule. While a basic DIY clean can address most lint-related issues, complex ductwork, long runs, or damaged components may require a professional inspection. The key is consistency: a regular check reduces the chance of lint fires and keeps drying times efficient. With the right tools and a careful process, you can maintain a safe, efficient laundry area and protect your home.
Tools & Materials
- Stiff-bristled vent brush(3- to 5-inch head; rigid bristles; suitable for dirty, lint-filled ducts)
- Shop vacuum with long hose attachment(HEPA filter if available; hose length should reach exterior vent without moving the dryer)
- Vent cleaning snake or flexible rod(1/4–1/2 inch diameter; 6–12 feet depending on duct length)
- Flashlight(Bright, focused light to inspect duct interiors and joints)
- Ladder or sturdy step stool(Safe height to reach exterior vent hood without overreaching)
- Work gloves(Protect hands from sharp duct edges and debris)
- Drop cloth or old sheet(Catch debris and keep floors clean during cleaning)
- Trash bag(Contain lint for easy disposal)
Steps
Estimated time: 45-60 minutes
- 1
Power off and unplug the dryer
Begin by ensuring the appliance is fully powered down. Unplug from the wall outlet to prevent accidental startups while you work. Sunscreen not required, but a bright light helps you see the lint more clearly.
Tip: Verify the dryer is not connected to a gas supply if applicable, and keep a safe distance from any stored cords. - 2
Disconnect the vent from the dryer
Loosen the clamp holding the vent hose to the dryer cabinet and carefully detach the hose. Place the hose on the floor or a protective surface to prevent lint from scattering.
Tip: Have a second person steady the hose area if it’s heavy or awkward to access. - 3
Inspect the duct near the dryer opening
Using a flashlight, look into the duct from the dryer side to gauge how far lint is packed and identify obvious blockages or kinks in the run.
Tip: Mark any tight bends with masking tape so you know where to focus brushing and suction. - 4
Brush and loosen lint from the interior
Insert the stiff brush and rotate gently to loosen lint along the first section of duct. Move in sections from the dryer outward, applying steady pressure without forcing through tight corners.
Tip: Work in small segments to avoid pushing debris deeper into the duct. - 5
Suction up loosened lint
Operate the vacuum hose near the duct opening while brushing to capture dislodged lint. Keep the nozzle close to the surface without pressing into the duct wall.
Tip: If the lint is stubborn, rotate the brush while pulling it back toward the opening. - 6
Extend cleaning toward the exterior
If accessible, insert the vent snake through the exterior hood from outside or inside to pull lint toward the opposite end. Collect debris as you go to prevent a secondary mess.
Tip: Avoid forcing the rod through sharp bends; back off and adjust angle if resistance increases. - 7
Clean the exterior vent cap
Clear debris from the exterior vent hood, spring-loaded flaps, and surrounding area. Rinse away any spider webs or dirt that may hinder airflow.
Tip: Check for moisture buildup around the exterior opening; wipe dry if damp. - 8
Reassemble and secure connections
Reconnect the vent hose to the dryer and secure clamps. Ensure all joints are snug but not over-tightened, which can crush the duct.
Tip: Run your finger along the joint to confirm there are no gaps or loose sections. - 9
Test airflow and function
Turn on the dryer and observe airflow at the exterior hood. A firm, consistent flow indicates a clean path. If airflow is weak, recheck joints and bends.
Tip: Place a tissue in front of the exterior opening to visually confirm suction strength during a short cycle. - 10
Document the cleaning event
Note the date, areas cleaned, and any anomalies such as damaged ducts or stiff terms. This helps you schedule the next maintenance and track improvements in drying performance.
Tip: Keep a small maintenance log in a drawer near the laundry area.
Common Questions
How often should I clean a dryer vent?
Most homes benefit from an annual cleaning, with more frequent checks for high-use households. If you notice longer drying times or hot clothes, clean sooner.
Annual cleaning is typical, but if you run into longer dry times or warm clothes, clean sooner.
Can I clean the vent from inside the house only?
Cleaning from the dryer side helps, but most effective results come from addressing both interior ducts and the exterior vent. External access ensures complete lint removal.
Interior cleaning helps, but you should clean both sides for best results.
What signs indicate a clogged vent?
Longer drying times, clothes still damp after cycles, and a warm dryer are key signs. A burning odor warrants immediate inspection and possibly professional help.
Longer dry times, damp clothes, or a burning odor mean you should check the vent.
Is it safe to use a power drill to clean the vent?
No. Drills can damage ductwork or generate sparks. Use manual brushes, rods, and a vacuum designed for lint removal.
Don’t use a drill; use brushes and a rod with a vacuum.
When should I call a professional?
If you encounter persistent blockages, visible duct damage, or an inability to access certain sections safely, a professional inspection is advisable.
Call a professional if you hit persistent blockages or damaged ducts.
Does cleaning the vent improve energy efficiency?
Yes. Clear ducts reduce resistance, lowering cycle times and energy use while shortening drying durations.
Cleaning the vent can make drying faster and use less energy.
Watch Video
Key Points
- Keep the dryer unplugged before cleaning.
- Use a vent-specific brush, vacuum, and rod to remove lint.
- Inspect both interior ducts and the exterior hood for damage.
- Document maintenance and schedule annual checks.