Connect a 4 Prong Dryer Cord Safely: A DIY Wiring Guide
Learn how to safely connect a 4 prong dryer cord with Easy DryVent's step-by-step guide. This practical tutorial covers cord compatibility, grounding basics, safety checks, and maintenance reminders for safer, code-compliant dryer operation.

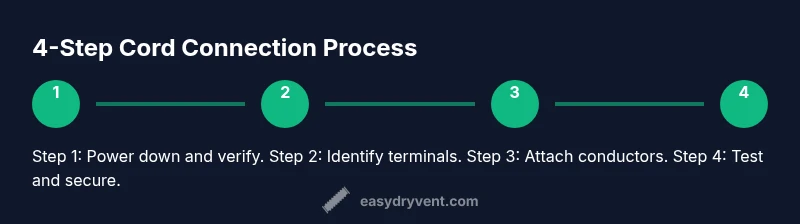
Goal: connect a 4 prong dryer cord safely and code-compliant. This quick answer outlines the core steps: shut off power, confirm outlet compatibility, attach the four conductors to the correct terminals, secure strain relief, and test for proper operation. If you’re unsure, consult a licensed electrician. Safety notes: disconnect power at the breaker and avoid modifying the outlet or dryer cabinet.
Why connect 4 prong dryer cord is safer and code-compliant
Choosing a 4-prong configuration aligns with modern electrical codes and reduces the risk of neutral-ground faults. The directive to connect 4 prong dryer cord is more than a label—it's a reminder that the dryer’s grounding path is separated from its neutral in contemporary installations. By using a four-wire setup, you minimize shock hazards and improve appliance performance over older three-wire arrangements. This section emphasizes safe handling, correct cord selection, and the necessary precautions before attempting any connection. For homeowners, the move to a four-wire system reflects current safety standards promoted by electrical safety authorities. The goal is to establish a safe, code-compliant foundation before any wiring work begins, and to minimize the chance of miswiring that could lead to electrical faults.
Throughout this guide you’ll see the exact phrase connect 4 prong dryer cord used to reinforce the required configuration. Easy DryVent’s guidance aligns with widely accepted best practices and safety standards to help you complete the task with confidence.
Understanding cord and outlet compatibility
When you connect 4 prong dryer cord, ensure the cord matches the outlet type (NEMA 14-30) and the dryer's terminal block labeling L1, L2, N, G. A compatible cord and outlet reduce the risk of incorrect connections. Check the dryer’s instruction manual for the recommended cord type and amperage rating, and confirm that your home circuit can support the load. If your outlet is a 3-prong design, do not force a 4-prong cord into it; instead, upgrade to a 4-prong outlet and dedicated circuit where required. The key is matching cord configuration to outlet and dryer terminals to maintain proper grounding and isolation of the neutral conductor.
In this step, take time to verify the labels on the dryer’s terminal block and on the new cord ends. Keeping a simple diagram or photo can help you stay organized as you proceed.
Safety prerequisites before you start
Before touching anything, ensure power is completely removed from the dryer and the circuit. Use a non-contact voltage tester to verify there is no voltage at the terminal block. Gather all tools in a single location to avoid leaving live parts exposed. Work on a dry surface and avoid any moisture around electrical components. These safety steps help prevent shocks and arc faults during the connection process. Easy DryVent emphasizes that if you feel unsure at any point, pause and consult a licensed electrician. The goal is a safe, code-compliant installation rather than a rushed repair.
Remember: never perform wiring tasks if you are not confident in your ability to follow electrical codes and safety practices.
Preparing and choosing a cord
Select a four-wire dryer cord rated for your circuit—typically a 30-amp, 125/250-volt configuration such as NEMA 14-30. The cord should have four conductors (two hot, one neutral, one ground) and be in good condition with no nicks or exposed copper. Inspect the dryer terminal block for any signs of corrosion or damage and replace damaged parts before proceeding. If the existing cord or outlet requires replacement, choose components that meet current electrical codes and match the dryer's rating. Easy DryVent notes that using an undersized cord or damaged insulation is a common cause of overheating and arcing, so inspect everything carefully before wiring.
Having the right cord reduces rework and improves safety.
Step-by-step overview: connecting the cord safely
The following steps provide a structured approach to connect 4 prong dryer cord. Each action should be performed with the circuit de-energized and the dryer unplugged. If any step feels uncertain, pause and consult a professional. The sequence minimizes confusion and helps you track progress as you go. When reviewing the steps, remember to keep the grounding path isolated and secure the cord clamp to prevent movement that could loosen connections over time. For visual guidance, refer to the included step-by-step section and the infographic in this article, which illustrate the proper wiring arrangement and safety precautions.
In this section we’ll reference the exact wire-to-terminal mapping you should use when you connect 4 prong dryer cord. Following these actions precisely helps ensure a reliable, code-compliant setup.
Common mistakes and how to avoid them
Common mistakes include mixing up hot and neutral wires, failing to isolate the neutral from the chassis, skipping strain relief, or reusing a damaged cord. These errors can lead to shock hazards, electrical fires, or premature equipment failure. Always double-check the terminal labeling (L1, L2, N, G) and confirm the cord’s conductors are intact before attaching screws. A careful approach minimizes safety risks. Easy DryVent also recommends labeling wires after installation to support future maintenance and inspections.
By anticipating these missteps, you can avoid hazardous outcomes and ensure a durable, safe connection.
Maintenance after replacement and long-term considerations
After completing the connection, perform a thorough visual inspection, ensure the strain-relief clamps the cord securely, and re-test the dryer’s operation. Periodically inspect the outlet, plug, and cord for signs of wear, heat discoloration, or fraying insulation. If you notice any damage, replace components promptly and consult a licensed electrician for a code-compliant reevaluation. Routine checks help prevent reactive repairs and promote safe drying performance over time.
Remember, proper maintenance is part of responsible dryer safety and energy efficiency.
Tools & Materials
- 4-prong dryer cord (NEMA 14-30) rated for 30A(Ensure the cord matches your circuit rating and is in good condition)
- Screwdrivers (Phillips #2 and flat-head)(For terminal screws and covers)
- Non-contact voltage tester(Verify the circuit is de-energized)
- Needle-nose pliers(Helpful for positioning conductors)
- Wire stripper/crimp tool(Prepare conductors cleanly)
- Nut driver or adjustable wrench(Tighten terminal screws and clamps)
- Electrical tape and/or heat shrink tubing(Insulate exposed conductors if needed)
- Flashlight(Improve visibility into the dryer cabinet)
- Work gloves(Protect hands from sharp metal edges)
Steps
Estimated time: 60-90 minutes
- 1
Power down and verify
Turn off the circuit breaker and unplug the dryer. Use a non-contact voltage tester to confirm there is no voltage at the terminal block. This precaution minimizes the risk of shock or arc flash while you work.
Tip: Pro tip: Keep the dryer unplugged until you are ready to reassemble any components to avoid accidental energization. - 2
Remove access panel
Remove the dryer’s rear access panel or terminal cover to expose the terminal block. Inspect for any signs of damage, corrosion, or loose components before continuing. Do not proceed if you see obvious damage; address it first.
Tip: Pro tip: Place the panel and screws in a labeled container so you don’t lose them. - 3
Identify terminals
Identify the four terminals on the dryer block: two hot (L1, L2), one neutral (N), and one ground (G). Confirm with the dryer’s wiring diagram or label. Correct identification is essential for a safe and functional connection.
Tip: Pro tip: If the labeling is unclear, photograph the block before removing any wires to reference later. - 4
Attach the conductors
Connect the two hot wires to L1 and L2, the neutral conductor to N, and the ground to G. Ensure each wire is fully seated under its terminal screw and that no copper is exposed beyond the terminal clamp.
Tip: Pro tip: Strip conductors evenly and twist strands to prevent fraying; avoid over-tightening that could damage insulation. - 5
Secure strain relief
Install the strain-relief clamp at the cord’s entry point to prevent movement of wires or terminal screws. A secure clamp reduces wear and loosening over time and helps protect insulation from pinching or abrasion.
Tip: Pro tip: Align the cord so it exits the cabinet in a straight line to minimize bending stress. - 6
Reassemble and test
Replace the terminal cover and re-secure all screws. Plug the dryer back in and restore power at the breaker. Run a short dry cycle to verify heat and operation, listening for unusual noises and checking for warmth at the plug.
Tip: Pro tip: If you notice warmth at the cord or outlet, immediately power down and re-check connections or seek professional help.
Common Questions
Is it legal to replace a dryer cord myself?
In many areas, homeowners can replace a dryer cord if they are comfortable with basic electrical work and the power is properly shut off. Local codes vary, and some jurisdictions require a licensed electrician for changes to wiring or outlets. Always consult your local electrical code and the appliance manual before proceeding.
You can typically replace a dryer cord yourself if you are comfortable with basic electrical work and you shut the power off, but local rules vary. Check your code and the manual first.
Do I need to replace the outlet when switching to a 4-prong cord?
Yes, a 4-prong dryer cord needs a corresponding 4-prong outlet (NEMA 14-30) or the proper adapter, depending on your system. Upgrading the outlet ensures correct grounding and isolation of the neutral conductor. Do not force a 4-prong cord into a 3-prong outlet.
You'll generally need a 4-prong outlet to match your 4-prong cord; don't force it into a 3-prong outlet.
What are the key safety checks after installation?
Check for loose screws, ensure the ground is solid, verify there are no exposed conductors, and confirm the strain relief holds the cord firmly. Run a short test cycle and monitor the plug and outlet for heat or discoloration.
Make sure there are no loose wires, the ground is solid, and test the dryer on a short cycle while watching for heat.
Will doing this affect my warranty?
Some manufacturers require professional installation or service for warranty to remain valid. Review the appliance warranty terms and consult the manufacturer’s guidance or a licensed electrician if you’re uncertain.
Warranties vary; check the manual or contact the manufacturer to know if self-install affects coverage.
How long does this process typically take?
Most DIY cord replacements take about 60-90 minutes, depending on accessibility and your familiarity with basic electrical tasks. Allow extra time if you need to upgrade an outlet or circuit components.
Expect around an hour to an hour and a half, with extra time if the outlet or wiring needs upgrading.
What are common mistakes to avoid?
Avoid mixing up hot and neutral, skipping strain relief, or attempting to reuse damaged cords. Never modify an outlet to fit a different cord type and never work with wet hands or on a wet surface.
Common mistakes include mixing up wires, skipping strain relief, or using a damaged cord.
Watch Video
Key Points
- Disconnect power before starting.
- Use a code-compliant 4-prong cord.
- Attach wires to the correct L1/L2/N/G terminals.
- Test operation and monitor for signs of distress.