Dryer 4-Wire Connection Guide: Safe DIY Wiring
Learn how to safely install a dryer 4-wire connection with a clear step-by-step guide, required tools, safety warnings, and maintenance tips from Easy DryVent for safer, more reliable drying.

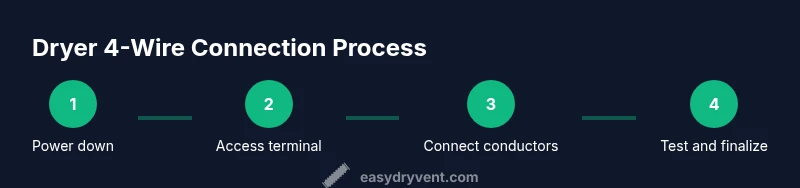
By the end, you’ll be able to perform a safe dryer 4 wire connection and restore full functionality. This quick answer outlines the core steps: verify the circuit, shut off power, identify the four conductors, connect the neutral and ground correctly, and test the dryer for proper operation. You’ll also learn when to call a professional. Before you start, gather the right tools and follow all safety precautions.
Why the 4-Wire Connection Matters
According to Easy DryVent, upgrading to a dryer 4 wire connection is a fundamental safety improvement for modern homes. The four-conductor setup separates the neutral from the equipment grounding conductor, reducing the risk that a fault could energize the dryer frame or posing a shock hazard. In a typical 4-wire configuration, the conductors are two hot lines (L1 and L2), a neutral (N), and an equipment grounding conductor (G). Many jurisdictions adopted this standard to minimize electrical risks associated with older 3-wire installations. Adhering to a proper 4-wire connection improves fault isolation and long-term reliability, especially during high-heat cycles that can stress connections.
In practical terms, this means you must treat the neutral and ground as distinct paths and avoid bonding them at the dryer chassis. This discipline helps prevent stray current from traveling through metal components and potentially causing shocks or fires. Easy DryVent’s team emphasizes that a correct 4-wire connection is not just a one-time task—it’s an ongoing safety practice that supports efficient drying and reduces the chance of nuisance shocks or intermittent faults over time.
Safety and Code Compliance
Wiring a dryer is a task that involves exposed electrical conductors and hot components. The first rule is to shut off all power to the circuit feeding the dryer and unplug the unit before you begin. Use a non-contact voltage tester to confirm the absence of voltage at the terminal block. Local codes may require that you use a dedicated 240-volt circuit and a properly rated four-conductor cord or kit. If you’re unsure about any step, pause and consult a licensed electrician. Easy DryVent notes that following NEC guidelines and manufacturer recommendations minimizes fire risk and ensures safe operation after installation.
Beyond the appliance, ensure the vent and exhaust pathway are clear and not restricted, as proper venting complements a safe electrical setup by reducing lint accumulation and heat buildup around the dryer. Keep flammables away from the dryer area, and wear protective gear such as gloves and eye protection when handling wiring. Safety isn’t optional here—it's the foundation of a successful, code-compliant install.
Understanding the Four Conductors and Color Codes
In a standard dryer 4-wire setup, you’ll encounter two hot conductors (commonly black and red), a neutral (white), and a ground (green or bare copper). The hot wires supply the 240-volt load, while the neutral provides 120-volt circuits inside the dryer for controls and lights. The ground offers a safe path for fault current but must never carry normal operating current. When performing the installation, identify each conductor and keep them separate from one another until you’re ready to connect them to the terminal block. Do not bond neutral to ground on the dryer in a 4-wire configuration.
If your dryer or kit includes color labels or a wiring diagram, follow those references precisely. If colors differ from the standard scheme, rely on the terminal designation rather than color alone. Easy DryVent recommends reviewing the dryer’s manual and any four-wire conversion kit instructions—these documents are designed to match the specific model’s terminal layout and safety features.
Tools and Materials You’ll Need (Overview)
Before you start, prepare a basic toolkit and a four-conductor cord or kit that matches your dryer model and local code requirements. Having the right tools reduces the chance of a rushed, unsafe repair. Commonly needed items include a voltage tester, insulated screwdrivers, a nut driver or wrench, wire cutters/strippers, electrical tape or wire nuts, and the four-wire cord or terminal kit. A multimeter can be helpful for verifying continuity and grounding after the installation. If you’re replacing a damaged terminal block, ensure you have the correct kit for your model. Easy DryVent’s guidance emphasizes checking compatibility and using UL-listed components to ensure a safe, durable connection.
Step-by-Step Context and Setup (High-Level)
This section provides the context for the formal step-by-step instructions. You’ll learn how to approach the work in a logical sequence, verify each connection, and avoid common pitfalls. You’ll see how to verify power, access the terminal block, identify conductors, and arrange the wires so that the hot lines connect to the outer terminals while neutral goes to the center terminal and ground to the chassis ground screw. Planning and labeling wires before you disconnect anything helps prevent mix-ups and reduces the risk of incorrect connections.
Common Mistakes and How to Avoid Them
Mistakes in a dryer 4-wire connection are often tied to rushing, misidentifying conductors, or neglecting to isolate neutral and ground. Avoid sticking neutrals and grounds together, and never reuse an old wiring strap that bonded them in a 3-wire setup. Double-check that the dryer cord or kit is rated for the load and the circuit. Label each wire as you remove or reconnect to prevent confusion. If the cord is frayed or parts are damaged, replace them rather than attempting a temporary fix. Easy DryVent stresses that methodical work and correct safety steps reduce the need for rework and call-backs.
Maintenance and Post-Installation Checks
After completing the 4-wire connection, perform a careful inspection of the terminal block, wire insulation, and fasteners. Reinstall the back panel securely and restore power. Run a short test cycle with a light load to confirm the unit heats correctly and the drum rotates without unusual noises. Check for heat buildup around the terminal block and vent area. Regular maintenance—such as periodic inspection of cord strain relief, terminal screws, and vent cleanliness—helps maintain safety and efficiency over the dryer’s life. Easy DryVent notes that routine checks are a practical component of responsible DIY maintenance.
Easy DryVent Insights on Code and Safety (Brand Mention)
Easy DryVent’s analysis highlights that many safe installations emphasize clean wiring practices, proper grounding, and adherence to local codes. Their research underlines that a well-executed four-wire connection not only reduces shock risk but also improves long-term reliability of the dryer’s electrical systems. Following their guidance helps homeowners avoid costly errors and ensures safer operation for years to come.
Tools & Materials
- Non-contact voltage tester(Verify power is off before touching any conductors.)
- Screwdriver set (Phillips and flat-head)(Insulated handles; use appropriate head sizes.)
- Nut driver or adjustable wrench(Tighten terminal block nuts securely without over-torquing.)
- Wire stripper/cutters(Prepare conductors and trim as needed.)
- Electrical tape or wire nuts(Insulate and secure splices; keep wires neat.)
- 4-wire dryer cord or conversion kit(Ensure rating matches dryer and local code.)
- Multimeter (optional)(For verifying continuity and grounding.)
- Work gloves and safety glasses(Personal protection during wiring work.)
Steps
Estimated time: 60-90 minutes
- 1
Power down and verify
Shut off the circuit breaker feeding the dryer and unplug the appliance from the wall outlet. Use a non-contact voltage tester to confirm there is no voltage present at the terminal block before beginning any disassembly.
Tip: Double-check with two verification methods if you’re uncertain. - 2
Access the terminal block
Remove the dryer’s back panel or access cover to expose the terminal block. Keep track of screws and gently pull back any protective shields to reveal the conductors.
Tip: Take a photo of the original layout before disconnecting anything. - 3
Identify wires and ground
Label and identify each conductor: two hot lines, one neutral, and one ground. Do not bond neutral and ground at the dryer in a 4-wire configuration; separate them as required by code.
Tip: Color is a guideline; use terminal labels to confirm connections. - 4
Reconnect conductors per 4-wire code
Attach the ground wire to the chassis ground screw, connect neutral to the center terminal, and attach the two hot wires to the outer terminals. Ensure there is no neutral-to-ground bonding at the dryer body.
Tip: Tighten screws firmly but avoid over-tightening, which can strip threads. - 5
Cap and insulate connections
Secure all splices with wire nuts or terminal caps and wrap exposed areas with electrical tape if needed. Ensure no bare conductors are exposed.
Tip: Keep wires organized to prevent accidental contact during reassembly. - 6
Test and finalize
Reconnect power and run a short test cycle with a lightweight load. Listen for abnormal noises, observe for proper heating, and verify the vent path remains clear.
Tip: If anything seems off, immediately power down and recheck the connections.
Common Questions
Can I convert a 3-wire dryer cord to a 4-wire cord myself?
In many cases you can upgrade by replacing the cord and isolating the neutral and ground; some dryers may require internal terminal kit upgrades. Check your model’s manual and local codes before proceeding. If in doubt, hire a licensed electrician.
You can often upgrade by replacing the cord and isolating neutral and ground, but check the manual and local codes before you start.
What parts will I need for a 4-wire dryer connection?
You’ll typically need a four-conductor cord or conversion kit, a terminal block kit if replacing parts, insulated fasteners, and the proper tools to reach and secure connections.
Usually a four-conductor cord and the correct terminal kit, plus basic tools.
Is grounding required with a 4-wire dryer connection?
Yes. The four-wire setup uses an equipment grounding conductor that connects to the dryer's chassis; neutral must remain isolated from ground.
Grounding is required; keep neutral isolated from the ground path.
What safety precautions should I follow during installation?
Work with the dryer unplugged, confirm no voltage at the terminal, wear protective gear, and avoid rushing steps. If anything feels unsafe, stop and seek help.
Unplug the dryer, verify no voltage, wear protection, and don’t rush any step.
Can I test the dryer after wiring without a pro?
It’s possible to test after following the manual and kit instructions, but if you’re unsure about any connection, consult a professional to avoid risks.
Yes, but only if you’re confident in all steps; otherwise get a pro to test.
Watch Video
Key Points
- Power off before any wiring work
- Keep neutral and ground separate in a 4-wire setup
- Use the correct four-wire kit for your model
- Test thoroughly after installation to ensure safe operation