How to Wire a 4-Prong Dryer Cord Safely
Learn how to safely wire a 4-prong dryer cord, with practical steps, tools, safety checks, and maintenance tips. Easy DryVent explains best practices for a secure, code-compliant connection.

In this guide, you will learn how to wire a 4-prong dryer cord correctly and safely, including compatibility checks, required tools, and essential safety precautions. We cover separate grounding from neutral, bonding strap removal when converting from 3-prong to 4-prong, and how to test your connections before use.
Understanding the Difference: 4-Prong vs 3-Prong Dryer Connections
Many homes built or updated in recent years require a separate grounding path for modern electric dryers. A 4-prong dryer cord provides distinct hot conductors, a neutral, and a dedicated grounding path. This separation improves safety by preventing neutral-ground bonding during operation. When converting from a 3-prong cord, you must remove the bonding strap that previously connected the neutral to the chassis and connect the new ground wire to the dryer’s frame. Always consult the dryer’s user manual and local code requirements before making any change. The Easy DryVent team emphasizes safety: if you’re unsure, hire a licensed electrician to avoid fire hazards or electrical shock.
note2PrivateIdForEditorEmpty?
Tools & Materials
- 4-prong dryer cord (NEMA 14-30P compatible with your dryer’s terminal block)(Ensure the cord matches your dryer’s receptacle and terminal layout)
- Screwdriver set (flathead and Phillips)(Phillips #2 commonly fits most dryer panels)
- Nut driver or adjustable wrench(Used to loosen/tighten terminal screws safely)
- Non-contact voltage tester(Verify power is off before touching wires)
- Wire stripper/crimper(Prepare wires and trim insulation as needed)
- Multimeter (optional)(For verifying continuity after wiring)
- Electrical tape and zip ties(Secure and insulate connections and strain relief)
- User manual or wiring diagram for your dryer(Follow manufacturer-specific terminal labeling)
Steps
Estimated time: 45-60 minutes
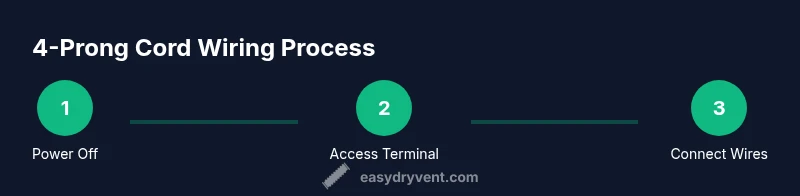
- 1
Power down and unplug the dryer
Begin by turning off the circuit breaker supplying the dryer and unplugging the appliance from the wall outlet. This prevents accidental energized contacts and reduces shock risk during cord replacement. If the dryer is hard-wired, shut off the corresponding breaker and disconnect the appliance from the service panel.
Tip: Always double-check with a voltage tester before touching any conductors. - 2
Access the terminal block
Open the dryer’s rear access panel to expose the terminal block. Use a screwdriver to remove any screws holding the panel in place. Confirm there is no power to the unit and visually inspect for any damaged insulation or corrosion on the terminals.
Tip: Keep screws organized and note the orientation of the existing wires for reference. - 3
Disconnect the old cord safely
Loosen the terminal screws and detach the old cord. If you’re replacing a damaged cord, gently remove it and inspect the terminal block for signs of wear or scorching. Remember: do not yank wires; loosen, then detach each conductor.
Tip: Take a photo of the wiring layout before removing anything for reference. - 4
Prepare the new 4-prong cord and bonding strap
Inspect the new cord’s wires: two hot wires (usually black and red), a white neutral, and a green or bare ground. If you’re converting from a 3-prong cord, remove the bonding strap that connected neutral to the frame, as required by code changes. Do not reuse the old strap in a 4-prong configuration.
Tip: Ensure the bonding strap is removed only if your dryer’s manual specifies a 4-prong setup. - 5
Attach the wires to the terminal block
Connect the black wire to one hot terminal, the red wire to the other hot terminal, and the white neutral to the neutral terminal. Attach the green ground wire to the dedicated grounding screw or lug on the dryer frame. Tighten all screws securely without over-torquing.
Tip: Hold each wire while tightening to avoid movement that could loosen connections later. - 6
Reassemble and secure wiring
Reinstall the terminal block cover and any screws removed earlier. Fit the strain relief into the cord entry hole to prevent wire movement. Check that no bare conductors are exposed outside the terminal block.
Tip: Reroute cables neatly with zip ties and avoid sharp bends that could damage insulation. - 7
Test the setup and verify safety
Restore power at the breaker and plug the dryer in. Use a voltage tester to confirm hot, neutral, and ground are correctly present. Run a short dry cycle with no load to check for arcing, unusual smells, or heat buildup. If anything seems off, power down immediately and recheck connections.
Tip: If you smell burning or see smoke, stop and call a professional right away. - 8
Document and maintain
Record the cord type, date of installation, and any notes about the terminal layout for future reference. Regularly inspect the cord for wear, secure connections, and proper strain relief as part of routine dryer maintenance.
Tip: Set a reminder for annual checks to uphold safety and efficiency.
Common Questions
Is it legal to wire a dryer yourself and convert from a 3-prong to a 4-prong cord?
Many jurisdictions allow DIY wiring for home appliances if codes are followed. Some areas require a licensed electrician for major electrical work. Always check local codes and the dryer’s manual before proceeding.
You can usually do it yourself if you follow the code and manual, but when in doubt, consult a licensed electrician.
What are the main differences between 3-prong and 4-prong dryer cords?
A 3-prong cord shares neutral and ground, while a 4-prong cord provides separate ground. Converting involves removing the bonding strap and ensuring correct wire connections to hot, neutral, and ground terminals.
The 4-prong design keeps neutral and ground separate for safety; make sure to remove the bonding strap when converting.
What tools do I need to wire a 4-prong dryer cord?
Common tools include a screwdriver, wire stripper, pliers, a non-contact voltage tester, and a multimeter if you want extra verification. Always use insulated tools.
You’ll need basic hand tools and a tester to ensure power is off and connections are solid.
How can I verify the wiring is correct after installation?
Power off to the unit, reconnect and cover the terminal block, then restore power and run a short test cycle to ensure there are no sparks, smells, or heat buildup.
Turn the power back on and run a quick dry cycle to confirm the setup works safely.
What should I do if I see signs of damage on the terminal block?
If you notice scorching, melted insulation, or loose terminals, stop and consult a professional. Damaged blocks can cause fires or electric shock.
If you see damage, don’t proceed; consult a professional to avoid serious hazards.
Do I need to replace the dryer or cord if it’s older?
Old cords or dryers may have degraded insulation or compromised terminals. Replacing with a modern 4-prong setup is advisable if you notice wear or if local code requires updates.
If the components show wear or your local code requires newer setups, replace.
Watch Video
Key Points
- Disconnect power before starting any wiring task
- Use a 4-prong cord with separate ground and neutral
- Remove the bonding strap for 4-prong configurations
- Close up securely and test before use