How to Install a Dryer Cord 3-Prong: Safe DIY Guide
Learn how to safely install a 3-prong dryer cord with practical steps, essential tools, safety tips, and maintenance guidance for homeowners and DIY enthusiasts.

Installing a 3-prong dryer cord can be safe when your home’s outlet and dryer’s terminal are compatible and power is fully off. This guide covers when a 3-prong is allowed, the essential tools, and a clear step-by-step process with safety warnings. Always verify local code and consider upgrading to a 4-prong outlet if required by code.
Understanding the 3-Prong vs 4-Prong Standard
Electric appliances have evolved to improve safety, but many homes still use older wiring configurations. A 3-prong dryer cord utilizes a combined neutral/ground conductor, which was common in older installations. Modern practice favors a 4-prong cord with a separate grounding conductor. This separation reduces the risk of shock or stray currents affecting the appliance and surrounding metal surfaces. According to Easy DryVent, compatibility between the dryer’s terminal block, the outlet, and the local electrical code determines whether a 3-prong installation is acceptable. Before you touch anything, check your dryer’s manual and your outlet type. If the dryer is designed for 3-prong operation and the outlet is an approved 3-prong configuration, you may proceed with caution, keeping in mind that many jurisdictions now require a 4-prong connection for new work.
Is a 3-Prong Install Legally Acceptable in Your Area?
Legal requirements for dryer connections vary by locale and age of the home. In some older residences, a 3-prong setup may still be allowed if the outlet matches the dryer’s terminal configuration and the grounding strap is present and properly connected. In newer or renovated homes, many jurisdictions require a 4-prong outlet with a separate ground. Always compare the dryer manual with local code and, when in doubt, consult a licensed electrician. Easy DryVent emphasizes that staying within code protects your home’s electrical system and reduces fire risk. If you discover that your outlet or dryer does not align with current standards, upgrade to a 4-prong configuration rather than attempting a risky adaptation.
Safety Essentials Before You Start
Power down completely: unplug the dryer, turn off the corresponding circuit, and verify no voltage is present at the outlet with a non-contact tester or a multimeter. Wear non-slip footwear and eye protection, and keep the work area dry. Never work with live wiring, and avoid touching metal components with damp hands. If you encounter damaged insulation, burnt smells, or exposed conductors, stop immediately and seek professional assistance. Easy DryVent notes that proper PPE and a clean, dry workspace are non-negotiable when dealing with electrical connections.
Tools and Materials You Might Need
Having the right tools on hand prevents improvisation, which can lead to mistakes. Typical items include a properly rated 3-prong dryer cord, a screwdriver set, a nut driver or adjustable wrench, a voltage tester, wire strippers, and electrical tape. Always use UL-listed components rated for the dryer’s current and outlet configuration. This block is a practical orientation; you will find a detailed list in the Tools & Materials section of this article to ensure you don’t miss anything essential.
Grounding Straps and Terminal Blocks: What to Know
Some 3-prong cords depend on a grounding strap that ties the neutral conductor to the dryer’s chassis. If the strap is present, ensure it is intact and correctly positioned according to the dryer’s installation guide. If the strap is damaged or missing, attempting a 3-prong configuration can create shock hazards or improper grounding. Always verify whether the dryer’s terminal block requires the strap, and never alter grounding configurations without confirming compatibility with the manufacturer and local code. Easy DryVent emphasizes that grounding practices are central to safety when dealing with 3-prong connections.
Post-Install Checks and Safe Operation
After securing the cord, restore power and perform a careful check. Confirm the cord sits neatly inside its strain relief and that the plug aligns with the outlet without forcing. Run the dryer on a low-heat cycle to observe any unusual heat buildup, buzzing, or spark-like signs. If anything abnormal occurs, immediately power down and re-inspect connections. A successful test means no overheating at the plug or outlet, and normal operation within the dryer’s cycle. Regular inspection of the cord and outlet every few months helps maintain long-term safety.
Common Mistakes to Avoid
- Skipping the power shutdown or testing step, which can cause electric shock.
- Forcing a 3-prong cord into a 4-slot outlet or using the wrong terminal configuration.
- Omitting a proper strain relief, which can wear the cord over time.
- Ignoring manufacturer guidance or local code requirements.
- Failing to test the installation with a known-good outlet tester after wiring.
Tools & Materials
- 3-prong dryer cord (UL-listed)(Ensure rating matches your dryer's amperage and that it is labeled for dryer use.)
- Screwdriver set (Phillips #2 and flathead)(One driver for terminal screws, one for panel screws.)
- Nut driver or adjustable wrench(Used to secure terminal box screws and cord clamps.)
- Voltage tester or multimeter(Verify no voltage at the outlet before starting.)
- Wire strippers(Prepare conductors and trim insulation cleanly.)
- Electrical tape or heat-shrink tubing(Seal exposed conductors and protect connections.)
- Safety gloves and eye protection(Personal protective equipment for electrical work.)
- Flashlight or headlamp(Improve visibility in the dryer cabinet.)
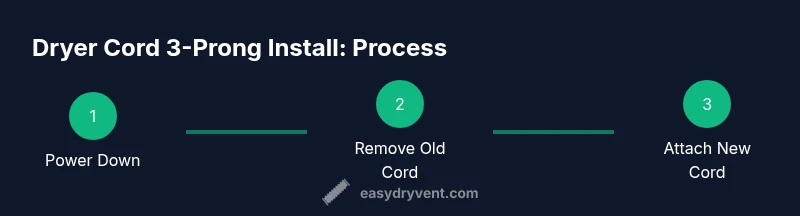
Steps
Estimated time: 30-45 minutes
- 1
Power down and verify no power
Unplug the dryer and switch off the circuit breaker. Use a voltage tester to confirm the outlet is de-energized. This prevents shocks during inspection and removal of the old cord.
Tip: Double-check by testing both prongs and the chassis ground before touching wires. - 2
Remove the old cord and inspect the terminal block
Carefully remove the screws securing the current cord. Inspect the terminal block for melted insulation, corrosion, or loose screws. Replace damaged components before proceeding.
Tip: If you see scorching, stop and consult a professional. - 3
Prepare the new 3-prong cord
Unpack the 3-prong cord and inspect its conductors. Ensure the grounding strap (if present) is in the correct orientation per the manufacturer’s guide.
Tip: Do not cut or shorten conductors beyond factory length. - 4
Connect the cord to the dryer terminals
Attach each conductor to its matching terminal (L1, L2, and N) and secure with screws. If your model uses a grounding strap, install it per the manual.
Tip: Tighten screws firmly, but avoid over-tightening which can strip threads. - 5
Secure the cord and reassemble the dryer cabinet
Reattach any covers, run the cord through the strain-relief clamp, and secure the cabinet. Ensure the cord has a clean bend radius and isn’t kinked or pinched.
Tip: Test the strain-relief once more to confirm it locks the cord in place. - 6
Test operation and perform a final safety check
Plug in the dryer, reset the circuit, and run a short cycle to verify normal operation. Check for overheating at the plug and outlet, and monitor for unusual noises.
Tip: If anything smells hot or looks abnormal, power down immediately.
Common Questions
Is it safe to install a 3-prong dryer cord at home?
Only if your dryer and outlet are designed for 3-prong use and local codes permit it. If unsure, upgrade to a 4-prong outlet to maximize safety. Always follow the manufacturer’s instructions.
A 3-prong installation is only safe if the dryer and outlet support it and local code allows it. When in doubt, upgrade for safety.
What tools do I need for a 3-prong installation?
You’ll need a UL-listed 3-prong cord, screwdriver, nut driver or wrench, voltage tester, wire strippers, and electrical tape. Safety gear like gloves and eye protection is recommended.
Have the essential tools ready: cord, driver, tester, and wire tools, plus safety gear.
What should I do if I find damaged wiring or a burnt terminal?
Do not proceed. Stop installation, unplug, and consult a licensed electrician. Damaged components can create shock or fire hazards.
If you see damage, stop and call a pro, don’t risk it.
Why is a 4-prong outlet often recommended?
A 4-prong outlet provides separate ground and neutral, reducing the risk of stray currents and improving safety. Many codes now require it for new installations.
A four-prong setup is safer and increasingly required by code.
Can I DIY this without a permit?
Code requirements vary by location. Many areas don’t require a permit for simple replacements, but major wiring changes usually do. Check your local electrical code.
Check local rules—permits vary by area.
What if the dryer manual specifies a 3-prong option is allowed?
If the manual explicitly allows a 3-prong cord with proper grounding, you may proceed following the manual’s instructions and local code.
Follow the manual and local code if 3-prong is allowed.
Watch Video
Key Points
- Power off and unplug before starting
- Verify compatibility and follow local code
- Use the correct 3-prong cord and strain-relief
- Secure connections and test thoroughly
- Consider upgrading to a 4-prong outlet for long-term safety