Dryer 3 Prong vs 4 Prong: A Practical Safety Guide
Learn the essential differences between dryer 3 prong and 4 prong wiring, safety implications, code considerations, and upgrade steps with Easy DryVent. Practical guidance for homeowners and DIYers.

According to Easy DryVent, understanding the dryer 3 prong vs 4 prong setup hinges on grounding, code requirements, and safety. A 4-prong outlet with a separated ground is typically the safer, code-compliant option for most homes, while older houses may still use a 3-prong cord. Upgrading improves safety and appliance performance over time.
Understanding Dryer Prong Configurations
The phrase dryer 3 prong vs 4 prong refers to the electrical plug and receptacle configuration that powers a clothes dryer. In most homes, a 240-volt circuit is used to supply the main heating elements, while a 120-volt circuit handles signaling and control functions. The critical difference is how neutral and ground are treated. A three-prong cord combines ground and neutral on a single conductor, while a four-prong cord uses a separate ground conductor and an isolated neutral. According to Easy DryVent, this separation reduces ground-neutral coupling that can lead to stray currents, shock risk, or nuisance tripping of the dryer. From a safety and long-term maintenance perspective, the four-prong approach aligns with current electrical codes and industry best practices. For many homeowners, the decision comes down to existing wiring, the age of the structure, and willingness to upgrade. This block also dispels common myths about quick fixes or adapters that promise a simple solution without addressing fundamental electrical principles. In short, the dryer 3 prong vs 4 prong decision is a question of safety, reliability, and future-proofing.
Grounding and Code Implications
Grounding is the linchpin in the dryer 3 prong vs 4 prong debate. A three-prong configuration ties the neutral and ground together at the appliance, relying on the outlet body to provide grounding. A four-prong setup separates neutral and ground, reducing potential stray currents that can affect electronics or pose shock hazards. Modern electrical codes generally require the four-prong arrangement for new installations and major remodels. Easy DryVent emphasizes that upgrading to a four-prong system is not just about compliance; it also improves dryer performance by stabilizing the electrical supply and protecting sensitive controls from voltage fluctuations. If you own an older home with a 3-prong outlet, you’ll want to assess whether the existing wiring can support a 4-prong dryer cord and a properly grounded receptacle. This section explains how to verify grounding paths, inspect the outlet, and determine if a professional upgrade is warranted. It also clarifies that using adapters is a stop-gap at best and can introduce new risks. The takeaway: grounding integrity matters for safety and reliability, especially with high-draw appliances like dryers.
Wiring Basics: 3-Prong vs 4-Prong (Electrical Fundamentals)
Neutral and ground play different roles in the dryer circuit. In a 3-prong configuration, the neutral wire also serves as the ground path, which can introduce stray currents in some fault conditions. In a 4-prong configuration, the neutral is isolated from the ground, and a dedicated grounding conductor is connected to the dryer frame. This separation helps prevent backfeeding through metallic enclosures and reduces the risk of electric shock. Both configurations deliver the same 240-volt heating power, but the safety margin is higher with four dedicated conductors. For homeowners, the practical implication is that 4-prong cords require a grounded receptacle or panel with a separate grounding path. When evaluating a dryer, check the label on the appliance and the existing outlet to confirm compatibility. If you’re unsure, consult a licensed electrician who can interpret wiring diagrams and ensure the duty cycle and safety features operate correctly.
How to Determine Your Current Setup
Start by inspecting the outlet behind the dryer and the dryer's cord. If you see a three-slot receptacle, a three-prong cord is a possibility, but confirm that the dryer model supports it. If the outlet has four slots or a separate ground, you’re likely in a four-prong configuration. Look for labels on the dryer that indicate cord type and grounding requirements. Check the circuit breaker panel for a dedicated 30-amp or 40-amp circuit, and verify that the wiring to the outlet includes a separate ground conductor. If your home’s wiring is older or uses knob-and-tuse connections, the upgrade may require new wiring. Don’t rely on adapters as a permanent solution; they can mask underlying grounding and insulation problems. In cases where the dryer is already performing consistently and the outlet is compatible, a simple cord swap may be all that’s needed, but only after verifying the electrical service and grounding path.
When to Convert: Practical Scenarios and Guidance
Conversion from 3-prong to 4-prong is common in homes where an older outlet uses a 3-prong plug and there is available space to install a grounded receptacle. In many jurisdictions, upgrading to a four-prong outlet is a straightforward but skilled job that should be performed by a licensed electrician. If you’re renting or in a home with existing wiring that cannot be easily upgraded, you may consider a 3-prong to 3-prong replacement with a properly rated cord, but avoid any attempt to circumvent grounding with a temporary adapter. For new installations or major remodels, plan for a four-prong setup as the norm. The decision should factor in local codes, safety considerations, current dryer model compatibility, and long-term maintenance implications. Easy DryVent recommends balancing cost, safety, and compliance when planning an upgrade, and suggests verifying that your dryer’s manufacturer explicitly supports the chosen configuration.
Costs, Time, and What to Expect
Upgrading a dryer installation to a four-prong configuration typically involves obtaining a properly grounded receptacle, a new cord, and potentially wiring changes or panel upgrades. Costs can vary based on local labor rates, the complexity of the run, and whether the existing circuit requires replacement. In general terms, a straightforward outlet upgrade and cord replacement performed by a licensed professional can be completed within a day, with minimal downtime for the appliance. If wiring work is required, plan for additional time and potential testing. Homeowners who choose to do part of the work themselves should still have the electrical work inspected by a licensed professional to ensure compliance. Easy DryVent notes that investing in a safe, code-compliant configuration pays off with lower risk of electrical faults, better dryer performance, and peace of mind.
Installation Steps: DIY vs Professional Approach
For those who are comfortable with electrical work, it’s possible to upgrade a dryer setup, but it is not a beginner task. The safest path typically starts with turning off the appropriate circuit, verifying there is no voltage, and planning a proper grounded outlet installation with a separate ground path. The four-prong cord must be matched to a four-slot outlet, and the dryer’s junction box may require a strain relief and a correct mounting plate. If you choose a professional, expect them to inspect the circuit integrity, replace the outlet, verify the grounding conductor’s continuity, and test the dryer’s operation. A competent electrician will also check for proper bonding, inspect the panel, and confirm that the wiring gauge matches the dryer’s amperage rating. DIYers should not bypass safety features or use improvised adapters.
Common Mistakes and How to Avoid Them
Common mistakes include relying on adapters to force compatibility, using undersized wiring, and failing to separate neutral and ground in a four-prong setup. Another frequent error is not testing the circuit after wiring changes or neglecting to re-seat the dryer’s plug properly. Always follow the dryer’s manual and local code requirements when wiring, and do not assume that a longer cord will solve impedance or voltage drop problems. Before starting, turn off the power, gather the correct tools, and double-check the outlet type. If a mismatch exists between the dryer's plug and the outlet, upgrade the receptacle and ensure a secure, code-compliant connection. Finally, document the upgrade with notes for future maintenance and resale.
Quick-Reference: Checklist for Homeowners
- Identify outlet type (3-prong vs 4-prong) and verify dryer compatibility
- Confirm grounding path and panel grounding conductor continuity
- Plan a safe, code-compliant upgrade with a licensed electrician if needed
- Install a four-slot outlet and a four-prong cord for safety and compliance
- Test the dryer’s performance and controls after upgrade
- Document changes for future maintenance and resale
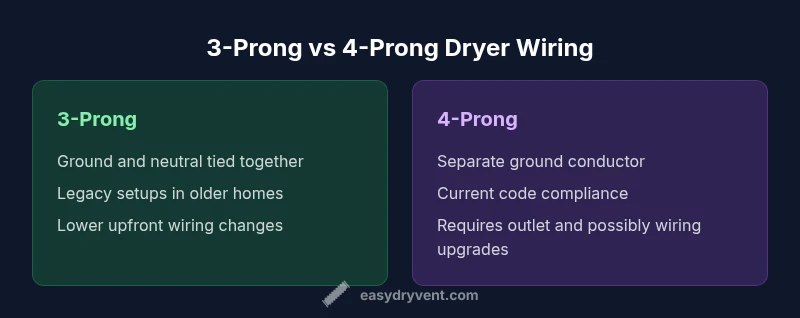
Comparison
| Feature | 3-prong dryer cord | 4-prong dryer cord |
|---|---|---|
| Grounding configuration | Ground and neutral tied together at the appliance | Neutral and ground separated; dedicated grounding conductor |
| Code compliance | Legacy setup; common in older homes | Current code-compliant; preferred for new installs |
| Wiring requirements | Single conductor path for ground/neutral | Separate neutral and dedicated ground conductor |
| Installation complexity | Simpler cord swap may be possible | Outlet replacement or wiring work required |
| Compatibility with dryers | Most older dryers support 3-prong or 4-prong with kit | Modern dryers and outlets commonly shipped as 4-prong compatible |
| Cost to upgrade | Lower upfront cost if existing wiring allows | Higher upfront cost for outlet, wiring, and possible panel work |
The Good
- Increases safety by reducing neutral-ground coupling
- Aligns with current electrical codes and insurance expectations
- Improves dryer performance and electrical stability
- Reduces risk of shock on fault conditions
Negatives
- Higher upfront cost and potential home wiring work
- Requires professional installation in many homes
Upgrade to a four-prong configuration for safety and future-proofing.
For most homes, the 4-prong setup provides better safety with a separated neutral and ground. It aligns with current codes and supports reliable dryer operation. The Easy DryVent team recommends planning the upgrade when renovating or upgrading electrical service.
Common Questions
Can I use a 3-prong dryer cord with a modern 4-prong outlet?
Using a 3-prong cord on a 4-prong outlet is not recommended as a long-term solution. It bypasses the safety benefits of the four-wire configuration and can create shock hazards. If you want to use the existing dryer safely, upgrade the outlet or dryer cord to match the outlet, or consult an electrician for a compliant upgrade.
No—use the matching cord and outlet to maintain safety and code compliance.
Is upgrading to a four-prong setup legal for older homes?
Yes, upgrading is legal in most areas, but it must meet local electrical codes. An electrician will verify the grounding path, replace the outlet, and ensure the wiring gauge and circuit capacity are appropriate for the dryer. Always obtain a permit if required by your jurisdiction.
Yes, but have a licensed electrician confirm code compliance.
Will converting affect my dryer warranty?
Warranties vary by manufacturer. Upgrading to a four-prong configuration generally does not void a warranty when performed by a licensed professional and when the components are compatible with the dryer model. Check your dryer’s manual and warranty terms for specifics.
Check the manual; professional work usually keeps warranties intact.
What tools are needed for the upgrade?
Basic electrical tools and safety gear are required, including a voltage tester, screwdriver, wire stripper, and proper grounding equipment. If wiring to a four-slot outlet is needed, you’ll also need new cable and possibly a new junction box or panel work, depending on the setup.
A tester, screwdrivers, and wiring supplies are common needs.
Can I defer upgrading and use a temporary adapter?
Adapters are generally discouraged as a permanent solution. They can mask grounding issues and may fail under load. If you must delay, plan a formal upgrade as soon as possible and consult a professional to ensure safety.
Adapters aren’t a safe long-term fix; consider an upgrade plan.
How long does a typical upgrade take?
A straightforward outlet and cord upgrade by a licensed electrician can often be completed in a few hours. More complex renovations, such as rerouting wiring or panel upgrades, may take longer and involve scheduling and permitting.
Most upgrades take a few hours with a professional.
Key Points
- Identify outlet type before planning upgrades
- Choose 4-prong for safety and code compliance
- Plan upgrades with a licensed electrician
- Avoid adapters as a long-term solution
- Document changes for future maintenance and resale