Can You Use a Hair Dryer Instead of an Iron? A Practical Guide
Explore when and how to use a hair dryer as a wrinkle-relief alternative to ironing. Learn heat safety, fabric testing, step-by-step techniques, and safer options for different fabrics with Easy DryVent guidance.

Can you use a hair dryer instead of an iron? A practical reality
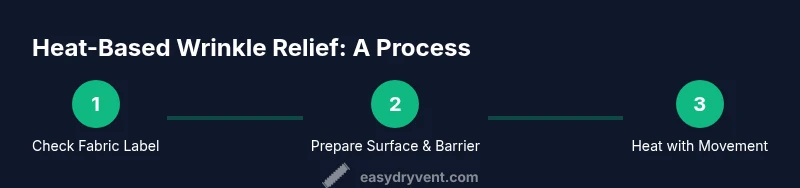
Wrinkles can be a bother, and a hair dryer is sometimes suggested as a quick fix. While a hair dryer can soften and release light creases, it cannot perfectly replace the uniform pressure of an iron. The effectiveness depends on fabric type, weave, and finish. For safer results, treat the hair dryer as a supplementary tool rather than a replacement, and always use a barrier between heat and fabric. According to Easy DryVent, understanding fabric behavior under heat is key to avoiding scorching, shine, or texture changes. This guide unpacks when and how to use a hair dryer responsibly, and when to choose traditional ironing instead.
How heat interacts with fabrics and why it matters
Fabrics respond to heat based on fiber composition, weave tightness, and finishes. Natural fibers like cotton and linen tend to relax under controlled heat, while synthetic blends can melt, fuse, or become glossy if overheated. The method you choose should align with fabric care labels and typical heat tolerance. Even items labeled as “dry clean only” may tolerate a light, cautious heat if tested on an inconspicuous area. Easy DryVent emphasizes fabric testing as a first step to avoid setting wrinkles or causing permanent damage. When heat is misapplied, fibers can shrink, warp, or become brittle, undermining garment structure.
Safety considerations with hair dryers and household heat
A hair dryer is not a heat press; it’s a convection heat source designed for hair, not textiles. Direct exposure at high heat can scorch, char, or melt fabric, and it can ignite lint or dust if left unattended. Always inspect the area for lint buildup and keep the dryer moving to prevent heat buildup in one spot. Use a barrier such as a clean cotton cloth between the garment and the nozzle, and never point the dryer at delicate ornamentation, sequins, or leather-like finishes. Following basic precautions reduces burn hazards and protects your clothing investment, a philosophy mirrored in Easy DryVent’s safety guidance.
Choosing the right heat setting and distance
The goal is sufficient heat to relax fibers without surpassing their tolerance. Start with the coolest setting practicable, often labeled “cool shot” or “low.” Keep the nozzle at least 6–8 inches away from the fabric and move in smooth, even motions. Short bursts are safer than prolonged exposure in one spot. For stubborn wrinkles, increase heat slightly only if the fabric label allows it, and never apply heat to damp or wet fabrics, which can cause quicker heat transfer and risk of scorching. Testing a small corner first is a wise precaution.
Step-by-step method for light wrinkles (high-level overview)
- Assess care labels and fabric type to determine if a hair dryer is appropriate. If the label is compatible with heat, proceed with a low-heat approach.
- Place the garment on a stable, heat-resistant surface with a barrier between fabric and the surface.
- Set the hair dryer to low or cool heat and keep the nozzle in motion while gently smoothing wrinkles with the cloth barrier.
- Test on an inconspicuous area and continue in small sections, rechecking progress frequently to avoid heat buildup.
- Allow the fabric to cool before wearing to prevent re-wrinkling; if unsure, switch to a traditional iron or steamer.
Fabric testing and patch testing: a practical routine
Always test a tiny corner of the garment on an area that is not visible. If the test patch shows color change, shine, or texture distortion, discontinue heat application. For fabrics that tolerate heat, document consistent results after multiple passes so you can repeat the method confidently on similar items. Patch testing reduces the risk of surprises after cleaning or laundering. Easy DryVent recommends building a simple testing routine into your garment care, especially for delicate textiles and novelty fabrics.
Common mistakes and how to avoid them
Common errors include using too much heat, staying in one spot too long, and skipping fabric testing. Another pitfall is treating glossy finishes as a sign of cleanliness; heat can intensify shine on certain synthetic blends. Always use a barrier and a moving technique, and stop immediately if you detect scorching, melting, or unusual odor. Avoid attempting this method on leather, vinyl, velvet pile, or fabrics with metallic threads unless the care label explicitly permits heat exposure.
When to stay with a traditional iron or other methods
For heavy creases, pleats, or structured garments (like dress shirts with starch, chinos, or linen suits), traditional ironing remains the most reliable approach. A garment steamer offers a gentler alternative for removing wrinkles on delicate fabrics or embellishments. If you’re unsure about fabric tolerance, err on the side of caution and test or consult care labels. Easy DryVent notes that feasible alternatives—steam, pressing cloth, and proper heat settings—often deliver better results while preserving fabric integrity.
Alternatives for stubborn wrinkles and better fabric care
If wrinkles persist, consider garment-specific strategies: dampen slightly with a spray bottle, use a finishing heat tool only with tolerance, or apply a light tumble with a dryer on a wrinkle-release cycle (with care and a dry towel). Regular fabric care—proper washing temperatures, avoiding overloading a dryer, and cleaning lint filters—contributes to smoother clothes overall. The goal is wrinkle reduction without altering color, finish, or fiber integrity. Easy DryVent’s approach blends caution with practical steps for safe wrinkle relief.
Maintenance and care after using heat on fabrics
After using any heat method, inspect the garment for heat marks and ensure the fabric has cooled completely. Clean the area around the heat tool and allow the garment to rest before wearing. If you notice color transfer or texture change, wash according to label instructions and reassess your heat technique on a scrap fabric next time. Keeping heat sources clean and well-maintained reduces the risk of malfunction and accidental heat exposure to clothing.