Can You Use a Hair Dryer Instead of a Diffuser? A Practical Guide
Explore whether a hair dryer can replace a diffuser, with safety tips, technique guidance, and how to mimic diffuser benefits when you don’t have one. Easy DryVent explains how to dry hair safely and effectively in 2026.

Can you use a hair dryer instead of a diffuser? Technically yes, but it’s not ideal for curls or textured hair. A diffuser distributes air, reduces heat concentration, and protects the cuticle. If you skip the diffuser, use a low heat setting, keep the dryer at least 6 inches away, and move constantly to avoid hot spots. For best results, attach a diffuser when possible.
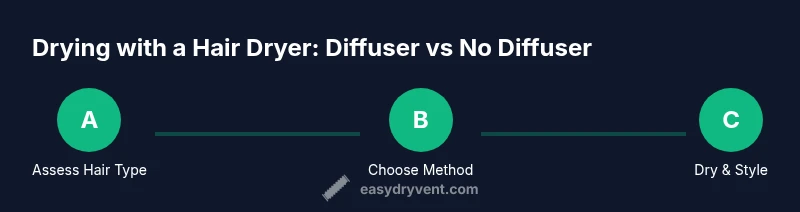
Can you use a hair dryer instead of a diffuser?
According to Easy DryVent, can you use a hair dryer instead of a diffuser? In practical terms, you can dry hair with a standalone dryer, but a diffuser attachment is designed to distribute air evenly and minimize direct heat on a small area. For many hair types—especially curls and textured hair—the diffuser helps maintain natural texture, reduce frizz, and protect the cuticle from heat concentration. If you skip the diffuser, you’ll need to rely on technique and caution: keep the dryer at a safe distance, move constantly, and use lower heat. This guide will unpack when a diffuser matters, how to manage without one, and strategies to mimic its benefits with common tools. Easy DryVent emphasizes that understanding your hair type and environment is key to achieving reliable results with or without a diffuser.
How diffusers work and why they matter
A diffuser is not just a fluffy add-on; it shapes airflow. By spreading air over a larger surface area, it reduces the intensity of heat hitting individual strands and helps preserve curl patterns. The design minimizes turbulence that can cause frizz, distributes moisture more evenly, and can speed up drying without compromising texture. This makes diffusers particularly valuable for curly, coily, or wavy hair, where abrupt heat points can loosen curl patterns or create crunchy or fuzzy results. If you have fine or straight hair, you may still benefit from a diffuser, but the impact on final texture will be subtler. Understanding how diffusion works helps you decide when to use it or when a direct nozzle might suffice.
Hair type considerations: curls, waves, and straight hair
Hair type drives whether a diffuser is worth using. Curlier textures respond best to diffusion because the broader airflow helps set curl shape and reduce frizz. Wavy hair also benefits, as diffuser-like air can encourage clumping and natural wave formation without over-drying. For straight or fine hair, a diffuser may be less crucial, but it can still help with gentle volume and smoothing if used with low heat and a light touch. Personal experimentation is valuable: some people achieve excellent results with a diffuser on damp hair; others prefer a controlled, direct airflow for sleek, blown-out looks. The key is to tailor heat, distance, and movement to your hair’s response.
Pros and cons of using a hair dryer without a diffuser
Pros include faster drying times, simpler setup, and fewer attachments to manage. Cons include increased heat concentration, higher risk of frizz, uneven drying, and potential damage if used incorrectly. Without a diffuser, you’ll need to maintain more consistent motion to avoid heat spots and consider shorter intervals between passes. If your goal is defined curls or textured volume, the absence of a diffuser makes maintaining shape more challenging. Weighing these factors against your hair goals will guide your approach.
Safer drying practices if you skip the diffuser
If you don’t have or don’t want to use a diffuser, prioritize safety and hair health. Start with a low heat setting and a low fan speed. Hold the dryer several inches from your hair (usually 6–8 inches), and keep the nozzle moving in smooth, even strokes to avoid hotspots. Use a cool shot at the end to help set the style and reduce remaining moisture gradually. Avoid blasting the same patch of hair for too long, which can cause heat damage. Hydration and moisture retention become especially important when you’re not diffusing, so consider a leave-in product with heat protection and a light smoothing cream to tame flyaways.
How to mimic diffuser benefits with attachments
Even if you don’t own a diffuser, you can mimic some of its advantages. Use a wide-tooth comb while drying to distribute moisture and minimize tangling, and opt for a larger-diameter attachment that creates gentler airflow. If you have access to a diffuser attachment that fits your dryer, use it; otherwise, a well-fitted concentrator nozzle can help with controlled airflow when moving the dryer. Gentle, fluctuating pressure—rather than a single, sustained blast—often yields better texture. Consider drying hair damp rather than soaking wet to reduce the total heat exposure.
Alternative drying methods that minimize heat damage
Air-drying remains the safest option for minimizing heat-related damage, especially for curly or textured hair. If you need quick results, combine a short air-dry with careful blow-drying using low heat and diffusion-like techniques. Hooded dryers or bonnet attachments offer even heat distribution without direct, intense contact with the hair. In all cases, protect the hair with heat-protectant products, avoid repeated passes over the same section, and limit the overall heat exposure. These practices are consistent with safe drying guidelines promoted by Easy DryVent.
Maintenance and cleaning of hair dryer attachments
Regular maintenance extends the life of your attachments and improves performance. Clean lint and hair from the diffuser or nozzle after each use. Check for cracks or loose connections, which can affect airflow and safety. Store attachments in a dry, clean area to prevent mold and mildew. A little routine care reduces buildup and ensures consistent, predictable results when you use any diffuser-like tool or its alternatives.
Quick-start checklist and buying tips
Before you dry your hair, assemble your tools, test heat on a small strand, and pick a method aligned with your hair goals. If you have curly hair, prioritize diffuser use or a compatible attachment that distributes air evenly. For straight hair, focus on smooth, controlled airflow and heat management. When buying, look for a dryer with adjustable heat and multiple speed settings, a compatibility range for attachments, and a cool-shot button to help set styles. Easy DryVent’s guidelines suggest starting with gentle heat, increasing as needed, and never leaving heat on one spot for too long.
Tools & Materials
- Hair dryer with adjustable heat & speed(Aim for settings with cool-shot option)
- Diffuser attachment (optional)(Use if you have curly or textured hair)
- Concentrator nozzle (optional)(Helpful for directing airflow in straight hair)
- Heat protectant spray or serum(Apply evenly from roots to ends)
- Wide-tooth comb or detangling brush(Use on damp hair to minimize breakage)
- Towel or microfiber cloth(Blot excess moisture before drying)
Steps
Estimated time: 15-25 minutes
- 1
Prep & protect
Start with clean, towel-dried hair. Apply a heat-protectant product evenly from roots to ends. This minimizes damage when heat is applied, whether you use a diffuser or a direct nozzle.
Tip: Distribute product with your fingers or a wide-tooth comb for uniform protection. - 2
Choose your air path
If you have a diffuser, attach it and set the dryer to low heat with a soft airflow. If not, use a concentrator nozzle and keep it moving to mimic diffusion. The goal is to avoid direct, concentrated heat on a single area.
Tip: Keep the dryer at least 6 inches away from hair and avoid focusing on one patch for too long. - 3
Section your hair
Divide hair into 4–6 sections to manage drying evenly. This reduces tugging and helps you maintain control over the shape you want. Working in sections also speeds up the overall process.
Tip: Clip sections out of the way when not actively drying them. - 4
Dry with controlled movement
Move the dryer in slow, circular or downward motions over each section. Avoid keeping heat on one spot for more than a few seconds. Alternate between slow passes and brief pauses to monitor moisture evenly.
Tip: Use a cool shot for a few seconds at the end of each section to help set the finish. - 5
Assess and adjust
Check for damp areas and re-dry as needed, especially at the crown or ends. If using a diffuser, tilt the diffuser to help encourage curl clumping or smooth sections as desired. If without a diffuser, rely on careful airpath and technique to avoid frizz.
Tip: Lightly finger-comb or scrunch curls while damp to guide texture without breaking shape. - 6
Finish and protect
Complete drying with a cool air blast to seal cuticles and reduce styling frizz. Apply a light finishing product if needed, focusing on ends for smoothness. Avoid heavy products that can weigh hair down when using a diffuser or direct nozzle.
Tip: Avoid touching hair immediately after drying to prevent new frizz from heat exposure.
Common Questions
Diffuser necessary for curls?
For many curl patterns, a diffuser helps preserve natural shape and reduce frizz. It’s not mandatory, but it often yields better texture with less damage when done correctly. If you don’t have one, focus on even airflow and low heat to minimize disruption to curl pattern.
Diffusers help curls, but you can manage without one by using careful technique and low heat.
Curly hair without a diffuser—can I still style well?
Yes, you can, but results may vary. Use a wide-tooth comb, section hair, and dry with controlled movement on low heat. Expect more manual styling to shape curls and reduce frizz compared with diffuser-based drying.
You can style curls without a diffuser, just be prepared for potentially more manual shaping.
Will using high heat without a diffuser damage hair?
Repeated high-heat exposure increases the risk of damage, especially at the cuticle. Always start with the lowest effective heat and keep the dryer moving. Pair heat with heat protection products for safety.
High heat can damage hair, so start low and keep moving.
Does a diffuser affect drying time?
A diffuser can slightly extend drying time compared with a direct nozzle, but it reduces frizz and preserves texture. If you’re pressed for time, plan extra minutes or use a diffuser only on sections needing curl definition.
Diffusers may add a bit of time, but they protect texture and reduce frizz.
Should I always finish with cool air?
Cool air helps seal the cuticle and set the style, reducing frizz after heat is applied. It’s a simple step that improves longevity of the hairstyle, whether you used a diffuser or not.
Cool air helps set your style and reduce frizz.
What attachments should I buy for better results?
A diffuser is ideal for curls; a concentrator nozzle helps with straight styles. Look for compatible attachments from reputable brands and ensure a snug fit to prevent air leaks.
Diffuser for curls, concentrator for sleek looks; choose compatible attachments.
Watch Video
Key Points
- Choose diffuser when possible for curls and texture.
- If no diffuser, use low heat and steady movement.
- Protect hair with heat defense products before drying.
- Finish with cool air to set style and reduce frizz.