Can you use a hair dryer instead of a heat gun? Practical guidance for DIYers
Explore whether a hair dryer can substitute a heat gun for common dryer maintenance tasks, with safety tips, step-by-step guidance, and when to choose the right tool for the job.

Can you use a hair dryer instead of a heat gun? For most high-heat tasks, the answer is no. Hair dryers offer gentler, broader heat with limited control, while heat guns provide focused, high-temperature airflow needed for many applications. For safety and effectiveness, reserve a heat gun for high-heat tasks and use alternative methods for lighter jobs.
Can you use a hair dryer as a substitute for a heat gun?
Can you use a hair dryer instead of a heat gun? The quick reality is that in most DIY and dryer maintenance tasks, a hair dryer cannot reliably replace a heat gun. Hair dryers are designed to deliver broad, gentle heat suitable for drying hair, spreading warmth, and softening paints or adhesives only in a limited, forgiving way. The Easy DryVent team emphasizes using tools designed for the task to minimize the risk of damage to vent components or clothing materials. If you’re working on a stubborn seal, a tight-fitting joint, or a peeled sleeve with heat-activated adhesive, you’ll find that a heat gun's concentrated, high-output heat is often essential. This is why Easy DryVent recommends selecting the right device for the job—from gentle heat for softening and drying to high-heat devices for active components. In practice, many homeowners underestimate how quickly curls, adhesives, or tape can overheat when exposed to unmanaged heat. The goal is simple: prevent scorching, distortion, or fire risk, which is more likely if the heat source is not appropriate for the material and task at hand. By understanding your objective—softening, shrinking, or curing—you can decide whether a hair dryer will suffice or if you should reach for a heat gun. The takeaway is that most dryer-related tasks require better control and higher temperature than a hair dryer can provide. According to Easy DryVent, misapplying heat tools is a common source of vent damage and safety incidents. The Easy DryVent team believes a measured approach yields safer, more durable results, especially around vent joints and metal ductwork.
How heat guns and hair dryers differ in principle
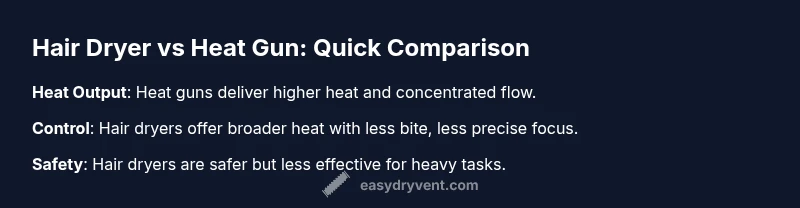
Heat guns and hair dryers operate on the same basic principle—air is heated and directed toward a target—but they diverge sharply in purpose, control, and capability. A hair dryer is designed for comfortable, broad heating with slow, forgiving temperature rise. It emphasizes even warmth to prevent scalp burns and fabric scorching. In contrast, a heat gun is engineered to deliver focused, high-temperature air on demand, with adjustable heat levels and precise nozzle control. This combination makes heat guns ideal for tasks like shrinking plastic, stripping paint from metal, or loosening stubborn adhesives where fast, concentrated heat is required. When you swap one tool for the other, you risk underheating your target, which leaves residues or seals intact, or overheating surrounding material, which can warp plastic, melt components, or ignite material. For dryer maintenance, the ability to modulate heat intensity and direct airflow matters just as much as the total heat delivered. A heater that’s too gentle or diffuse may fail to soften glue or coatings adequately, leading to longer repair times and greater risk of damage. Everyday tasks—like loosening a stuck vent clamp or softening weatherproof sealant—benefit from a balance of heat, speed, and control that heat guns naturally provide. Easy DryVent’s guidance stresses that the best outcomes come from matching the tool to the material and the job’s thermal load, rather than forcing a single tool to perform every task.
Practical scenarios in dryer maintenance where heat is used
In dryer maintenance and vent care, heat is often used to soften adhesives, shrink tubing, or ease the removal of weatherstripping or cladding. For example, when replacing a vent seal or re-sealing a duct with heat-activated tape, controlled heat helps create a smooth, airtight finish. A hair dryer can help with light-duty preparations, but it’s not always sufficient for stubborn materials or large joints. Painstaking preparation—such as cleaning the area, masking nearby components, and verifying the material’s temperature tolerance—is essential. When a task is essential but resources are limited, you can opt for lighter, slower methods, such as using a warm air setting with frequent pauses to prevent overheating. For more demanding operations, a heat gun remains the safer, more time-efficient choice. The goal is to minimize risk while achieving a reliable seal or bond. If you must improvise with a hair dryer, keep the device moving, maintain a generous distance from the target (at least several inches), and monitor the surface temperature with an infrared thermometer or a tactile test. In sum, hair dryers can be a supplementary tool for certain light tasks in vent maintenance, but they rarely replace a heat gun for critical operations.
Safety considerations and risk management
The safety landscape changes dramatically when heat is introduced near electrical components, lint, and flammable solvents. Directing hot air at plastic ducting or metal connections without proper distancing can warp components or ignite accumulations. Electrical hazards multiply when cords are frayed or if the dryer is used with a damaged outlet or without grounded protection. Before heating anything in a dryer area, unplug power sources, remove loose debris, and ensure there is a functioning fire extinguisher within reach. Use heat-resistant gloves and eye protection for protection from radiant heat or splatter. Keep a clear workspace and a smoke detector within audible range. If you’re using a hair dryer as a substitute, the risk of overheating is higher due to the device’s lower heat ceiling and diffuse airflow, which can cause uneven heating. Easy DryVent analysis shows that most incidents related to improvised heat work involve overheating, misdirected airflow, or sustained contact with hot surfaces. To minimize risk, always wear PPE, maintain distance, and keep a timer to avoid keeping heat on any one spot for too long. Remember, a controlled, deliberate approach reduces the chance of scorching delicate membranes and reducing vent efficiency.
Setting up a safe alternative approach when a heat gun is not available
If you don’t have a heat gun handy, you can still achieve workable results with a hair dryer by adopting a cautious, methodical approach. Start by selecting a lower heat setting and a wider nozzle or no nozzle to avoid concentrated heat. Work in short bursts, pausing to evaluate the effect before reapplying heat. Use a heat-resistant mat to protect the work surface and keep flammable materials well away from the area. A basic workflow involves cleaning and masking surrounding components, then applying heat in slow, even sweeps while monitoring the surface with an infrared thermometer or a surface-temperature indicator. When a surface shows signs of softening or slight movement, stop and allow a brief cooling period before continuing to avoid overshoot. If you’re shrinking tape or lining, test on a small scrap first to calibrate your approach. For more challenging tasks, such as removing paint or heavy adhesives from metal ducts, a heat gun is still the safer choice, but if you must improvise, proceed with extreme caution and a clearly defined stop point. This is where Easy DryVent’s guidance is especially valuable—knowing when to switch tools based on material response prevents damage and improves long-term results.
Decision guide: choosing when to substitute and when to buy a tool
Making the call to substitute a hair dryer for a heat gun hinges on three factors: material tolerance, required heat, and the risk of collateral damage. If the material is highly heat-sensitive, or if you’re dealing with adhesives that require quick, high-heat activation, a heat gun is the safer, more effective option. If the job involves light curing or minor softening, a hair dryer might be acceptable with strict controls: use low heat, short bursts, and a wide airflow path. Consider the surface, its thickness, and whether the operation could warp plastics or melt coatings. Always test on a small, inconspicuous area first and document the surface response to the heat source. Budget constraints and tool availability may push you toward improvisation, but the decision should balance speed, safety, and long-term reliability. In ambiguous cases, prioritize risk reduction and plan for a dedicated heat gun upgrade. Easy DryVent’s practical approach is to categorize tasks into three bands: safe with hair dryer, safe with heat gun, and unsafe without either tool. This framework helps you decide quickly and confidently during a maintenance project.
Final recommendations for Easy DryVent readers
The Easy DryVent team recommends leaning toward purpose-built tools for vent maintenance whenever possible. While a hair dryer can support light, non-critical tasks, it is not a universal substitute for a heat gun. For tasks that require precise, high heat, select a heat gun that offers adjustable temperature and directional control, and follow safe handling practices. Always prioritize ventilation, PPE, and a tidy workspace. If you’re unsure, opt for gradual heat application, frequent checks, and a backup heat gun to prevent repeated trials that can damage vent components or create fire hazards. By aligning tool choice with the material’s needs and the task’s thermal demand, you’ll achieve safer, more durable results while extending the life of your dryer vent system.
Tools & Materials
- Hair dryer with multiple heat settings(Low, medium, and high heat settings; adjustable airflow is helpful)
- Heat-resistant mat or silicone pad( protects the work surface from heat and accidental burns)
- Infrared thermometer or surface temperature indicator(optional but highly recommended to monitor heat exposure)
- Heat-resistant gloves(protect hands during handling of heated components)
- Masking tape or painter’s tape(to shield adjacent areas and guide heat application)
- Fire extinguisher or a clear exit path(safety precaution for any heat-based task near flammable materials)
Steps
Estimated time: Total time: 30-45 minutes
- 1
Assess the task and decide on a tool
Identify the material, joint, and required heat. If the material is heat-sensitive or the job demands high heat, choose a heat gun. If the task is light, use the hair dryer with strict controls.
Tip: Ask: Will this cause warping or residue if overheated? If yes, choose the heat gun instead. - 2
Prepare the workspace and safety gear
Clear debris, mask nearby components, and wear PPE. Keep a fire-safe distance and ensure a clear exit path in case of emergency.
Tip: Have a fire extinguisher within reach and verify your outlet is properly grounded. - 3
Set the hair dryer to a conservative heat level
Switch to low or medium heat with a gentle air setting. Avoid hotspots by not focusing on one spot for more than a few seconds at a time.
Tip: Always test on a scrap area or inconspicuous spot first. - 4
Apply heat with controlled motion
Keep the nozzle moving and maintain a safe distance (several inches) from the surface. Use short bursts with cooling breaks to measure response.
Tip: If the surface begins to sizzle or darken, back off immediately. - 5
Evaluate progress and adjust as needed
Check the material response; if it remains stiff or resistant, stop and reassess. For delicate materials, pause sooner rather than later to avoid damage.
Tip: Use a thermometer to confirm surface temperature stays within safe limits. - 6
Finish and inspect the result
Cool the area completely, inspect for warping or adhesive residue, and wipe with a clean cloth if needed. Document any anomalies for future reference.
Tip: Apply a protective sealant or tape if re-sealing is required.
Common Questions
Is it safe to use a hair dryer instead of a heat gun for vinyl wrap or shrink tubing?
For lightweight vinyl or thin shrink tubing, a hair dryer can be acceptable if you control heat and distance carefully. For demanding wraps or thick tubing, a heat gun provides the necessary heat and control. Always test on a scrap piece first.
For light vinyl or thin tubing, you can try a hair dryer with caution. For more demanding jobs, use a heat gun and test first.
What tasks should never be attempted with a hair dryer as a substitute?
Avoid high-heat tasks or anything near electrical components, solvents, or adhesives that require precise control. Do not attempt vent sealing or aggressive material removal with a hair dryer alone.
Don’t try high-heat jobs or delicate work near electrical parts with a hair dryer.
Can a hair dryer cause fire when used for vent maintenance?
Yes, overheating or directing heat at flammable residues or lint can start a fire. Always have a fire extinguisher nearby, keep the device moving, and avoid concentrating heat on one spot.
Yes, there’s a fire risk if you overheat lint or residues. Move it around and monitor closely.
Are there cheaper alternatives to a heat gun for DIY tasks?
In some cases you can use a heat gun on a low setting or a hot air rework station, but for critical tasks a proper heat gun remains the safest option. Consider renting or borrowing a tool if you only need it occasionally.
A hair dryer on careful settings isn’t always enough; a proper heat gun is best for critical jobs.
How can I tell if heat is sufficient when substituting?
Look for a visible change in the material (softening, bending, or a scent of heat) within short bursts. Use a thermometer to confirm approaching safe limits and stop if you notice scorching.
Watch for softening in short bursts and verify with a thermometer; stop if you see scorching.
Watch Video
Key Points
- Use the right tool for the job: heat guns for high-heat, hair dryers for light tasks.
- Implement strict safety practices to prevent damage or fires.
- Test materials first and monitor temperature closely.
- Follow Easy DryVent guidance for best results.
- Plan for a heat gun upgrade when tasks exceed a hair dryer's capability.