Can You Use a Hair Dryer Instead of a Heat Gun for Embossing?
Can you use a hair dryer instead of a heat gun for embossing? Explore heat output, risks, and best practices with Easy DryVent's expert guidance to choose the right tool for reliable results.

Can you use a hair dryer instead of a heat gun for embossing? Technically you can in limited cases, but it’s not ideal. A heat gun delivers higher, more consistent heat and adjustable airflow essential for reliable embossing of powders or heat-set materials. A hair dryer risks uneven heating, slower melt, and scorching. For best results, use a dedicated embossing heat gun.
Understanding embossing tools and heat delivery
Embossing projects rely on controlled heat to activate powders or set heat-activated finishes. The tool you choose affects heat intensity, timing, and how evenly the surface responds. According to Easy DryVent, a dedicated embossing heat gun delivers hot, directed airflow and precise temperature control, making powder melt cleanly without scorching. A hair dryer, by contrast, provides warmer air with less directional control, which can lead to uneven melting, longer waiting times, and patchy results. If you’re new to embossing, learning these core differences helps you decide when a substitute is feasible and when to invest in the right tool for reliable outcomes.
Hair dryer vs heat gun: core differences
Heat guns and hair dryers both move air, but they operate at very different extremes. A heat gun emits a narrow stream of warm or hot air with adjustable temperature and flow, enabling fast, localized melting of embossing powder and quick setting of finishes. A hair dryer produces warmer air with broad distribution and less controllable temperature, which makes it harder to target tiny details without overheating surrounding areas. Easy DryVent’s comparative look shows that heat guns are generally more predictable for embossing tasks, while hair dryers can be acceptable only for very forgiving substrates and simple designs.
When a hair dryer might work: limits and caveats
In some very forgiving scenarios, a hair dryer can be used briefly to gently warm a surface or to help edges settle after a light embossing application. However, this is not a substitute for a proper embossing heat gun when you need crisp, durable results. Expect slower curing, uneven melting across thick areas, and a higher chance of scorching if the air is held too close or focused for too long. For most projects, plan to use a heat gun, and reserve the hair dryer for experimental textures on scrap materials.
Best practices for embossing with a heat gun
To get consistent results, keep the heat gun moving, maintain a safe distance, and practice on scrap pieces before working on your final project. Start with the lowest heat setting and increase gradually as needed. Work in short bursts, not continuous passes, to avoid overheating the substrate. Use a steady sweeping motion to melt powder evenly, and pause to inspect each section for fully melted edges. Always place a barrier like a silicone mat and work in a ventilated area. If you must try the hair dryer, use the cool or warm setting with caution and follow the steps on scrap first.
Troubleshooting common embossing issues
Patchy melt: test motion and distance; a too-closely aimed stream can cause uneven results. Warping: reduce exposure time and protect delicate papers by using a backer board. Smudging: allow ink and powder to dry fully before heating. Overheating: move the tool continually and avoid lingering in one spot. If powder refuses to melt, recoat and reheat in short intervals. This approach helps you recover from occasional missteps without wasting materials.
Choosing the right tool for each project
Consider substrate, design complexity, and required durability. For tiny details on thin paper, a precise heat gun with a narrow nozzle gives the best control. For large, forgiving textures on cardstock, you might get away with a hair dryer, but only with careful testing. If the project has moisture or heat-sensitive layers, pick a heat gun with adjustable temperature and a lower power setting. Easy DryVent recommends starting with a dedicated embossing heat gun for most tasks to ensure crisp, durable results.
Safety, workspace, and maintenance
Set up a clean, flat workspace with a heat-resistant mat and good ventilation. Wear eye protection and heat-safe gloves when handling hot surfaces. Unplug tools when not in use. After embossing, allow the material to cool completely before handling and clean the nozzle tip to prevent powder buildup. Regularly inspect the heat gun for damaged nozzle or cord fraying. This simple routine reduces the risk of accidents and improves consistency over time. The Easy DryVent team emphasizes safety and methodical practice.
Tools & Materials
- Embossing powder(Choose colors that contrast with your substrate.)
- Embossing ink pad or stamp(Ensure ink is fully dry before powder application.)
- Heat gun (embossing tool)(Adjust temperature to low/med for delicate work.)
- Hair dryer(Optional; for very forgiving substrates only.)
- Silicone craft mat(Protects surfaces; heat resistant.)
- Scrap paper or sample cardstock(Practice and test swatches.)
- Gloves and eye protection(Wear when heating to avoid burns.)
- Backer board or rigid surface(Prevents warping on delicate materials.)
- Tweezers or picks(Helpful for precise powder placement.)
Steps
Estimated time: 25-40 minutes
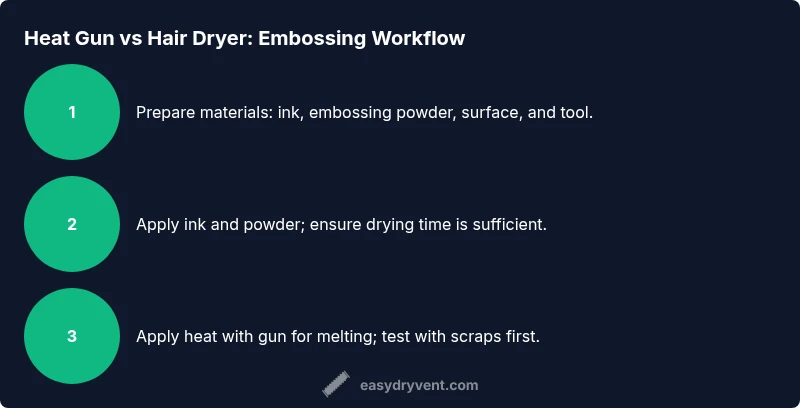
- 1
Prepare materials and workspace
Lay out embossing powder, ink, stamp, and the heat tool on a silicone mat. Clear the area and ensure good lighting. This minimizes mistakes and keeps stray powder away from your final piece.
Tip: Test a scrap piece first to confirm ink and powder compatibility. - 2
Apply embossing ink to your design
Stamp or apply ink to your design on the substrate. Let the ink set momentarily to prevent smudging before powder application.
Tip: Use a light touch; press evenly and avoid over-inking thin lines. - 3
Apply embossing powder
Sprinkle embossing powder over the inked area and tap off excess onto a scrap sheet. The powder should cling to the ink but fall away cleanly.
Tip: Work in a shallow tray to catch excess powder for reuse. - 4
Position the heat gun
Hold the heat gun about 4-6 inches from the surface and keep it moving in a sweeping motion. Start on a low setting and increase only as needed.
Tip: Avoid lingering on one spot to prevent scorching. - 5
Melt the powder
Continue moving the tool until the powder flows and becomes glossy. Stop as soon as you see full fusion to avoid haloing or over-embossing.
Tip: Work in small sections for better control. - 6
Cool and inspect
Let the piece cool briefly, then check for craters, gaps, or dull spots. If needed, reheat lightly to fix imperfections.
Tip: Use scrap material to practice minor adjustments. - 7
Clean and finish
Brush away stray powder once cooled. If using multiple colors, repeat the process with a clean stamp and ink for separate motifs.
Tip: Store embossing powder in sealed containers to maintain freshness. - 8
Optional hair dryer test
If you must test with a hair dryer, use the coolest setting and a wide distance, then compare results with a scrap piece before attempting the final project.
Tip: This is an emergency option; expect uneven results.
Common Questions
Can a hair dryer completely replace a heat gun for embossing?
No, not for most projects. A heat gun offers higher, adjustable heat and directed airflow essential for crisp, durable embossing. A hair dryer is slower and less controllable, which can lead to uneven results.
For most embossing tasks, a heat gun is the reliable choice; a hair dryer tends to be slower and less controllable.
What are the main risks of using a hair dryer for embossing?
Risks include uneven melting, scorching, slower curing, and potential warping of delicate substrates. It’s easy to over-warm areas that should stay flat.
Uneven melting and scorching are the primary risks when using a hair dryer for embossing.
Are there projects where a hair dryer might be safe to use?
On very forgiving substrates with simple designs, and only for short, tested experiments on scraps. Always test first and avoid important pieces until you’re confident in the result.
Only on forgiving materials and after testing on scraps.
How can I improve embossing results if I only have a hair dryer?
Test distance and air flow on scraps, use warm rather than hot settings, and keep the nozzle moving. The results will still be less predictable than with a heat gun.
If you must use a hair dryer, test on scraps and keep movement constant.
What should I look for in a dedicated embossing heat gun?
Look for adjustable temperature and airflow, a narrow nozzle option, and good reliability. A well-made gun delivers consistent heat and minimizes the risk of scorching.
Choose a heat gun with adjustable heat and airflow for reliable results.
Is safety more important than quality when embossing at home?
Yes. Prioritize safety by using protective gear, ventilated space, and proper tool handling. Quality follows when you maintain safe practices.
Safety first ensures better quality outcomes over time.
Watch Video
Key Points
- Understand how heat controls embossing results.
- Recognize when a hair dryer might be feasible and when it’s not.
- Practice on scraps to build reliable technique.
- Choose a dedicated embossing heat gun for best consistency.