Can You Use a Hair Dryer Instead of a Heat Gun for Tint? A Practical Guide
Can you use a hair dryer instead of a heat gun for tint? This practical guide breaks down why a heat gun is typically required, what a hair dryer can and cannot do, and step-by-step safer DIY alternatives from Easy DryVent.

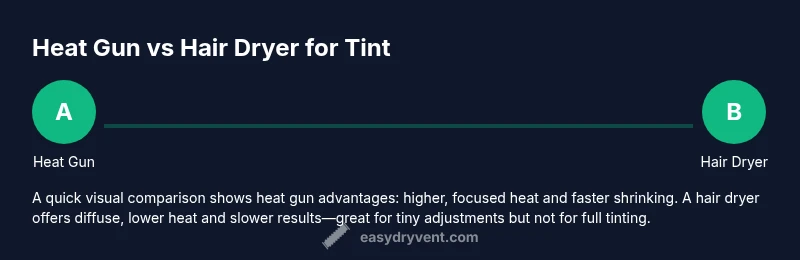
Using a hair dryer instead of a heat gun for tint is generally not recommended. A heat gun delivers concentrated, high-temperature airflow essential for shrinking film and activating adhesives, while a hair dryer provides gentler, diffuse heat that can cause uneven results or damage. For best results, use a dedicated heat gun or work with a professional tint installer.
Can you use a hair dryer instead of a heat gun for tint? A practical reality
In this guide we answer: can you use a hair dryer instead of a heat gun for tint. The quick answer is that it’s not a reliable substitute for professional tint work. According to Easy DryVent, tint projects rely on controlled, high-heat, focused airflow to shrink film evenly and activate adhesives. A hair dryer, by contrast, distributes heat more broadly and at lower temperatures, which often leads to uneven edges, wrinkling, or slow shrinking. If you’re just exploring a rough mock-up or fine-tuning a small edge, a hair dryer might offer a very limited, cosmetic aid, but it will not replicate the performance of a true heat gun. This distinction matters for both aesthetics and long-term durability of the tint.
In this section we’ll lay out the physics of heat application, compare typical tool capabilities, and set expectations so you don’t waste time or risk damaged film.
Note: Always test on a small inconspicuous area first and monitor heat exposure closely to prevent scorching or adhesive failure.
Tools & Materials
- Heat gun (adjustable temperature and airflow)(Prefer one with multiple heat settings and a narrow nozzle for focused heat)
- Hair dryer (high heat setting)(Only for very limited, non-critical testing—do not rely on it for final tinting)
- Window tint film or pre-cut template(Quality film and clean surfaces improve outcomes)
- Squeegee and felt edge tool(For smoothing and edge sealing)
- Spray bottle with soapy water or tint-specific slip solution(Helps reposition film and reduce air bubbles)
- Lint-free cloths and microfiber towels(Keep surfaces clean and dry during heating)
- Scissors or razor for trimming edges(Sharp blades for clean cuts after shrinking)
- Heat-resistant mat or glass board(Protect surfaces from heat exposure)
- Gloves and eye protection(Personal safety first when handling hot tools)
- Masking tape or painter’s tape(For masking edges during test heat sessions)
Steps
Estimated time: 60-120 minutes
- 1
Prepare the workspace
Set up in a well-ventilated area with a clear, flat work surface. Clean the glass thoroughly and lay down a protective mat. This minimizes dust and helps you see heat effects more clearly.
Tip: Have a helper hold the film in place while you start heat exposure to prevent edge curling. - 2
Test heat on a small corner
Place a scrap or corner of the tint on an inconspicuous area and apply heat with the lowest practical setting. Observe how the film tightens, shrinks, or wrinkles as you move the heat source.
Tip: Keep the nozzle moving in smooth, short passes to avoid concentrating heat in one spot. - 3
Align and secure the film
Position the tint film with a light spray of slip solution and use a squeegee to lay it flat. Secure edges with masking tape if needed. Stabilize the film before heating.
Tip: Use a helper to keep film taut; this reduces air pockets during heat application. - 4
Apply heat in quick, controlled passes
With the heat gun, hover at a safe distance and move steadily. Avoid lingering heat in one area to prevent scorching. Focus on shrinking the edges first, then the center as needed.
Tip: Never aim directly at the same spot for more than 2–3 seconds at a time. - 5
Check edges and corners
After shrinking, inspect edges for lift or wrinkling. If needed, reheat the edge to encourage final tack-down and trim excess film.
Tip: Use a soft cloth to wipe away adhesive residue from edges before final trim. - 6
Cool, trim, and seal
Allow the film to cool before trimming with a sharp blade. Trim along the edge carefully and seal with the squeegee to ensure a clean finish.
Tip: Work slowly near the window frame to avoid nicking the glass or peeling edge seals. - 7
Document results and compare
Take photos of the finished area from multiple angles. Compare to a control area if available to assess uniformity and adhesive set.
Tip: Note any areas that require additional passes or a different heat approach. - 8
Cleanup and safety check
Power down tools, unplug equipment, and clean the work area. Store remaining film and tools in a safe place away from children and pets.
Tip: Wipe surfaces with a damp microfiber to remove any residue before storage.
Common Questions
Can a hair dryer really replace a heat gun for tint?
In most cases, no. A hair dryer lacks the concentrated heat and rapid, controlled action needed to shrink tint film evenly and prevent edges from lifting. A heat gun provides more predictable results and reduces the risk of damage.
Generally, a hair dryer can’t replace a heat gun for tint; you’ll get uneven results and higher risk of defects.
What temperatures do heat guns reach compared to a hair dryer?
Heat guns are designed to deliver hot, focused air at much higher temperatures than a typical hair dryer. This combination is essential for shrinking film quickly and uniformly.
Heat guns reach much higher, more focused heat than hair dryers, which helps film shrink evenly.
Is there any scenario where a hair dryer might be useful?
Only for very small touch-ups or slow edge smoothing on non-critical areas. It should not be relied upon for full tint shrinking or adhesion activation.
Only for tiny touch-ups—not for full tinting.
What should I use instead of a hair dryer for tint projects?
A dedicated heat gun is recommended for most tint projects. If unsure, consult a professional installer to ensure durability and a clean finish.
Use a heat gun or hire a pro for best results.
Are there safety concerns with heat tools during tinting?
Yes. Heat tools can ignite flammable materials and burn skin. Use gloves, eye protection, and work away from plastics and solvents. Ensure proper ventilation.
Heat tools can be dangerous—protect yourself and ventilate the area.
How long does it take for tint to set after heating?
Adhesives cure as the film cools. Plan for a setting period after heating and avoid aggressive handling until it's firmly bonded.
Let it cool and set; don’t rush handling after heating.
Watch Video
Key Points
- Avoid hair dryer as a primary tool for tint; prioritize a heat gun.
- Test heat on inconspicuous areas before committing to a full panel.
- Move heat sources continuously to prevent scorching and warping.
- Seal and trim edges after cooling for a clean finish.
- If in doubt, consult a professional installer for best results.