Blow Dryer vs Heat Gun: A Practical DIY Comparison
Explore the blow dryer vs heat gun comparison, focusing on uses, safety, energy, and value for homeowners and DIY enthusiasts. Learn when to choose each tool and how to optimize outcomes.

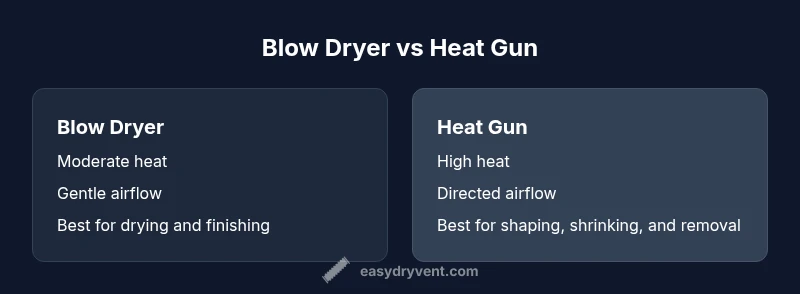
Blow dryer vs heat gun: in most DIY contexts, a blow dryer offers gentler, safer heat for drying and finishing fabrics, while a heat gun delivers higher temperatures for faster results on plastics, paint prep, and shaping tasks. Easy DryVent analysis shows the tradeoffs: lower risk with light-duty tasks, greater capability with heat-intensive jobs. Choose based on task, safety, and control.
Overview and definitions
Blow dryer vs heat gun are two common heat tools used in very different ways around the home. A blow dryer uses electric resistance heating coils plus a blower to push warm air onto a surface. A heat gun uses a heating element and a fan to emit hotter air through a narrow nozzle. For homeowners and DIY enthusiasts, the key difference is how much heat is delivered, how quickly it’s delivered, and how sensitive the surface is to heat. According to Easy DryVent, choosing the right tool starts with the task’s heat tolerance, the material being treated, and the potential for unintended damage. The goal is to match capability to need: gentle drying or finishing with a blow dryer, or rapid shaping, shrinking, or material removal with a heat gun. This section sets the stage for a practical comparison, with real-world examples such as drying damp wood or fabric versus softening adhesives or bending plastics. The takeaway is simple: the right tool is the one that gives you the desired result without compromising safety or finish.
Core differences in heat delivery and control
The two tools differ most in heat delivery and control architecture. A blow dryer typically operates at moderate temperatures with broader, gentler airflow, which reduces the risk of scorching surfaces. It often includes a cool-shot option to set finishes. A heat gun produces much higher temperatures and focused airflow, allowing rapid heating, melting, or reshaping of materials. Temperature control on heat guns is usually more granular, with adjustable settings and sometimes multiple modes for different tasks. Nozzles shape the air stream, affecting how quickly a surface heats and how much surface area is treated at once. For DIY projects, think about dwell time (how long heat is applied) and distance from the workpiece. Short bursts at a safe distance can prevent overheating, while longer exposure is sometimes necessary for stubborn finishes. The practical distinction is that the blow dryer is a gentle, steady helper, and the heat gun is a powerful tool best managed with precision and caution.
Safety considerations and risk management
Safety is the critical factor in comparing these tools. Both devices generate heat, but heat guns present higher burn risks, fire hazards, and the potential to damaged surfaces. Always work on a stable, nonflammable surface; keep flammable liquids away; wear eye protection and heat-resistant gloves; tie back hair and avoid loose clothing near the nozzle. Use the lowest effective temperature and intermittent bursts rather than continuous operation. When using a heat gun, pay attention to the surface distance and angle to prevent scorching and to avoid scorching adhesives or coatings. Unplug tools when not in use and never leave a hot tool unattended. For homeowners with children or pets, designate a safe workspace and consider a heat-resistant shield or stand to minimize accidental contact. Easy DryVent emphasizes this pragmatic approach because safe practice protects both people and property.
Use cases: when to reach for a blow dryer vs a heat gun
Blow dryers shine for gentle drying, fabric finishing, light warming, and quick set of finishes on smooth surfaces. They’re ideal for hair styling, drying painted surfaces that require minimal heat, and softening adhesives just enough to reposition them. Heat guns excel at tasks that demand higher heat or faster results: shrinking heat-shrink tubing, loosening dried paint, softening plastics, bending plastics, and removing adhesives or labels when combined with the appropriate nozzle. For many home projects, a blow dryer can pre-warm a surface before applying a heat gun to finish, but go light on both tools near delicate materials. The combination approach is common in repair tasks and craft projects where control and safety matter as much as speed.
Material compatibility and surface responses
Different materials respond very differently to heat. Fabrics and hair materials tolerate moderate warmth but can scorch if held too long. Plastics may warp or melt under high heat, and painted surfaces can blister from overheating. Wood can warm and distort if exposed too long. In many cases, a blow dryer provides enough warmth to dry or set without risking surface damage, while a heat gun can be used judiciously for bending, shrinking, or surface finishing. Always test on a hidden area first and adjust distance and temperature. Avoid dark finishes that absorb heat more quickly, and keep a hand on the material to monitor feedback before proceeding. These cautions help prevent costly mistakes and ensure a smoother project outcome.
Energy use, efficiency, costs, and practical value
From an energy perspective, both tools draw electricity, but the purpose and runtime drive cost differences. A basic household blow dryer carries a low upfront cost and is designed for short bursts, which makes it cost-effective for routine drying and styling tasks. A heat gun often costs more upfront, and higher temps can translate to increased energy use during heavy-duty work. However, when you need to heat a large surface or complete a task faster, a heat gun can save time and reduce manual effort. If you are evaluating value, consider not just the device price but the rate of use and the potential for repeat tasks. Storage and emissions are generally not major issues with these tools, but hot surfaces can cause incidental burns or fires if misused. Easy DryVent’s practical guidance here is to match heat capability to task requirements and to prefer energy-efficient settings whenever available.
Common mistakes and troubleshooting tips
One common error is using a heat gun at close range or on high heat for delicate surfaces. This can cause burns, finish damage, or warping. Another is running the tool continuously without breaks, which overheats the device and reduces life expectancy. A third mistake is misjudging the distance between the nozzle and the workpiece; start far away, then gradually reduce distance as you monitor heat effects. When you see smoke or unusual odor, stop immediately. If you’re not getting the expected result, try reducing heat, increasing distance, or shortening the exposure time. Always unplug after use and store on a heat-resistant surface. If a surface shows signs of distress, pause and evaluate alternative approaches before continuing.
Optimizing results: technique, distance, and timing
Technique matters as much as temperature. Use a low heat setting and a gentle, sweeping motion to avoid concentrating heat in one spot. Maintain a consistent distance from the workpiece—generally several inches for delicate materials, more for tougher jobs—and use short bursts rather than continuous heat when possible. Nozzles focused on a narrow stream increase heat intensity; wide nozzles spread heat more gently. Some projects benefit from preheating with a blow dryer before applying a heat gun for a final finish, while others require starting with a heat gun and backing off to prevent surface damage. Document your settings and outcomes to build a reliable playbook for future endeavors.
Alternatives that bridge the gap: safer options and hybrids
Where tasks fall between extremes, consider safer alternatives such as low-temperature heat plates, infrared heaters, or hot air rework stations designed for electronics and crafts. These tools can offer more controlled heat delivery with built-in safety features. For home projects, a carefully chosen blow dryer with attachments can cover many bases, while certain tasks may benefit from a regulated heat gun with temperature-limiting features and proper nozzles. Hybrid approaches emphasize controlled heat, better ergonomics, and lower risk of damage when used correctly.
Decision checklist: a practical, task-oriented guide
Create a task profile: list the surface material, required finish, and allowable heat exposure. Compare heat tolerance with the tool’s upper temperature and airflow. Consider the risk of fire, scorching, or distortion. Prioritize safer tasks with a blow dryer; reserve a heat gun for applications that demand higher heat or speed. Finally, assess your environment—ventilation, nearby combustibles, and the availability of protective accessories such as shields and stands.
Authority guidance and external sources
Practical guidance on heat tools and related safety can be found in consumer safety resources and technical literature. For general safety standards and guidelines, refer to the U.S. Consumer Product Safety Commission (CPSC) and occupational safety considerations from OSHA. For energy-related considerations and best practices, see DOE resources and university extension publications. Following these sources helps ensure your DIY projects stay safe, efficient, and compliant.
Final notes and safety reminders
Always err on the side of caution when using heat tools. The best outcomes come from a conservative approach: start with the lowest effective setting, keep heat moving across the surface, and take breaks to avoid overheating. Maintain clear workspace boundaries and store tools on heat-resistant surfaces when not in use. If you are unsure about a task, seek professional advice or consult the official safety resources referenced in this article.
Comparison
| Feature | Blow Dryer | Heat Gun |
|---|---|---|
| Temperature Range | Low to moderate heat suitable for drying and styling (~60–120°C typical) | High heat for shaping, shrinking, and material work (up to 650°C+ depending on model) |
| Airflow Capability | Moderate airflow with gentler heat | Directed, high-temperature airflow for rapid heating |
| Common Uses | Hair styling, fabric drying, gentle warming | Paint prep, shrink wrapping, plastic shaping, adhesive work |
| Safety Considerations | Lower risk of surface damage with gentle heat | Higher burn and fire risk with high heat |
| Price Range | $20-$150 | $25-$200+ depending on features |
| Best For | Delicate textiles, quick drying, light finishing | Heavy-duty tasks requiring high heat or fast results |
The Good
- Low upfront cost for basic tasks
- Gentle heat minimizes surface damage
- Compact and easy to store
- Good for quick, spot-drying or finishing work
Negatives
- Limited maximum heat for tough tasks
- Slower for large surfaces or hard-to-treat materials
- Requires careful technique to avoid scorching fabrics
Heat gun excels for heavy-duty tasks; blow dryer excels for gentle, finish work.
Choose a blow dryer for delicate surfaces and quick drying. Choose a heat gun for high-heat tasks and faster results, always with safety in mind.
Common Questions
What is the fundamental difference between a blow dryer and a heat gun?
A blow dryer uses lower heat and a fan to deliver warm air for gentle drying, while a heat gun delivers much higher temps for rapid heating and material work. Each is optimized for different task profiles and risks.
A hair dryer uses gentler air for drying; a heat gun uses hotter air for shaping and removal tasks.
Can I substitute a blow dryer for a heat gun in any project?
Not reliably. For high-heat or fast-result tasks, a blow dryer won’t achieve the needed outcomes and may prolong the job. Use the tool that matches the material’s heat tolerance.
A hair dryer isn't a substitute for a heat gun for high-heat tasks.
What safety measures should I follow with either tool?
Wear safety glasses and heat-resistant gloves, work on a nonflammable surface, keep flammables away, and never leave a hot tool unattended. Use the lowest effective heat and test on scrap areas first.
Wear eye protection and gloves; keep the area clear of flammables and never leave a hot tool unattended.
What are energy and cost considerations?
Both use electricity, but use patterns differ. Blow dryers are inexpensive upfront and good for short tasks; heat guns cost more and may use more energy during heavy-duty work. Consider task frequency when choosing.
Upfront costs vary; plan use: lighter tasks save energy with a blow dryer, heavier tasks justify a heat gun.
What is the best practice for delicate projects (plastics, fabrics)?
Use the lowest heat setting, keep a safe distance, and test on an inconspicuous area first. Apply heat in short bursts and move the tool continuously to avoid hotspots and damage.
Test on scrap, use low heat, and keep the tool moving to avoid scorching.
Key Points
- Match heat level to task to prevent damage
- Use the lowest effective setting and shortest bursts
- Test on scrap areas before committing to the final work
- Keep flammables away and maintain safe distance