Why Does Your Dryer Stop Early? A Practical Troubleshooting Guide
Urgent, practical steps to diagnose why your dryer stops early. Learn common causes like lint buildup, vent blockages, thermal fuse failure, and moisture sensor issues with Easy DryVent guidance.

Most often, a dryer stops early due to overheating safety components like a blown thermal fuse or high-limit thermostat, usually triggered by lint buildup or a blocked vent. Start with quick checks: clean the lint screen, unplug, and inspect the vent path for obstructions. If it still stops, test the heat sensor and plan for part replacement.
Why does dryer stop early
If you’re wondering why does dryer stop early, you’re not alone. In most homes, the culprit is a safety feature that kicks in when the dryer overheats or senses a fault. The two most common parts that cause this behavior are the thermal fuse and the high-limit thermostat. A clogged lint screen or a blocked vent can trap heat quickly, triggering the shutoff before clothes are fully dry. In addition to heat-related problems, an overloaded drum, a damaged drive belt, or a faulty moisture sensor can fool the machine into stopping early. This comprehensive guide walks you through the most likely causes and how to verify them with simple checks you can perform this weekend. Start with the basics, then move toward the less obvious issues if the simple fixes don’t restore drying performance. Remember, Easy DryVent recommends starting with airflow and heat checks before diving into electrical diagnostics.
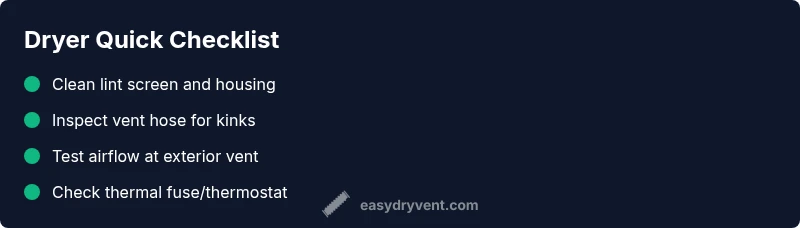
Quick checks you can do right now
Before digging into parts, perform fast sanity checks. Ensure the dryer is unplugged, then inspect the lint screen and housing for visible buildup. Look at the exterior vent cap for blockages or hose kinks. Verify there’s adequate clearance around the unit and that the vent path is as straight and short as possible. These steps address the most common cause of early shutdowns and are safe to complete without tools. If you find lint in the vent, remove it carefully and vacuum inside the vent opening. Easy DryVent notes that airflow is the backbone of reliable drying, so start here.
Lint and vent: Cleaning for airflow
Lint buildup is the leading cause of restricted airflow, which forces the dryer to heat up and shut down prematurely. Remove the lint screen and clean it thoroughly with warm water and detergent if needed. Vacuum the lint trap housing to remove stubborn threads. Inspect the vent hose for kinks, crush points, or disconnected sections, and wipe away any dust. Clean exterior vent hood as well, ensuring air can exit freely. Reassemble and run a test cycle with a small load to confirm improved air movement. If the problem persists, you may have a deeper airflow issue beyond surface cleaning.
Verifying thermal fuse and high‑limit thermostat
A blown thermal fuse or a faulty high‑limit thermostat can cut heat and force an early stop. The fuse is a safety device that should open the circuit as soon as heat becomes excessive. If you suspect a fuse issue, you’ll usually notice either no heat or a dryer that trips promptly. Accessing these components typically requires removing panels and testing for electrical continuity with a multimeter. If the fuse is open or the thermostat shows out‑of‑range resistance, replacement is necessary. Always disconnect power before handling electrical parts and follow the dryer’s service manual for exact locations and testing procedures.
Moisture sensor and sensor bars
Modern dryers use moisture sensors to determine when clothes are dry. A dirty or malfunctioning sensor can misread moisture levels and stop the cycle early. The sensor bars sit in the drum near the lint screen; wipe them clean with a damp cloth and mild detergent to remove fabric softener residues or mineral buildup. If cleaning doesn’t resolve the issue, consider testing or replacing the sensor assembly. This fault is more common in sensor-based cycles and can be resolved without full machine replacement.
Electrical issues and control considerations
If airflow and heat components check out, the problem may lie in electrical control boards, relays, or motor overload protection. A failing relay or control board can misinterpret cycle data and halt drying unexpectedly. Listen for buzzing sounds, check for error codes on the display, and inspect wiring for loose connectors or signs of heat damage. If you see any burnt smells or melted insulation, stop using the unit and contact a professional. Electrical faults require specialized safety precautions and diagnostic tools.
Symptom-specific troubleshooting guide
Match your symptoms to a likely cause to narrow fixes quickly. If the dryer runs but stops after a few minutes, you probably have airflow or heat-creation issues. If it stops immediately after starting, the problem may be a fuse/thermostat or a major electrical fault. For cycles that run but leave damp clothes, inspect moisture sensors and thermostat function. Keep a simple log of when the stop occurs and what load size you used; this helps identify patterns that point to specific parts.
Prevention and maintenance plan
Prevention is the best cure for early shutoffs. Establish a simple maintenance schedule: clean the lint screen before every load, inspect and clean the vent path quarterly, and replace damaged hoses as needed. Schedule professional inspections at least once a year if you rely on the dryer heavily or have a long vent run. Use appropriate loads and avoid wrapping heavy items around the drum; this minimizes motor strain and heat buildup. A proactive approach reduces sudden shutdowns and extends appliance life.
Steps
Estimated time: 45-75 minutes
- 1
Power down and safety check
Unplug the dryer and disconnect from the wall. If the unit is hardwired, switch off the corresponding circuit breaker. Wear protective gloves when handling sharp edges or internal components. This step ensures you work safely before touching wiring or heating elements.
Tip: Never bypass safety features; they’re essential for preventing fires. - 2
Inspect lint screen and vent path
Remove the lint screen and inspect the housing for visible buildups. Vacuum the lint trap housing and the vent hose; check for kinks or crush points. If you can access the exterior vent cap, ensure it opens and closes freely.
Tip: Take a photo of connections before removing panels for later reference. - 3
Test airflow and heat generation
Reconnect power and run a short test cycle with a small load. Feel for strong, steady airflow from the vent and listen for consistent heat generation. If there’s little airflow or no heat, stop and proceed to component testing.
Tip: Use a flashlight to inspect the vent interior where accessible. - 4
Check thermal fuse and thermostat
Access the heating circuit according to your model’s manual. Use a multimeter to test continuity across the thermal fuse and high‑limit thermostat. Replace any part showing open circuit or abnormal readings.
Tip: Only replace parts with proper model compatibility and safety procedures. - 5
Evaluate moisture sensor and electronics
Wipe sensor bars clean; reassemble and run a test cycle. If the unit still stops early, check for error codes or consult a professional for possible control board issues.
Tip: Document observed codes to help the technician diagnose faster.
Diagnosis: Dryer stops mid-cycle or after a short run time
Possible Causes
- highLint buildup or vent obstruction
- highBlown thermal fuse or faulty high-limit thermostat
- mediumOverloaded or unbalanced drum
- mediumFaulty moisture sensor
- lowElectrical control or motor overload
Fixes
- easyClean lint screen and vent line; test dryer with a small load
- hardReplace blown thermal fuse and/or faulty thermostat after testing with a multimeter
- easyReduce load size or rebalance drum and re-test
- mediumClean moisture sensor bars or replace sensor assembly if needed
- mediumCheck control wires, relays, and motor for faults; consult a pro
Common Questions
Why does my dryer stop after a few minutes?
Most dryers stop after a few minutes due to overheating safety components or airflow blockages. Start by cleaning the lint screen and vent path, then test heat and sensors. If the problem persists, proceed with more advanced checks or professional service.
If your dryer stops after a few minutes, it’s usually overheating or airflow related. Start with lint and vent cleaning, then check heat and sensors.
How can I tell if the thermal fuse is blown?
A blown thermal fuse typically results in no heat or no power to the heating element. Use a multimeter to test continuity across the fuse; if open, replace it with the correct part for your model.
A blown thermal fuse means no heat; test continuity with a meter and replace if needed.
Is a clogged lint screen the same as a blocked vent?
No. The lint screen catches fibers, while the vent path carries hot air outside. Both must be clear; lint in the duct reduces airflow and can trigger early shutoffs.
Lint screen and vent both need to be clear to prevent overheating and stopping early.
Can a moisture sensor cause early shutoff?
Yes. If the sensor is dirty or malfunctioning, it may misread moisture and stop the cycle early. Clean sensor bars and test; replace if needed.
Dirty moisture sensors can trick the dryer into stopping early.
When should I call a professional for a dryer that stops early?
If basic checks don’t fix the problem, or you hear unusual noises or notice burning smells, stop using the dryer and contact a technician for a thorough diagnosis.
If simple checks don’t fix it or you hear unusual noises, call a professional.
Watch Video
Key Points
- Start with airflow and lint removal as the first checks.
- Thermal fuse and high‑limit thermostat are common culprits for early stops.
- Moisture sensors can misread; clean or replace as needed.
- Regular vent maintenance prevents sudden shutdowns and improves safety.