Why is My Dryer Stopping and Starting? A Quick Troubleshooting Guide
Urgent, practical steps to diagnose why your dryer stops and starts. Easy DryVent explains common causes, safety checks, and prevention tips for reliable drying.

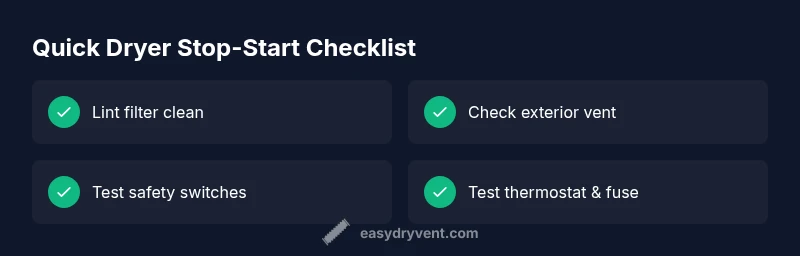
Most dryer stop-start issues come from airflow or safety components. Start by cleaning the lint filter, checking the exhaust vent for blockages, and resetting the dryer by unplugging for 60 seconds. If the dryer still cycles, inspect the drum switch and cycling thermostat, and consider a professional service to test the thermal fuse.
Understanding Why Dryers Stop and Start
According to Easy DryVent, when a dryer suddenly stops mid-cycle or repeatedly starts and stops, it's often due to airflow and safety components. The keyword to understand is airflow and safety: restricted airflow, sensor issues, or safety switches can trigger an automatic shutdown to protect your home. In plain terms, a dryer stops or restarts because the dryer thinks something is wrong and it needs to pause for safety. In addition, lint buildup and vent blockages are common culprits. This guide helps homeowners diagnose the problem quickly, prioritize safety, and avoid costly misdiagnoses. We’ll walk you through a practical, step-by-step approach to identify whether the issue is simple enough to fix today or if it requires professional help. Keep in mind that addressing lint and vent maintenance not only solves the stop-start symptoms but also improves drying efficiency and reduces fire risk. If you’re asking why is my dryer stopping and starting, you’re not alone, and a systematic approach can restore reliable operation fast. The Easy DryVent team found that quick wins are often simple cleaning tasks that immediately improve performance.
Common Causes at a Glance
A dryer that stops and starts can be caused by several overlapping issues. The most frequent are airflow restrictions from lint or a blocked vent, a failing cycling thermostat, a blown thermal fuse, and door or drum switch problems. Other possibilities include a worn belt that causes inconsistent drum rotation, and miswired or loose electrical connections. Quick checks can confirm or rule out these causes: inspect the lint screen, visually inspect the vent hose for kinks, and listen for a humming sound that indicates a motor struggling. Easy DryVent’s experience shows that airflow problems account for the majority of stop-start behavior, followed by safety component failures. Address airflow first, then test safety devices if the symptom persists.
Safety-First Checks You Can Do Today
Before you reach for tools, unplug the dryer and wear eye protection. Start with the lint filter: remove any lint buildup and vacuum around the lint trap housing. Next, inspect the exhaust vent outside for lint accumulation or a crushed section; a restricted vent can cause overheating and shutoffs. Check the door switch with a multimeter if you have one, or simply press the door edge while starting a cycle to see if the dryer responds consistently. If you notice a hot smell or overheating, stop using the dryer and let it cool. These checks are inexpensive, quick, and frequently resolve the stop-start symptom without disassembly. If the dryer still behaves erratically after these steps, move to the diagnostic flow.
Diagnostic Flow: Symptom to Solution
Begin with the symptom description: does the dryer run for a few minutes and then stop, or does it cycle on and off within seconds? Map the symptom to likely causes: airflow restriction, safety switch fault, or sensor issue. For each likely cause, perform a controlled test: clean lint and vent; reset power; test the door switch; then observe whether cycling persists. If the problem remains, the next steps involve testing electrical components like the cycling thermostat and thermal fuse. At each stage, document what you observed and proceed to the next test only after confirming the previous one didn’t fix the issue. This logical flow reduces unnecessary disassembly and helps you decide when professional service is warranted.
Step-by-Step Fixes for the Most Common Cause
Most stop-start issues are solved by clearing airflow obstructions. Step 1: Unplug the dryer and remove the lint screen; clean with a brush and vacuum. Step 2: Detach the vent hose and inspect it for lint buildup, kinks, or crush points; scrub, straighten, and reconnect. Step 3: With the vent path cleared, run a test cycle and note whether the dryer completes a full cycle without stopping. If it still stops, Step 4: locate the cycling thermostat and test with a multimeter; replace it if out of spec. Step 5: check the thermal fuse and replace if blown. Step 6: recheck all connections and test again. Pro tip: replace foil-backed vent tape with foil tape rated for heat to ensure a proper seal.
Prevention Tips to Stop Future Stop-Starts
To keep your dryer running smoothly, establish a quarterly maintenance routine: clean the lint screen after every load, vacuum the interior of the dryer cabinet, and inspect the vent exterior for visible blockages. Schedule annual vent cleaning if you burn candles or iron fabrics often, as creosote-like buildup can occur in long vent runs. Use shorter vent runs when possible and avoid using plastic or foil accordion hoses that sag and trap lint. A well-maintained vent improves efficiency, reduces drying time, and lowers energy costs. Easy DryVent recommends keeping a simple maintenance log to track cleanings and any test results you perform so you have a documented history for future troubleshooting.
When to Call a Professional
Some symptoms require professional diagnostic tools and safety procedures. If you notice scorching smells, heat above normal, or you cannot access the internal components safely, stop using the unit and call a licensed technician. If you’ve tested the cycling thermostat and thermal fuse yourself but the dryer still stops and starts, a professional can perform electrical measurements and confirm whether a control board fault or wiring issue is the root cause. The goal is to prevent hazardous conditions and ensure code-compliant ventilation. A pro can also help with duct cleaning and vent installation if needed, restoring reliability and safety.
Steps
Estimated time: 25-40 minutes
- 1
Power down and safety check
Unplug the dryer and remove jewelry. Verify the area is dry and free of standing water around the outlet before starting any inspection. This protects you from shock and prepares you for safe testing.
Tip: Always unplug before touching electrical components. - 2
Clean lint filter and cabinet area
Remove the lint screen and clean thoroughly with a brush or vacuum to remove lint buildup. Vacuum around the lint trap housing and the cabinet interior to remove hidden lint that can impede airflow.
Tip: A clean filter dramatically reduces fire risk and improves airflow. - 3
Inspect vent hose and exterior vent
Detach the vent hose and check for kinks, crushing, or lint clogs. Use a flexible brush to dislodge lint and ensure the exterior vent opening is clear and unobstructed.
Tip: Avoid using plastic or foil accordion hoses; use rigid metal or semi-rigid ducting. - 4
Test the door switch
With the dryer unplugged, locate the door switch and gently test it by pressing the switch with a finger while attempting to start a cycle. If the drum doesn’t respond consistently, the door switch may be faulty.
Tip: Wiggle test connections to rule out loose wires. - 5
Check cycling thermostat and/or thermal fuse
If you have electrical testing tools, measure continuity across the cycling thermostat and thermal fuse. Replace any component that shows open circuit or excessive resistance.
Tip: Replace with the same part rating and verify the new part functions correctly. - 6
Reassemble, test, and monitor
Reconnect all components, run a short cycle, and observe whether the stop-start behavior recurs. If the problem persists, escalate to a professional for advanced diagnostics.
Tip: Keep a maintenance log of what you tested and observed.
Diagnosis: Dryer stops and restarts intermittently during cycles
Possible Causes
- highLint buildup in vent or lint screen
- highBlown thermal fuse
- mediumFaulty cycling thermostat
- mediumDoor switch failure
Fixes
- easyClean lint filter, inspect vent hose, and ensure vent path is clear
- mediumTest and replace the thermal fuse if blown
- mediumTest cycling thermostat with a multimeter and replace if out of spec
- easyInspect door switch wiring and connections, repair as needed
Common Questions
What are the most common causes of a dryer stopping and starting?
The most frequent causes are airflow restrictions from lint or a blocked vent, a failing cycling thermostat, and a blown thermal fuse. Door switches and control board issues can also trigger stop-start behavior. Start with lint and vent cleaning, then test safety components if needed.
Common causes include airflow restrictions, a faulty cycling thermostat, and a blown fuse. Begin with lint cleaning and vent checks, then test safety switches if the issue persists.
Can a clogged vent cause cycling or stopping mid-cycle?
Yes. A clogged or restricted vent can cause the dryer to overheat and shut down to prevent fire risk, leading to stop-start cycles. Cleaning the vent path is often the quickest fix.
A clogged vent can cause overheating and automatic shutoffs, leading to stop-start cycles. Cleaning the vent path often fixes it.
Is the cycling thermostat the likely culprit for intermittent stopping?
The cycling thermostat can cause intermittent stopping if it fails to regulate temperature correctly. Testing or replacing it is a common step after airflow issues are resolved.
A faulty cycling thermostat can cause intermittent stopping. It’s a common follow-up test after checking airflow.
When should I replace the thermal fuse?
Replace the thermal fuse if it is blown; a blown fuse will stop heat production and can prevent the dryer from running. This is a safety-critical repair that may require a multimeter for verification.
If the thermal fuse is blown, replace it. It’s a safety-critical fix.
Do I need a professional for vent cleaning?
If you have a long or complex vent run, frequent lint buildup, or you’re uncomfortable with electrical testing, a professional vent cleaning and inspection is recommended to ensure safety and code compliance.
Professional vent cleaning is wise if you’re unsure or have long vent runs. It ensures safety and proper venting.
How often should I inspect the lint filter?
Inspect and clean the lint filter after every load. Regular maintenance helps airflow, reduces drying time, and lowers fire risk.
Clean the lint filter after every load to keep airflow strong and minimize fire risk.
Watch Video
Key Points
- Audit airflow first: lint and vent blockages are the leading cause.
- Test safety components before costly repairs.
- Document tests to guide professional service if needed.
- Maintain a routine to prevent future stop-starts.
- Consider professional vent cleaning for long runs.