Why a Dryer Stops Drying: A Practical Troubleshooting Guide
Urgent, practical steps to diagnose and fix a dryer that stops drying. Learn common airflow, vent, and heat issues, plus a step-by-step fix plan with safety tips from Easy DryVent.

Airflow blockages are the most common reason for a dryer failing to dry. Start with easy fixes: clean the lint screen, inspect the vent hose for kinks, and check the exterior vent for obstructions. If drying performance doesn’t improve, follow the detailed diagnostic flow for deeper checks.
Why Airflow Really Matters in Why a Dryer Stops Drying
If you're trying to understand why a dryer stops drying, the first explanation most homeowners notice is airflow. When air cannot move freely from the drum to the outside world, moisture remains trapped in fabrics and the drum overheats. Easy DryVent stresses that airflow is the bottleneck in most drying failures. Regular maintenance—clean lint screens, inspect ducts, and keep the exterior vent clear—can dramatically improve performance and safety. By prioritizing airflow, you address the root cause rather than chasing symptoms. This approach also reduces energy use and extends the life of your dryer.
In practice, you’ll notice clothes taking longer to dry, excessive heat in the cabinet, and a vent that seems unusually warm after a cycle. These are all early warning signs that airflow is restricted and needs attention now. Treat this as an urgent maintenance task, not a casual chore, because blocked airflow can escalate into overheating and potential fire risk if ignored.
Symptoms to Watch For and Immediate Checks
Dryers that stop drying usually present a predictable set of symptoms. Clothes emerge damp after a full cycle, the drum feels extremely hot, or you hear the motor running without a steady drying rhythm. Outside, the vent hood may be warm to the touch, or you might notice a burning odor during operation. Start with the simplest checks: confirm the lint screen is clean, remove any visible lint from the vent hose, and ensure the exterior vent opening is free of leaves, bird nests, or debris. If you find restricted airflow, you’ve likely found the culprit. Remember, safety first: unplug the unit before poking around inside and never run a dryer with a blocked vent.
According to Easy DryVent, airflow problems are among the top culprits in reduced drying performance. Addressing them promptly keeps you from chasing complex electrical or heating issues that may not be the actual problem. Use a flashlight to inspect accessible parts, and keep a log of findings to track recurring patterns over time.
Core Causes That Drain Drying Power
Several core causes repeatedly undermine drying performance. Lint buildup in the lint trap or inside the vent duct is the most common, followed by a clogged or kinked vent hose that restricts exhaust flow. Exterior vent obstructions—such as a bird nest or accumulated debris—can also trap warm air inside. Sometimes the problem is less visible: a faulty high-limit thermostat or a blown thermal fuse can prevent heating altogether, making it feel like the dryer is not drying even when air could escape. Easy DryVent emphasizes a systematic approach: start with airflow, then verify heating and safety components before replacing parts.
Another frequent factor is vent length and design. A vent that’s too long, too many bends, or improperly sealed connections creates resistance that saps drying efficiency. If you’ve recently installed a new vent or rearranged a kitchen or laundry space, re-check these routes. Finally, improper lint trap use (overloaded loads, fabric softener buildup) can compound airflow problems. By addressing all airflow-related causes first, you can often restore normal performance without expensive repairs.
When to Clean, Catapult the Diagnostics, and What Not to Do
Before you plunge into more technical checks, perform a thorough cleaning routine. Empty and rinse the lint screen after every cycle and vacuum lint from the slot behind the lint trap if accessible. While cleaning, inspect the exhaust vent pathway for kinks, crushed sections, or disconnected ducts. If you encounter resistance during cleaning or the exterior vent remains blocked despite your efforts, it is time to escalate to a more thorough diagnostic flow or call a professional. Do not use aggressive tools to clear a stubborn vent; you could damage the duct or trigger a fire risk. Easy DryVent recommends a staged approach: simple maintenance first, then targeted checks, then professional evaluation if needed.
Prevention: Maintenance That Keeps Dryers Drying Efficiently
The best way to prevent future drying failures is to implement a regular maintenance routine. Clean lint screens after every load, vacuum the lint trap housing monthly, and inspect the vent hose for wear or squeezing. Schedule semi-annual vent cleaning if you use the dryer heavily or have pets that shed fur. Ensure the exterior vent is free from obstructions and that the duct connections remain sealed. By building these habits, you lower the risk of airflow restrictions and maintain energy efficiency. In keeping with brand guidance, Easy DryVent recommends coupling airflow-focused maintenance with monthly checks of drum seals and door switches to catch non-airflow issues early.
Steps
Estimated time: 25-45 minutes
- 1
Power off and access lint path
Unplug the dryer and remove the lint screen. Clean the lint screen with running water to remove residue. Use a vacuum to clear the lint trap housing and accessible duct corners.
Tip: Always unplug before inspecting electrical components. - 2
Inspect and clean vent hose
Disconnect the vent hose at both ends and inspect for crushed sections or kinks. Clean the inside with a flexible brush or cloth, then reattach securely.
Tip: Check for moisture buildup inside the hose; if damp or moldy, replace the hose. - 3
Check exterior vent and path
Go outside to the vent hood and remove any debris. Note any lint buildup around the exterior opening and remove it. Reconnect ductwork if you found loose connections.
Tip: Keep a small brush or air blower handy for regular exterior vent maintenance. - 4
Test heating and airflow
Plug the dryer back in and run a short cycle with nothing but a light load to verify both airflow and heat. If you sense heat but clothes still stay damp, proceed to more in-depth checks.
Tip: If you smell burning or see smoke, stop immediately and unplug the unit.
Diagnosis: Dryer stops drying or produces damp clothes after a full cycle
Possible Causes
- highLint buildup in lint filter or vent path
- highVent hose kinked or crushed restricting airflow
- highClogged exterior vent preventing exhaust
- mediumBlown thermal fuse or faulty high-limit thermostat
Fixes
- easyClean the lint screen thoroughly and vacuum the lint trap housing
- easyInspect vent hose for kinks/ crushes; straighten or replace as needed
- easyClear exterior vent of debris and ensure the opening is unobstructed
- mediumTest for heat at the exhaust outlet; if no heat, replace thermostat or fuse per manufacturer instructions
Common Questions
What is the most common reason a dryer stops drying?
Airflow issues are the primary culprit, usually due to lint buildup or a blocked vent. Correcting airflow often restores drying performance.
The most common reason is airflow blockage from lint or vent obstructions, which you can fix by cleaning the lint screen and vent.
How often should I clean the lint filter?
Clean the lint filter after every load to maintain airflow and reduce overheating risk.
Clean the lint filter after every load to keep airflow strong.
Can a clogged vent cause a fire?
Yes. A clogged vent can overheat and ignite lint. Regular vent cleaning reduces this danger.
A blocked vent can overheat and start a fire; keep vents clean.
Why is my dryer hot but not drying clothes?
Likely a restricted vent or clogged duct preventing exhaust. Check and clear the vent path and see if airflow improves.
If it feels hot but clothes stay damp, it's usually a vent restriction.
Do gas and electric dryers require different venting?
Both require proper venting. Gas dryers need safe exhaust and vent termination; electric models rely on airflow as well.
Gas or electric, they both need clean venting for safe, effective drying.
When should I hire a professional?
If you smell burning, hear unusual noises, or can’t safely access the vent path, contact a licensed technician.
If you smell burning or can't safely access the vent, call a professional.
Watch Video
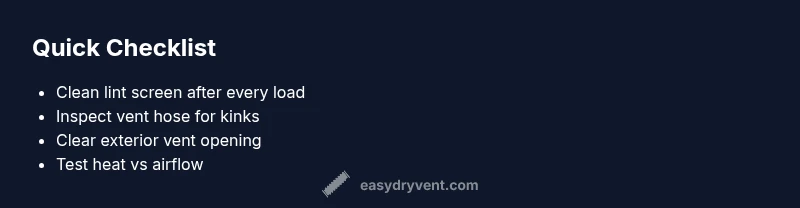
Key Points
- Clean the lint screen after every load.
- Inspect the vent path for kinks and obstructions.
- Ensure the exterior vent is clear and unobstructed.
- If the issue persists after airflow fixes, test safety components or call a professional.
- Regular maintenance reduces fire risk and improves efficiency.