How to Fix a Dryer That Quit Drying: A Practical Troubleshooting Guide
Learn how to diagnose and fix a dryer that quits drying. Easy DryVent shows practical steps to restore airflow, test components, and prevent future outages with safe, DIY-friendly tips.

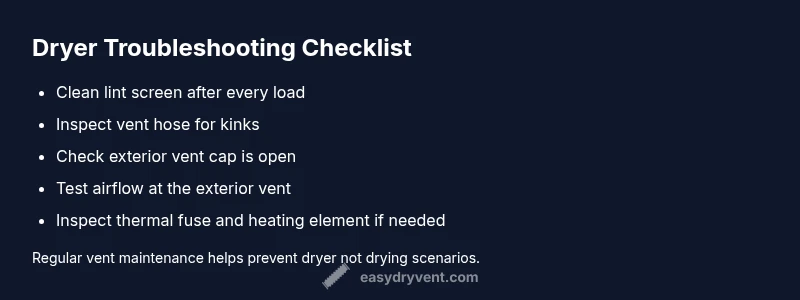
Follow these quick steps if your dryer quit drying: start with the simplest checks—unplug the unit, inspect and clean the lint screen, and inspect the vent hose and exterior vent for blockages. If airflow is weak at the exterior vent, clear the path and re-test. If heat or airflow remains poor, move to testing the heating element and thermal fuse.
Understanding the symptom: why your dryer quit drying
If your clothes come out damp and the drum keeps spinning while heat seems absent, you might be dealing with a dryer quit drying. This symptom usually points to airflow restrictions or a safety cut-off triggered by overheating. In many homes, the root cause is a blocked vent, lint buildup, or a malfunctioning heat source. When the dryer quits drying, the first step is to think airflow—restricted air means heat can't transfer efficiently to the load. These early clues help you prioritize checks without diving into unnecessary repairs. Another clue is how long the cycle runs; if it completes in a shorter-than-expected time yet leaves damp clothes, airflow problems are likely. If clothes emerge warm but still damp, it may indicate heat is being produced but not delivered effectively. Keep in mind that many fixes are straightforward and do not require tools beyond a basic vacuum, a screwdriver, and a new lint screen. As you troubleshoot, keep air moving and stay mindful of safety: never bypass a blown fuse or continue to run a clearly hot appliance. Throughout this guide, you’ll learn how to identify the most likely culprits, perform safe tests, and restore proper drying performance with practical steps.
Common culprits and quick checks
There are a handful of culprits that show up again and again when a dryer quits drying. Start with the simplest, most common fixes before moving to more involved tasks.
- Lint screen and lint trap: A clogged screen reduces airflow and extends drying time, sometimes causing the cycle to end early. Remove, clean, and reinsert; wipe the housing with a dry cloth to remove fine dust.
- Lint buildup in the vent hose: Debris accumulates over time; a blocked hose can dramatically restrict airflow. Disconnect the dryer and use a vacuum or vent brush to clear the inside of the hose.
- Exterior vent obstruction: Leaves, insects, or bird nests can block the vent cap. Check that the vent exterior is open and clear; test airflow by feeling a strong breeze when the dryer is running.
- Damaged vent hose or crushed duct: Ensure smooth, straight runs with the correct diameter. Replace crushed sections and avoid sharp bends.
- Heating element, thermostat, or thermal fuse: If airflow is fine but heat isn’t produced or is cut off, these components may have failed; these parts often require professional testing and replacement.
- Sensor or control issues: Some models rely on moisture or temperature sensors that can misread loads; a calibration reset or software update may be needed.
- Overheating safety: If the drum overheats, the dryer may shut off to protect components; this can be caused by airflow problems or a failing high-limit thermostat.
- Additional hints: Check for unusual noises or vibrating sounds that point to belt wear, drum support issues, or a loose blower wheel.
Safety first: when to call a professional
Tackling dryer repairs can involve electrical components and heat. If you notice burning smells, smoke, or melted wiring, stop immediately and unplug the unit. Do not operate with a blown thermal fuse or a visibly damaged cord. If you’re uncertain about vent cleaning beyond the exterior, or if you’ve already cleaned the lint screen and vent hose but the dryer still quits drying, it’s time to call a certified appliance technician. A professional can safely test the heating circuit, verify the thermal fuse function, and inspect internal wiring and sensor boards without risking injury or fire. Also consider if your dryer is older or a high-use unit; repeated issues may suggest wear that reduces efficiency or safety. When scheduling service, ask for a written estimate, check whether replacement parts include a warranty, and confirm the technician will perform a vent cleaning as part of the service. If you rely on a gas-powered model, ensure there is proper venting and professional inspection to avoid gas leaks or combustion hazards.
Diagnostic-flow: symptom to solution mapping
In this section, we map a common symptom to likely causes and practical fixes. Symptom: clothes come out damp or the drum stops heating. Diagnosis: restricted airflow is the leading candidate. Solution: clean lint screen, inspect vent hose for kinks, and test exterior airflow. If airflow is strong yet heat is absent, move to heating components: check the thermal fuse and thermostat. If still unresolved, inspect belt and drum for wear or misalignment. Each step builds toward restoring airflow and proper heat generation, reducing risk and downtime. We also provide a quick decision tree: if the exterior vent shows a visible blockage or low airflow, prioritize vent cleaning; if the exterior airflow is fine but heat is weak, test the heating circuit; if the drum doesn’t rotate, check the belt. Document what you test and the results to guide a technician if you need professional help.
Proactive maintenance to prevent future outages
Prevention beats repair. Regular lint screen cleaning after every cycle keeps airflow open and fires risk low. Schedule vent cleaning every 1-2 years based on usage; homes with long vent runs or frequent heavy loads benefit from annual checks. Use a foil or rigid metal vent hose rather than cheap flexible ducts, and ensure the exterior vent cap opens freely. Keep the area around the dryer clear, avoid stacking items nearby, and never vent outdoors into crawl spaces or attics. Finally, consider setting a quarterly self-check routine: inspect the exhaust path, listen for unusual noises, and monitor drying times to catch problems before they escalate. If you notice a drop in airflow or longer cycles, diagnose early and act before lint catches fire or the unit overheats. Learning simple checks like keeping the lint screen clean and inspecting the vent path will save energy and reduce wear on heating elements.
How to test after a fix
After you complete a repair or cleaning step, run a test cycle with a small load or a few towels. Note the drying time and whether clothes emerge warm and fully dry. Check the exterior vent again to confirm strong airflow. If dryness remains inconsistent, repeat the checks for lint, vent integrity, and heating components, and consider professional service if the problem recurs. Keeping a simple log of tests helps you notice gradual declines in performance earlier. Finally, verify that you reset any model-specific sensor or control settings after cleaning or replacement, and consult the user manual if a software update is available. A well-documented routine makes future maintenance faster and reduces downtime.
Steps
Estimated time: 45-90 minutes
- 1
Power down and unplug the dryer
Begin by unplugging the unit and turning off any nearby breakers as a safety precaution. Remove any nearby items from the surrounding area to prevent fire hazards. This ensures you can inspect components safely and avoids accidental shock or wiring damage.
Tip: Always unplug before touching electrical parts. - 2
Inspect the lint screen and lint trap
Remove the lint screen and thoroughly clean it with warm water if needed. Vacuum the slot to remove any dust that the screen missed. Reinstall correctly and run a quick test cycle with a small load to check improvement.
Tip: Lint buildup is a leading cause of airflow restriction. - 3
Check the vent hose for kinks
Inspect the entire vent path from the back of the dryer to the exterior wall. Look for kinks, crushing, or long bends that impede airflow. Straighten or replace damaged sections and ensure the hose diameter matches the dryer outlet.
Tip: Avoid using overly flexible foil ducts; prefer rigid or semi-rigid metal ducts. - 4
Test airflow at the exterior vent
Go outside and feel for a steady, strong breeze when the dryer is running. If airflow is weak or non-existent, the blockage is likely in the vent path or exterior cap. Clear the exterior opening and re-test.
Tip: A strong exterior breeze confirms good airflow through the system. - 5
Inspect heating components
If airflow is good but heat is not, test the thermal fuse and high-limit thermostat. These parts can fail closed during overheating. If you suspect a fault, replace with manufacturer-approved parts and reconnect safely.
Tip: Fuses and thermostats are safety devices; only test if you’re comfortable with electrical work. - 6
Check belt and drum rotation
If the drum doesn’t rotate or makes unusual noises, the belt or rollers may be worn. Inspect the belt for fraying; replace if necessary and ensure the drum rotates freely by hand.
Tip: A seized drum can prevent heat transfer even if the heating element works.
Diagnosis: Clothes not drying or taking longer to dry; dryer runs but heat or airflow may be insufficient
Possible Causes
- highRestricted airflow from lint buildup or vent blockage
- mediumFaulty heating element or failed thermal fuse/high-limit thermostat
- lowDamaged vent hose or exterior vent obstruction
Fixes
- easyClean lint screen and trap; vacuum the housing and re-test airflow
- easyInspect vent hose for kinks or crushing; straighten or replace as needed
- easyClean exterior vent cap and ensure it opens fully; test airflow at the vent
- hardTest and replace thermal fuse or heating element as needed; consult a professional for wiring checks
- mediumInspect belt and drum for wear if the drum doesn’t rotate properly
Common Questions
Why does my dryer quit drying after a few minutes?
Quitting after a few minutes usually points to overheating safety or airflow restriction. Start with lint cleaning and vent checks, then test airflow and heat components if needed.
It’s often an airflow or safety issue—start with lint and vent checks.
Can a dirty lint filter cause a dryer to stop drying?
Yes. A clogged lint filter reduces airflow, causing longer drying times or incomplete drying. Clean it after every load and inspect the housing for debris.
Yes, cleaning the lint filter helps airflow and drying efficiency.
Is it safe to run a dryer with a hot exterior vent?
No. A hot exterior vent can indicate overheating or restricted airflow. Stop the cycle and inspect the vent path and cooling airflow before trying again.
No—hot vents can signal a risk; stop and check the vent.
Should I replace a thermal fuse myself?
Replacing a thermal fuse is possible for experienced DIYers, but it involves electrical work. If unsure, hire a professional to avoid shock or wiring errors.
It’s risky to DIY; consider a pro if unsure.
When is it time to call a professional for a dryer that won’t dry?
If basic checks (lint, vent, airflow) don’t fix the issue or you suspect electrical or gas-vent problems, contact a certified appliance technician for safe testing and replacement parts.
If in doubt, call a pro for safe testing and guidance.
Watch Video
Key Points
- Address vent blockages first to restore airflow
- Clean lint screens after every cycle
- Don’t bypass safety devices like fuses or thermostats
- Call a pro if electrical components look damaged
- Maintain a quarterly vent-check routine