Common Problems with Dryers: Urgent Troubleshooting Guide 2026
Urgent, practical guide to diagnose and fix common problems with dryers. Step-by-step checks, safe diagnostics, and pro tips from Easy DryVent.

Most dryers fail due to airflow restrictions or electrical issues. Start with safety checks: unplug the unit, inspect the outlet, and reset the circuit if needed. Then remove lint from the filter and vent; improving airflow often resolves a wide range of common problems with dryers. If airflow returns but heating or tumbling remains inconsistent, proceed with the full step-by-step guide.
Understanding why common problems with dryers happen
Dryers are a balance of heat, airflow, and electrical control. When any one part of that balance is off, you’ll notice symptoms like longer drying times, clothes that stay damp, or odd noises. The most frequent causes behind the phrase common problems with dryers are lint buildup, vent blockages, faulty thermostats or thermal fuses, and simple power issues. By recognizing these patterns, homeowners can perform safe, practical troubleshooting that reduces energy waste and extends appliance life. Easy DryVent emphasizes that a systematic approach helps you separate quick fixes from issues that require deeper attention.
Typical symptoms and their likely causes
When a dryer stops heating, it’s often an airflow or electrical problem. If the drum still rotates but clothes remain damp, heat isn’t reaching the drum efficiently, usually due to vent restrictions or a faulty sensor. A squealing belt or grinding noise points to worn rollers or a drum belt. A burning smell signals overheating or wiring trouble that needs immediate attention. Notably, the most common problems with dryers involve lint buildup, blocked vents, and simple electrical faults. By matching symptoms to likely causes, you can decide which fixes to try first and when to call a pro. Easy DryVent notes that these patterns recur across brands, so a consistent process yields faster, safer results.
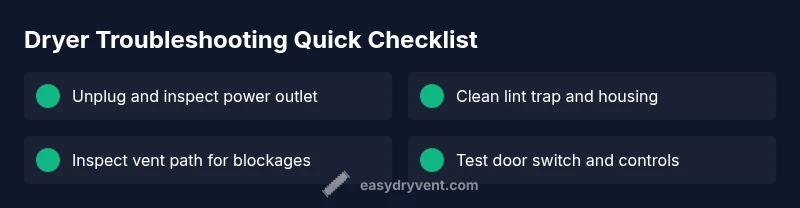
Quick safety checks you can perform now
Safety first: unplug the dryer before inspecting any components. Check the power cord and outlet for damage, and test the circuit to ensure it hasn’t tripped or a fuse hasn’t blown. Clean the lint screen every load and wipe the door seal. Inspect the exterior vent cover and visible ducting for obstructions, kinks, or crushed sections. If the dryer still exhibits issues after these checks, you’re ready to move into more detailed diagnostics. Remember: never bypass safety features or attempts to repair electrical components without proper training.
Diagnostic flow: symptom → diagnosis → fixes
Symptom: Dryer won’t heat or tumble. Likely causes include airflow restrictions (lint, vent blockage) and electrical faults (tripped breaker, blown fuse). Fixes range from easy (reset breaker, clean lint trap) to medium (clear vent ducts, inspect door switch) to hard (test or replace thermal fuse/heating element). Use the flow below to decide which path to take, starting with the simplest checks and progressing if symptoms persist. If you’re unsure at any point, stop and consult a professional. Easy DryVent’s diagnostic approach emphasizes safety and clarity.
Step-by-step fixes for the most common issue
- Power and safety check: Unplug the dryer, plug back in, and confirm the outlet provides power. 2) Lint trap and exhaust: Remove lint, brush the housing, and vacuum the vent opening. 3) Vent path inspection: Inspect ductwork for bends, kinks, or crushes; straighten or replace as needed. 4) Door and control checks: Ensure the door switch activates properly and the start button works. 5) Thermal fuse and heating element: If the dryer still won’t heat, test the thermal fuse and heating element (requires a multimeter). 6) Re-test: Run a short cycle with a light load to confirm heat and drum rotation. If problems persist, don’t force it—professional service is recommended. Tips: Take photos before disassembly and label wires. Easy DryVent recommends performing these steps in order to isolate the issue safely.
Prevention, maintenance, and smart habits
Establish a routine to clean the lint trap before every load and schedule a quarterly vent inspection to maintain optimal airflow. Use proper vent materials and keep the exterior vent clear of debris, especially during winter. Dryers run more efficiently when the venting path is unobstructed, so routine cleaning reduces wear and energy costs. Easy DryVent also suggests keeping the area around the dryer free of clutter and avoiding the use of highly lint-producing items that can accelerate buildup.
When to call a pro and what to expect
If you encounter a burning smell, loud grinding, visible damaged wiring, or persistent heat issues after cleaning and basic checks, stop using the dryer and call a licensed technician. Professionals can safely test electrical components, verify vent integrity, and replace faulty parts like a thermal fuse or heating element. The goal is to prevent fire risk and further damage, while restoring reliability and efficiency to your laundry routine.
Steps
Estimated time: 45-60 minutes
- 1
Power safety check
Unplug the dryer, inspect the plug and outlet, and verify the circuit is active. If the outlet or circuit shows issues, resolve those before proceeding.
Tip: Always start with power and safety before touching components. - 2
Inspect lint trap and housing
Remove the lint screen, clean it thoroughly, and brush the housing. A clogged trap can drastically reduce airflow and heating efficiency.
Tip: Vacuum the slot and use a small brush to loosen embedded lint. - 3
Check vent path and exterior vent
Follow the duct from the dryer to the exterior vent. Look for kinks, crushed sections, or blockages and clear them. Ensure the exterior vent hood opens easily.
Tip: Use a flashlight and, if needed, a vent cleaning brush kit. - 4
Test door switch and control panel
Open/close the door and test if the sensor engages the drum when starting a cycle. If the control doesn’t respond, the switch or board could be faulty.
Tip: Try a different cycle to see if any control inputs register. - 5
Assess heating components
If heat is absent after airflow is clear, test the thermal fuse and heating element with a multimeter or consult wiring diagrams. Replace faulty parts as needed.
Tip: Only attempt electrical tests if you’re comfortable; improper testing can cause shock or fire. - 6
Re-test operation
Plug in, run a short cycle with a light load to confirm heat and tumbling. Listen for normal motor sounds and observe airflow.
Tip: Document any changes and stop if symptoms reappear.
Diagnosis: Dryer stops heating or tumbles mid-cycle
Possible Causes
- highTripped circuit breaker or blown fuse
- highLint buildup restricting airflow
- highVent blockage or kinked duct
- mediumThermal fuse blown or heating element failure
- lowDoor switch or start switch fault
Fixes
- easyReset the circuit breaker or replace the blown fuse
- easyClean lint from the filter and vacuum the vent path
- easyInspect vent run for blockages and straighten or replace ducts
- mediumTest/replace the thermal fuse or heating element
- mediumRepair or replace the door switch or start switch
Common Questions
What is the most common reason a clothes dryer stops heating?
Lint buildup or a tripped breaker is typically the primary cause. Start with airflow checks and power verification before exploring internal components.
Lint buildup or a power issue is usually the culprit, so start with airflow and power checks.
Why does my dryer run but clothes come out damp?
Airflow restrictions prevent heat from circulating. Check the lint trap and vent path, then test a shorter cycle to confirm airflow improves.
Usually airflow problems—clean lint and check the vent.
Can I clean the vent myself safely?
Yes, with unplugged power. Use a vent brush or snake, vacuum the interior of the duct, and wipe down the exterior vent. If you encounter resistance, stop and assess for professional help.
Yes, with care. Unplug first and use the right tools.
Is a squealing dryer dangerous to continue using?
Yes. A squeal often indicates worn rollers or belt damage. Stop using the dryer and get a professional assessment to avoid further damage or a fire risk.
Squealing usually means worn parts; stop and call a pro.
How often should I clean the lint trap and vent?
Clean the lint trap before every load and schedule vent inspections every few months, depending on usage and vent length.
Clean the lint trap every load and check the vent regularly.
When should I call a professional for dryer issues?
Call a professional if there’s a burning smell, unusual noises, or persistent heat or cycling problems after basic checks. They can safely diagnose electrical and ventilation faults.
Call a pro if you smell burning or hear grinding, or heat issues persist.
Watch Video
Key Points
- Inspect airflow first: lint and vent blockages are the top culprits.
- Always start with power safety before opening panels.
- Clean lint trap before every load to prevent problems.
- If heat issues persist, don’t guess—test components or call a pro.
- Maintain venting and routine service to extend dryer life.