Why Does My Dryer Keep Overheating? A Practical Troubleshooting Guide
A practical, step-by-step guide to diagnose and fix dryer overheating safely. Learn common causes, quick fixes, and prevention tips from Easy DryVent.

Most dryer overheating is caused by vent restrictions or lint buildup. Start with the easiest fix: clean the lint screen and vent hood, then check the vent hose for kinks and disconnections. If the issue persists, inspect the exhaust path for obstructions and verify the drum seals are intact. For safety, unplug the unit before any inspection.
Why overheating happens in dryers
According to Easy DryVent, if you’re wondering why does my dryer keep overheating, the answer almost always comes down to airflow and heat generation. Dryers rely on a steady flow of cool air to carry away hot air; when lint, a blocked vent, or a kinked duct restricts that flow, heat builds up inside the drum and exhaust path. A malfunctioning cycling thermostat or a faulty high-limit thermostat can compound the problem by letting the heater stay on longer than needed. In most homes, the best first step is to address the vent and lint path. This guide walks you through practical, step-by-step checks to diagnose the issue, identify the most likely culprit, and stop overheating before it causes a fire risk. You’ll also learn simple maintenance habits to prevent recurrence with a simple maintenance routine.
Common causes of dryer overheating
- Blocked or restricted venting: Lint accumulation at the filter, vent hood, or in the run of the duct reduces airflow and traps heat. This is by far the most frequent cause.
- Damaged or crushed vent hose: A kinked or crushed hose increases backpressure and forces the dryer to work harder.
- Overloading the drum: Large or dense loads make the motor and heater run longer to dry, generating more heat.
- Faulty thermostat or thermal fuse: If a thermostat fails to regulate temperature or a thermal fuse opens too late, the dryer may overheat.
- Dirty blower fan and drum seals: Obstructed airflow inside the cabinet can raise operating temperatures.
- Inadequate vent length or multiple bends: Excessively long runs or many bends impede exhaust.
Understanding these culprits helps you plan a safe, methodical inspection rather than guesswork.
Safety first: quick checks you can do before disassembly
Always unplug the dryer before working on any components. Start with the visible exterior: ensure the lint screen is clean, the exterior vent cap opens freely, and the area around the dryer is free of lint and paper. If you smell burning, see discoloration, or notice warm surfaces beyond normal drying heat, stop and call a technician. This section covers basic checks that don’t require tools or disassembly. If you can’t access the vent path safely from the back, move to the professional route. Remember: safety first prevents further damage and protects you and your home; never bypass safety steps.
How to inspect vents and ducts for overheating risk
Begin with the exterior vent: remove the vent hood and clear any visible lint. Use a flashlight to check for obstructions and clean using a narrow brush. Then inspect the vent hose for kinks, crushing, or disconnections; replace any damaged segments with metal duct. At the interior end, vacuum the cabinet around the blower housing and lint screen area. If you can access the thermostat wiring safely, inspect for signs of damage. Reassemble carefully and run a short test cycle to verify airflow. A clear exhaust path is the single most effective guard against overheating.
Diagnosing internal components: thermostat, thermal fuse, and cycling control
If airflow looks good but overheating persists, internal components are suspect. The cycling thermostat and high-limit thermostat regulate heat; if they malfunction, the heater may stay on after the drum reaches target temperature. A blown thermal fuse prevents the dryer from starting when damaged, but failure can still contribute to overheating in some cycles before it trips. Testing these parts requires a multimeter and a wiring diagram for your model. If you’re not comfortable with electrical testing, skip to professional service. Easy DryVent notes that many overheating incidents are resolved by replacing a faulty thermostat or thermal fuse, which is a relatively affordable fix when performed correctly.
Step-by-step fix: clear vent blockage and restore airflow
- Unplug the dryer and move it to access the rear panel. 2) Disconnect power to the vent path by removing the duct from the back of the dryer. 3) Use a vacuum with a narrow nozzle to remove lint from the vent and duct. 4) Inspect the vent hood and exterior cap; clean or replace a clogged hood. 5) Reconnect the duct, ensuring a smooth path with no sharp bends. 6) Run a test cycle with a light or medium load to observe temperature and airflow. 7) If overheating returns, proceed to professional inspection. Pro tip: keep a small lint brush handy for ongoing maintenance.
Prevention and maintenance plan to avoid future overheating
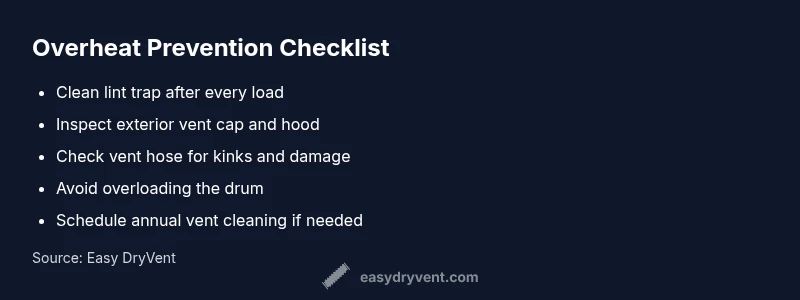
- Clean the lint trap after every load and inspect the venting quarterly.
- Consider annual vent cleaning if you have heavy lint production or pets.
- Use a properly rated vent hose, preferably metal, and ensure all joints are sealed.
- Do not overload the dryer; balance loads and separate heavy items.
- Keep the area around the dryer clear of paper, dust, and flammable items.
- Schedule a thermostat test during routine maintenance to catch aging components early.
When to call a professional and what to expect
If the problem persists after vent clearing and basic checks, contact a licensed technician. A professional can safely test electrical components, inspect the internal blower and thermostat, and check the vent run for hidden obstructions. Expect a diagnostic visit to include airflow measurements, a thermal test, and possible replacement of the thermal fuse or thermostat. Regular maintenance reduces overheating risk and extends dryer life.
Quick reference checklist and safety reminders
- Unplug before any inspection.
- Clean lint filter after every load; check exterior vent quarterly.
- Inspect vent hose for kinks or crushing; replace if damaged.
- Do not overload; keep drum balanced.
- If you smell burning, stop and call a professional immediately.
Steps
Estimated time: 60-90 minutes
- 1
Power down and prep the workspace
Unplug the dryer and pull it away from the wall to access the back panel. Gather a flashlight, vacuum, and a lint brush. Safety tip: never work near live electrical components; ensure you have dry hands and a dry work surface.
Tip: Double-check the outlet and cord for signs of damage before touching any wiring. - 2
Remove the back panel and inspect accessible ducts
With the dryer unplugged, remove the back panel to expose the exhaust path. Vacuum out visible lint from the cabinet, focusing on the blower housing and any accessible ducts. Reposition hoses to ensure a smooth, straight run.
Tip: Keep screws organized; label cables if you need to move components. - 3
Check the vent hose for kinks
Inspect the entire length of the vent hose for kinks, crushing, or disconnections. Replace damaged sections with metal duct if possible, ensuring all joints are sealed and secured. Reinstall the back panel when done.
Tip: Use securing clamps to prevent vibration and later disconnections. - 4
Clean the exterior vent and hood
Go outside to inspect the exterior vent hood for obstructions and clear any lint buildup. Ensure the hood opens freely and air can exit without restriction. Return inside and reassemble carefully.
Tip: A blocked exterior hood is a common missed source of overheating. - 5
Test electrical components if safe
If you’re comfortable, test the cycling thermostat and high-limit thermostat with a multimeter following the service manual. If you find a fault, replace the part or call a professional. Do not bypass safety devices.
Tip: If you’re unsure, skip to professional service. - 6
Run a controlled test cycle
Reconnect power and run a short, empty cycle to observe airflow and temperature. Listen for unusual noises and check that heat cycles off as the drum warms. If overheating recurs, discontinue use and seek professional help.
Tip: Document observed behavior for the technician.
Diagnosis: Dryer overheats quickly during a cycle
Possible Causes
- highBlocked vent or lint buildup
- mediumVent hose kinked or crushed
- lowThermal fuse or thermostat failure
- lowOverloading drum causing motor to overwork
Fixes
- easyClear lint screen and clean vent paths; ensure vent hood opens freely
- easyStraighten vent hose and remove blockages; replace if crushed
- mediumTest thermal fuse/thermostat with multimeter and replace if open circuit
- easyReduce load size and run shorter cycles; spread clothes evenly
Common Questions
What is the most common cause of a dryer overheating?
The most common cause is a blocked vent or lint buildup that restricts airflow and traps heat. Clearing these paths often resolves the issue quickly.
The most common cause is a blocked vent or lint buildup; clearing the vent usually fixes it.
Can a clogged lint filter cause overheating?
A clogged lint filter contributes to overheating by restricting airflow. Always clean the lint screen after every load and check the vent path if overheating occurs.
Yes, lint buildup in the filter can cause overheating; clean it after every load.
Is it safe to operate a dryer that overheats?
If a dryer overheats, discontinue use and inspect the vent path and lint screen. If the problem persists, call a professional to prevent a fire risk.
No, stop using it and get it checked if it overheats.
When should I replace a thermistor/thermal fuse?
Replace a faulty thermal fuse or thermistor after a proper diagnosis by testing with a multimeter or consulting a professional. Do not bypass safety components.
Replace the faulty fuse or thermistor after testing; don’t bypass safety parts.
How long does vent cleaning take?
A typical vent cleaning takes about 30-60 minutes depending on accessibility and duct length. A professional service may complete a thorough check in about an hour.
Vent cleaning usually takes 30 to 60 minutes.
Watch Video
Key Points
- Inspect and clean the vent path regularly
- Address lint buildup promptly to maintain airflow
- Avoid overloading and long cycle times
- Consider professional help for electrical components
- Maintain a routine maintenance plan to prevent overheating