Why Does Your Dryer Have Water in It? A Practical Troubleshooting Guide
Discover why a dryer might have water in the drum, how to diagnose the issue, and practical fixes. Easy DryVent provides urgent, action-focused steps for safe troubleshooting and prevention.

Most likely, water in the dryer comes from condensation or a misused steam option, not a leaking water pipe. The quick fix is to check the vent and lint screen, empty the condensation reservoir, and ensure the steam/water inlet line is properly connected or disconnected if you’re not using a steam cycle. For safety, unplug before inspection.
Why does dryer have water in it? Common causes and what you should know
When you notice water or dampness inside a dryer, your first question is usually why. The Easy DryVent team often hears homeowners describe a wet drum after a cycle, a puddle near the base, or a misty interior during a cooling phase. In many homes, the culprit isn’t a leaky pipe but moisture arising from condensation in the exhaust path, a misconfigured steam feature, or a full condensation reservoir. Other times, a blocked vent or a kinked hose prevents proper airflow, causing humidity to back up into the drum. It’s essential to approach the problem methodically: identify if you’re dealing with a steam-enabled cycle, a condenser dryer, or a vented model. By understanding the dryer type and recent usage, you can narrow down the likely causes quickly and safely. This is particularly important for households using a steam option, where water enters the drum as part of the process. Easy DryVent’s guidance emphasizes starting with the simplest checks and building toward more detailed diagnostics if needed.
Avoiding assumptions and keeping safety in focus
Before you dive into inspection, unplug the machine and, if your model has a water supply line for steam, shut off the valve to prevent accidental leaks during handling. Keep kids and pets away, and wear gloves if you’ll touch any metal parts or damp surfaces. If you own a condenser dryer, remember that these units often collect water in a reservoir or tray; check for fullness and drainage. If you suspect a steam setting, read the user manual or contact the manufacturer support to confirm whether you should disconnect the line when not using steam. Throughout this process, document what you see—wet drum, reservoir status, or damp exhaust. This information will be invaluable if you need to involve a pro.
The role of venting and condensation in moisture buildup
Blocked or restricted vents force dryer exhaust to resist flow, increasing humidity inside the cabinet and potentially causing water droplets to form on the drum wall or inside the drum. A clogged lint screen, a collapsed duct, or a kinked vent hose can all contribute to this problem. In condenser dryers, the moisture removed from clothes ends up in a reservoir; if that reservoir isn’t draining properly or is full, water can appear in the drum during the next cycle. Understanding your machine’s architecture — vented, condenser, or heat pump — is key to choosing the correct fix. Throughout this guide, we’ll reference practical steps you can take immediately and clearly indicate when professional help is warranted.
Quick checks you can perform safely
Start with the simplest tasks: inspect the lint filter for buildup, inspect the vent hose for kinks or obstructions, and verify that the exhaust path is clear from the dryer to the outside vent. If your unit uses a condensate tray, check its level and ensure the drain path is open. For steam models, confirm whether the water inlet valve is connected and that you are using the steam setting correctly. If water persists after these checks, you may be dealing with a more complex issue such as a leak or internal fault. Easy DryVent recommends documenting each step you take and the resulting condition to help you communicate clearly with a technician if needed.
What to do about persistent moisture
If the moisture continues after clearing vents and reservoirs, the most prudent next step is to perform a more thorough inspection of the internal seals and door gasket for signs of leaks or moisture ingress. In some cases, the issue stems from a faulty water inlet valve or a faulty condensate pump in a condenser dryer. Remember to unplug before opening any access panels and avoid touching heating elements. If you’re unsure or notice any signs of water near electrical components, do not operate the unit further. The risk to safety is real, and contacting a licensed technician is advised when you cannot identify the cause.
Why professional help can be worth it
While many moisture issues can be resolved with simple maintenance, water in a dryer sometimes signals a larger problem such as a leaking water line, a failing valve, or a damaged seal. A professional can perform pressure tests, inspect hoses and seals, and verify electrical safety. If your model is under warranty, professional service by an authorized technician is recommended to avoid voiding coverage. Easy DryVent’s experience shows that addressing the issue early prevents water damage and costly repairs down the line.
Steps
Estimated time: 45-60 minutes
- 1
Power down and unplug the dryer
Begin by turning off the power and unplugging the unit to ensure you won’t be exposed to any heated surfaces or live circuits while inspecting hoses and reservoirs.
Tip: Use a flashlight to inspect the back and sides for water droplets before touching any panels. - 2
Check steam/water connections
If your model uses a steam cycle, locate the water inlet valve and hose. Check for leaks, cracks, or loose fittings. If you aren’t using steam, disconnect the line per the manual and seal the connection to prevent drips.
Tip: Keep the manual handy; some models require specific disconnection steps to avoid alarms. - 3
Inspect the venting path
Trace the vent from the dryer to the outdoors. Remove any lint buildup from the duct, clean the lint screen, and ensure the vent cap outdoors is free of obstructions. A clear path dramatically reduces moisture backflow.
Tip: Run the dryer on a short test cycle with a dry load to observe any changes. - 4
Examine the condensate reservoir (if applicable)
Empty the reservoir or tray and inspect the drainage hose for clogs. If a reservoir is not draining, water can back up into the drum. Refill or reseat hoses as recommended by the manufacturer.
Tip: If you hear a gurgling sound, that’s typically a drainage issue—pause and check the path. - 5
Test with a controlled cycle
Run a short cycle with a dry load at a moderate setting to observe whether water appears again. Note the timing of water appearance, whether it’s after cooling or during heat.
Tip: Document cycle type, load weight, and any changes you’ve made. - 6
Plan next steps if water persists
If water remains after these steps, arrange service by a qualified technician. They can diagnose internal seals, valves, or condensers that could be faulty and assess any electrical safety concerns.
Tip: Do not attempt internal repairs beyond your comfort level; ongoing moisture can indicate a safety risk.
Diagnosis: Water pools or appears inside the dryer drum after a cycle
Possible Causes
- highBlocked vent or restricted duct causing condensation buildup
- highCondenser unit reservoir full or drainage blocked
- mediumSteam feature connected to water inlet line and actively adding water
- lowWater inlet valve or steam line leaks into the drum
Fixes
- easyClear lint screen and vent path; ensure no kinks or obstructions in the duct
- easyEmpty and inspect condensate reservoir; verify drainage works and lines are unobstructed
- mediumDisable unused steam settings or disconnect the water line if not needed; ensure connections are secure
- hardIf the issue persists, arrange professional service to inspect seals, valves, and internal components
Common Questions
What causes water to appear in a dryer's drum after use?
Water in the drum is usually the result of condensation build-up, an active steam feature, or a full condensation reservoir. A blocked vent can worsen condensation. Start with vent and reservoir checks before exploring internal components.
Water in the dryer is often due to condensation or a steam setting. Start with vent and reservoir checks before looking at internal parts.
Can a clogged vent lead to moisture inside the dryer?
Yes. A blocked vent reduces exhaust, causing humidity to linger and condense inside the drum. Cleaning the vent path and lint screen typically resolves this in most cases.
A clogged vent can cause moisture to stay in the drum. Clean the vent and lint screen first.
Is a water line or steam hose leak something I can fix myself?
Minor leaks from steam hoses may be fixable, but persistent leaks require a professional. If you’re not using steam, disconnecting the line safely is a good first step.
Small steam hose leaks may be fixable, but get a pro if it persists. If not using steam, safely disconnect the line.
What should I do before calling a technician?
Document symptoms, note when water appears, and list any steps you’ve taken. This helps the technician diagnose faster and reduces repeat visits.
Write down when water appears and what you did. It helps the technician diagnose quickly.
Does a condenser dryer always collect water in a tray?
Most condenser models collect water in a reservoir. If the tray fills or the drainage is blocked, water can back up into the drum. Regularly empty and clean the tray and check drainage.
Condenser dryers collect water in a reservoir. Empty it and check drainage to prevent back-up.
How can I prevent this issue from recurring?
Schedule routine vent cleaning, keep lint screens clean, and review steam settings. Ensure proper installation for condenser vs vented models and address leaks promptly.
Prevent recurrence by cleaning vents, checking steam settings, and fixing leaks promptly.
Watch Video
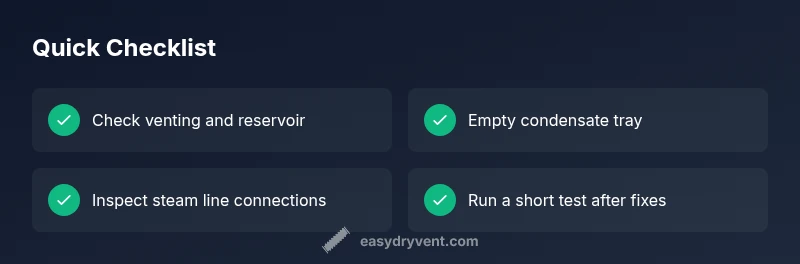
Key Points
- Check venting and reservoir to prevent moisture buildup.
- Disable unused steam settings to avoid water entry.
- Regularly clean lint trap and ducts to improve airflow.
- If water persists, contact a professional technician.