Can Dryers Leak Water? An Urgent Troubleshooting Guide
Learn how to diagnose and fix water leaks from clothes dryers with practical, safety-focused steps. Easy DryVent shares a systematic approach for homeowners to stop leaks fast and prevent future issues.

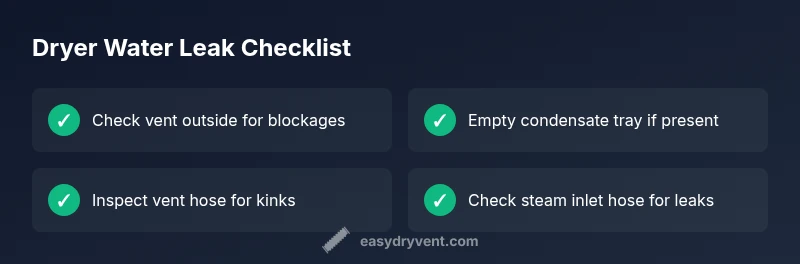
Most dryer water leaks come from condensate or blocked vents, not a faulty drum. Quick steps: unplug the dryer, check the drain pan and any condensate tray, clear the lint screen and vent hose, and inspect the vent outside for obstruction. Reconnect and run a short, empty cycle to observe where water appears. If water still leaks, stop using the unit and follow up with a professional.
Understanding why dryers leak water
Water leaks from clothes dryers can be alarming, but most issues come from moisture management rather than a faulty drum. According to Easy DryVent, many leaks arise from venting problems or condensate collection, especially in long or poorly vented runs. In a typical electric or gas dryer, warm, moist air is expelled through a vent; if the path is blocked or the collection system is overloaded, water can escape through seams, pan, or the exhaust area. The important distinction is between water that condenses inside the machine and water that leaks from external hoses or the cabinet. By understanding where water originates, you can pick the right fix and avoid unnecessary parts replacement. Regular maintenance and timely vent inspections reduce the risk of leaks and improve drying efficiency.
Common leakage scenarios and their telltale signs
There are several situations that can lead to visible water near the dryer or on the floor. The most common are vent blockages, condensate buildup, and leaks in steam-related features. If you notice moisture near the exhaust vent, a damp laundry room, or water pooling under the unit after a cycle, start with the simplest checks and work your way to more involved fixes. Easy DryVent notes that venting issues are the leading cause of water-related leaks in many homes. Pay attention to any musty odors or excessive humidity, which can indicate restricted airflow and condensation issues.
Safety first: what to do now
Safety comes first when you see liquid around the appliance. Unplug the dryer before touching any components. If you have a gas dryer, shut off the gas supply as a precaution and avoid any ignition sources near the vent area. Do not operate the dryer when water is present around electrical components or if you suspect a compromised electrical connection. If a steam feature is installed, ensure the water supply is off and there are no leaks from the inlet hoses. These steps reduce the risk of electric shock, fire, or gas-related hazards while you diagnose the leak.
Source identification: condensate vs external water
Leaks can originate from three main paths: condensate collection inside the unit, blocked vent causing condensate to back up and spill, or external water sources such as inlet hoses on steam dryers. Condensate is typically found near the tray or inside the drain line, while external leaks show up as droplets around hoses or cabinet seams. Distinguishing these sources helps you apply the correct fix without unnecessary replacements. If your model has a condensate tray, check its level and condition first; if it’s full or cracked, it can spill water during cycles.
Diagnostic steps you can perform at home
You can perform a few safe checks to narrow down the source. Start with the simplest: verify the lint screen is clean and the vent hose is straight and free of kinks. Inspect the exterior vent cap for obstruction, then remove and inspect the vent hose for moisture residue. Check the condensate tray or drain line (if your model has one). For steam dryers, inspect the water inlet hose and connections for leaks. Run a brief test cycle with the vent open to observe whether water appears at the vent or around the cabinet.
Most common fixes homeowners can do today
- Clear any obstructions in the lint filter and vent hose; ensure the vent path to the outside is not kinked or crushed.
- Empty or reseat the condensate tray; replace if cracked and verify the drain line is clear.
- Inspect water inlet hoses and connections on steam models; tighten fittings and replace damaged hoses as needed.
- If the venting path is long, consider shortening runs or adding a vent booster kit if recommended by the manufacturer. Always perform a test run after fixes to confirm the leak is resolved.
Preventing future leaks: maintenance routines
Create a simple maintenance routine to prevent leaks: clean the lint trap before every load, inspect the vent hose for wear annually, schedule a vent cleaning every 1–2 years depending on usage, and check condensate or drain components for signs of wear. Avoid over-drying, which increases moisture and strain on venting systems. Regular checks help you catch issues before they become leaks and improve dryer efficiency.
When to call a professional
If you identify a persistent leak after completing the above checks, or if you notice electrical or gas safety concerns, call a licensed technician. Leaks near electrical components or gas lines require trained personnel to avoid risk. A pro can perform a pressure test, inspect internal seals, and verify vent integrity with specialized equipment. Quick intervention often prevents more costly repairs later.
Steps
Estimated time: 60-90 minutes
- 1
Power off and secure the area
Unplug the dryer from the wall outlet. If you have a gas dryer, shut off the gas supply as a precaution. Clear the area around the unit to avoid tripping hazards while you inspect hoses and vents.
Tip: Take a quick photo of hose connections before disconnecting anything to guide reassembly. - 2
Inspect the exterior vent and vent hose
Go to the outside vent cap and look for blockage or bird nests. Detach the vent hose at the dryer end and inspect for kinks, tears, or crushing. Remove any lint or debris from the hose interior and the cap.
Tip: Use a flashlight and a long brush to reach into tight bends; never crush the hose during reattachment. - 3
Check the lint screen and internal path
Remove the lint screen and clean it thoroughly. Inspect the duct path from the drum to the vent; look for loose joints or signs of dampness along the cabinet seams.
Tip: Replace worn gaskets if you see gaps around access panels. - 4
Examine condensate tray and drain (if applicable)
If your model has a condensate tray, pull it out, empty it, and inspect for cracks. Check the drain line or pump for clogs and test the drain flow manually if possible.
Tip: Do not run the unit with a cracked tray or blocked drain—replace or repair as needed. - 5
Inspect steam/water inlet connections
For steam dryers, verify the inlet hose and fittings at the back of the unit are tight and free of leaks. Look for corrosion or moisture around the connection points.
Tip: If the hose shows any cracking or wear, replace it and consider upgrading to a reinforced hose. - 6
Run a controlled test cycle
Reconnect power and run a short cycle with the vent assembly in place, watching for any water escape path. If water appears from the cabinet, focus on seals and internal connections.
Tip: Keep a towel handy to catch residual moisture during testing. - 7
Decide on next steps
If the leak persists after these checks, call a professional. If the leak is resolved, schedule a routine vent cleaning and quiet check every 6-12 months.
Tip: Document the fixes you performed and note any parts you replaced for future reference.
Diagnosis: Water leaking from dryer during operation
Possible Causes
- highBlocked or kinked vent hose
- mediumFull condensate tray or clogged drain line
- lowSteam feature water inlet hose leaking
Fixes
- easyUnblock and straighten vent hose; clean exterior vent cap to restore airflow
- easyEmpty condensate tray; clean drain line; ensure proper drainage and seals
- mediumInspect and replace leaking water inlet hose or disable steam feature if not needed
Common Questions
What is the most common cause of a dryer leaking water?
The most common cause is a blocked vent or condensate buildup. A blocked vent prevents proper airflow, causing moisture to back up and leak. Condensate trays or drains can also overflow if not emptied regularly.
Most leaks come from a blocked vent or a full condensate tray. Clear the vent path and empty the condensate tray to fix it.
Can a steam dryer leak water even if the vent is clear?
Yes. Steam dryers rely on a water inlet line. A loose connection or damaged hose can leak water even with a clear vent. Inspect hoses and fittings for wear and replace as needed.
Steam dryers can leak through the inlet hose; check hoses and fittings for damage.
Is water leaking from a dryer dangerous?
Water leaks are typically a moisture issue, but electrical components and gas lines pose safety risks. If you suspect any electrical or gas involvement, stop using the unit and call a professional immediately.
Yes, especially near electrical or gas components. Stop using it and call a pro if you’re unsure.
Do all dryers require vent cleaning in response to leaks?
Not every leak requires vent cleaning, but a blocked vent is a frequent root cause. Regular vent maintenance helps prevent leaks and improves efficiency.
Regular vent maintenance helps prevent leaks and keeps your dryer efficient.
How often should I inspect condensate trays or drains?
If your model has a condensate tray, check it monthly and empty as needed. For steam models, inspect the drain line for clogs during routine maintenance.
Check condensate trays monthly and inspect drains during routine maintenance.
When should I replace the vent hose?
Replace a swollen, cracked, or creased vent hose promptly. Damaged hoses reduce airflow and increase condensation and leak risk.
Replace damaged vent hoses quickly to prevent leaks and improve airflow.
Watch Video
Key Points
- Identify whether the leak is condensate or vent-related.
- Start with simple checks: lint, vent path, condensate tray.
- Use a step-by-step diagnostic flow to avoid unnecessary parts replacement.
- Call a professional if safety is at risk or leaks persist after basic fixes.