Dryer is Leaking Water: Quick Fix and Prevention
A practical, step-by-step guide to diagnose and fix a dryer is leaking water, with home-safe checks and when to call a pro.

Most dryer leaks come from the condensate system, drain hose, or a worn seal. Start by unplugging the unit and turning off any water supply. Check the condensate bucket or drain, then inspect the hose connections for cracks or loose clamps. If you see obvious damage, replace the part or call a professional for a safe repair. This quick check helps prevent water damage.
What causes a dryer to leak water?
When the dryer is leaking water, the culprit is almost always moisture management rather than a plumbing leak. In most homes, you’ll find one of these common sources: the condensate system (for condensers and heat-pump dryers), the drain hose, or worn seals around the door or drum. If your model uses an internal condensate tank, an overflow often signals a clogged drain, a blocked vent, or a disconnected hose. A cracked drum seal or door gasket can also allow water to escape during cycles. The moment you notice the leak, take a breath and power down the unit to prevent electric shock or further water damage. A quick check can tell you whether this is a simple hose fix or something more serious that needs professional attention. If you’re comfortable with basic DIY, you can often stop the drip by addressing the easiest source first. Remember: safety first, especially around electricity and hot surfaces. If the leak persists after your checks, plan a professional service visit. The phrase "dryer is leaking water" should trigger a plan: isolate, inspect, fix, and test.
Inspect common leakage points
Start with the easiest-to-reach areas and work inward. The drain hose: locate the hose at the back of the dryer, inspect for cracks, kinks, or loose clamps. If you see a wet spot around the connection, tighten the clamp or replace the hose. The condensate pan or bucket: check that it’s not full and that there are no cracks. For condensers and some heat-pump models, the condensate line may drain into a pan inside or a bucket; empty if needed and ensure the drain line is clear. Door seal or drum gasket: run your fingers around the door and drum opening to feel for cracks or folds; replace if damaged. Venting: a clogged or blocked vent can cause moisture to back up inside the dryer and drip from seals. Clean the vent, inspect for crushed sections, and ensure there is no lint buildup near the exit. If you’re comfortable, run a test cycle with no load to observe where the water drips from. These checks help you decide whether you can fix it yourself or need a pro.
Safe, at-home checks you can perform today
Safety first: unplug from the wall outlet and switch off the circuit breaker if needed. Check the surrounding area for standing water; place towels to catch drips during inspection. Visually inspect the back panel for signs of moisture or rust near the hose fittings. Inspect the drain hose connection for tightness; reseat and tighten as required. Empty the condensate bucket or reservoir if your model uses one; ensure the drain path is open and not blocked. Inspect the door seal by closing the door on a tissue sheet and looking for air leaks or gaps around the gasket. Check the vent hose outside for moisture blowing back into the room; if you see condensed water near the vent opening, the vent may be clogged and require cleaning or replacement. After each check, run a short cycle with the drips in mind to see if the leak recurs. If the water flow stops after a repair, you’ve likely found the culprit. If not, move to the diagnostic flow and consider professional service.
Diagnostic flow: from symptom to solution
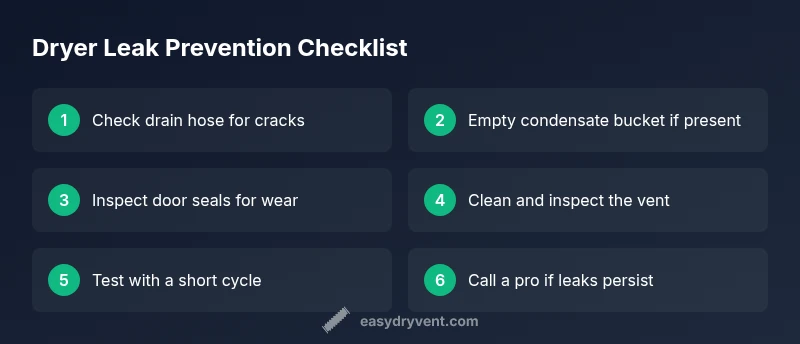
Symptom: Dryer is leaking water. Start with the easiest causes: hose and condensate system. If you fix the hose and empty the condensate bucket and leaks stop, you’re done. If not, consider door seals and drum gaskets. If you still see water, the issue may be a crack in the tub or a more complex vent problem. In that case, stop and call a professional. Use this sequence to minimize guesswork: 1) Check drain hose and clamps. 2) Empty condensate reservoir and verify drain path. 3) Inspect door seals. 4) Inspect vent for blockages. 5) If the leak persists after all these checks, escalate to a pro.
Step-by-step repair guide for the most common cause (drain hose or condensate system)
- Power down: unplug and, if gas-powered, turn off the gas supply. 2. Access the back panel: remove screws and carefully lower the panel to expose the drain hose and condensate components. 3. Inspect the drain hose: look for cracks, splits, or hardened clamps. 4. Replace or reseal: if damaged, replace the hose and secure clamps tightly. 5. Check condensate pan and drain: empty if full, clean the drain line with a small brush, and ensure the line is clear. 6. Reassemble and test: reattach the back panel, plug in, and run a short cycle with a towel to catch any drips. 7. Final test: run a full cycle and observe for leaks around the hose and condensate components. Tip: take photos of hose connections before disassembly to help reassembly. Estimated time: 60-90 minutes.
Tips, warnings, and prevention
- Pro tip: regular vent cleaning reduces moisture buildup and prevents leaks. Schedule vent inspections every 1-2 years depending on usage.
- Warning: never operate a dryer with exposed wiring or standing water – this is a shock hazard. Always disconnect power first.
- Note: keep condensate lines clean and free of blockages; a clogged line is a frequent leak source. Prevention: set a reminder to inspect hoses, seals, and venting quarterly.
Steps
Estimated time: 60-90 minutes
- 1
Power down and access inspection area
Unplug the dryer and, if connected, shut off any gas supply. Move the unit slightly to access the back panel safely. This prevents electrical shock during inspection.
Tip: Use a flashlight to see tight spots and take a quick photo of hose connections before touching anything. - 2
Inspect drain hose and connections
Examine the drain hose for cracks, splits, or loose clamps. Gently wiggle fittings to verify a snug seal; replace damaged hoses or clamps as needed.
Tip: If you can, detach and reattach the hose using new clamps for a secure fit. - 3
Check condensate system and pan
If your model has a condensate tray or internal tank, check for overflow or a full reservoir. Clear any blockages in the condensate line and ensure the drain path is open.
Tip: Empty and clean the condensate tray to prevent future overflows. - 4
Inspect door and drum seals
Look for cracks or wear on door gasket and drum seal. A damaged seal can allow moisture to escape during cycles and appear as a leak.
Tip: Gently press along the seals to feel for any play or cracks. - 5
Test vent and airflow
Check the exterior vent for lint buildup and ensure airflow is unobstructed. Restricted venting can cause condensation and leaks to back up inside the dryer.
Tip: Clean the vent with a long brush or vacuum attachment designed for ducts. - 6
Reassemble and run a test cycle
Put the back panel back on, plug in the unit, and run a short cycle with a towel to detect any residual drips.
Tip: Watch closely for several minutes to confirm the leak is addressed. - 7
Decide on next steps
If the leak persists after these steps, or if you notice tub seals or internal components damaged, contact a professional.
Tip: Document symptoms and steps already taken to speed up service.
Diagnosis: Dryer is leaking water
Possible Causes
- highClogged condensate drain or pan overflow
- highLoose or cracked drain hose
- mediumWorn door or drum seal allowing water to escape during cycles
- lowVent condensation due to restricted venting
Fixes
- easyUnplug the dryer and empty the condensate bucket; check the drain line for blockages and clear it
- easyTighten, reseat, or replace a cracked or loose drain hose
- mediumReplace worn door/dryer seals or drum gasket
- easyClean and inspect the vent system for blockages or kinks; ensure unobstructed flow
Common Questions
What should I do first if my dryer is leaking water?
Power down the dryer, unplug it, and start with the easiest checks: drain hose, condensate system, and door seals. This helps you identify whether the leak is simple to fix or requires a professional.
First, unplug the dryer and check the hose, condensate system, and door seals to pinpoint the leak.
Is it safe to use the dryer if I see water leaking?
No. Unplug the unit and avoid running it until you locate and fix the leak. Water plus electricity is a serious hazard.
No—unplug it and don’t run the dryer until you’ve fixed the leak.
Can a clogged vent cause a leak behind the dryer?
A blocked vent can cause moisture to condense inside and leak from seals or doors. Clean the vent and improve airflow.
A clogged vent can cause moisture to back up and leak from seals; clean the vent.
Do condensate leaks indicate a broken tub seal?
Not always, but it's a common culprit when leaks persist after hose and condensate checks. A damaged tub seal usually requires professional repair.
Persistent leaks after basic checks may mean a damaged tub seal, which needs a pro.
When should I replace the dryer instead of repairing it?
If critical components like the drum seal or tub are damaged, or if repair costs approach a new unit, replacement may be more economical.
If major internal damage is found, replacement could be more cost-effective.
Do I need a professional to fix a leaking dryer?
If basic checks don’t resolve the leak or you suspect internal damage, a qualified technician should handle the repair for safety and reliability.
Yes, call a professional if leaks persist or if internal components may be damaged.
Watch Video
Key Points
- Turn off power before inspecting
- Check condensate and drain points first
- Inspect hoses and clamps for damage
- Clean vents to reduce moisture buildup
- Call a pro for tub seals or internal damage