What Causes Dryer Thermal Fuse to Blow: Troubleshooting Guide
A homeowner-friendly guide to diagnosing and fixing a blown dryer thermal fuse, with safety steps, diagnostics, and prevention Tips to keep your dryer running reliably.

Most often, a dryer's thermal fuse blows from overheating caused by restricted airflow or lint buildup. Start with the simplest checks: unplug the unit, clean the lint screen, and inspect the vent hose for kinks or blockages. If airflow is clear but the fuse remains blown, replace the fuse and test on a low-heat cycle.
Understanding what causes dryer thermal fuse to blow
The thermal fuse is a safety device that interrupts power when the dryer overheats. In many homes, overheating happens not because a single fault, but because several minor issues combine to raise the vent temperature. According to Easy DryVent, airflow problems are among the most common contributors, especially in homes with long or partially obstructed vent runs. A blown fuse is a clear sign that the dryer attempted to operate beyond safe temperatures, protecting other components from heat damage. To prevent further risk, address airflow first, then inspect for lint buildup in the duct and around the heating element housing.
Identifying the symptoms of a blown thermal fuse
Typical symptoms include the dryer running but not heating, a complete lack of heat, a buzzing or clicking when starting, or the dryer shutting off mid-cycle. In many cases, the drum will turn but the heat will be absent. If you notice these signs, shut off power at the outlet and wait a few minutes before testing again. Do not bypass the fuse to keep the dryer running; the fuse exists to prevent electrical fires.
Primary causes: airflow restriction, lint buildup, and heat source issues
Blocked vents and lint buildup are leading culprits. A restricted lint trap reduces airflow and causes the exhaust air to become hotter, which can trigger the fuse. Over time, even modest blockages in the vent hose or outside vent cap can have a dramatic effect on heat buildup inside the dryer cabinet. Misaligned hoses, crushed ducts, or oversized lint traps can also contribute to overheating. Easy DryVent emphasizes addressing airflow first before replacing components.
Safety considerations before you begin
Always unplug the dryer before inspecting or handling electrical components. Wear eye protection if you must peek into the cabinet, and be mindful of sharp sheet metal and hot surfaces. If you smell burning plastic or see melted insulation, stop and call a licensed technician. If you’re unsure about electrical safety, do not attempt a DIY fuse replacement.
DIY checks you can perform to narrow down the cause
Document the dryer’s behavior and perform a controlled test. Check the lint screen and vent for blockages, test the outside vent cap for birds’ nests or debris, and verify the vent run isn’t kinked. Use a servicer's flashlight to inspect behind the drum for lint caught in the blower housing. If you confirm airflow is clear and the fuse still blows, the fuse or wiring might be faulty and require replacement.
Fuse replacement and post-repair testing
Replacing a thermal fuse is a precise procedure that requires the correct part and careful wiring. After confirming airflow, replace the fuse with an identical rating part, reconnect any wires securely, and reassemble the cabinet. Restore power and run a short heat cycle to verify heat delivery. If the fuse blows again, suspect a more serious underlying issue such as a faulty thermostat or blower wheel.
Prevention: maintenance steps to reduce future fuse blows
Schedule regular vent cleaning, ensure exterior vent termination is clear, and keep the lint screen clean before every load. Periodically inspect ductwork for kinks and crushed sections, and check the drum belt tension. Regular maintenance reduces the risk of overheating and extends the life of the appliance.
Steps
Estimated time: 60-90 minutes
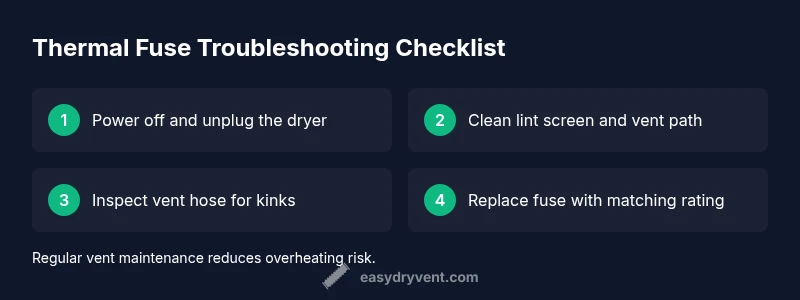
- 1
Power down and unplug the dryer
Disconnect power at the wall outlet and wait for the drum to stop spinning. Remove any access panel to reach the fuse indicators if you’re comfortable. This step protects you from electric shock while you inspect the components.
Tip: Take a quick photo of wiring before you disconnect anything. - 2
Inspect the lint screen and vent path
Remove and clean the lint screen thoroughly. Check the vent hose for kinks, crushing, or obstructions and wipe out the interior of the vent housing if accessible. A clear path dramatically reduces overheating risk.
Tip: Use a vacuum with a long attachment for thorough cleaning. - 3
Locate and inspect the thermal fuse area
Find the fuse holder inside the dryer cabinet or near the blower housing. Look for signs of discoloration, melted insulation, or loose wires. Do not touch wiring with wet hands and wear safety glasses.
Tip: If you don’t see a fuse, consult your model’s service manual. - 4
Replace the fuse and reassemble
Install an identical rating fuse in the same position, reconnect wires securely, and reassemble the cabinet. Ensure the door switch is properly engaged so the machine can power on.
Tip: Use the user manual to verify the correct fuse rating. - 5
Test run a short cycle
Plug in the dryer and run a short warm cycle with no load to verify heating. Listen for unusual noises and watch for any signs of overheating.
Tip: Monitor closely for the first 5-10 minutes.
Diagnosis: Dryer stops heating and may blow fuse during cycles
Possible Causes
- highRestricted airflow due to lint buildup or vent blockage
- highDamaged or disconnected vent hose
- mediumFaulty thermal fuse or blown internal fuse
- lowOverheating due to malfunctioning thermostat or blower wheel
Fixes
- easyClean lint screen and vent path; straighten and clear the vent hose
- mediumInspect and repair/replace thermal fuse and wiring; replace if blown
- hardCheck thermostat and blower wheel; replace faulty parts
Common Questions
What is a dryer thermal fuse and what does it do?
A thermal fuse is a one-time safety device that interrupts power if the dryer overheats. It protects components from heat damage and reduces fire risk. If the fuse blows, the dryer will stop heating and may not start until replaced.
A thermal fuse stops the dryer when it overheats; if it blows, replace it and check airflow.
Why would a dryer fuse blow after a few minutes of drying?
Overheating due to blocked vents or lint buildup is the most common cause. Other possibilities include a faulty thermostat or blower wheel. Address airflow first, then test the dryer after replacement.
Usually it's overheating from restricted airflow; clear the vent and replace the fuse.
Is it safe to replace the thermal fuse myself?
Replacing a thermal fuse can be safe if you follow the model’s instructions and disconnect power. However, working with electrical components carries risk. If unsure, contact a professional.
It can be safe if you disconnect power and use the correct part, but don’t guess.
How do I know if the fuse is blown?
You may notice no heat, a tripped breaker, or the dryer stopping mid-cycle with no error. A continuity test with a multimeter confirms a blown fuse. If in doubt, replace the fuse and test again.
Look for no heat and a blown fuse; test with a meter if you have one.
How can I prevent a thermal fuse from blowing in the future?
Keep vents clear, clean lint regularly, and ensure proper dryer loading. Regular maintenance reduces overheating risk. Consider annual vent inspection.
Prevent future blows by keeping airflow clear and maintaining the vent.
Should I replace the vent if the fuse blows again after repair?
Yes. A recurring fuse blow often indicates a venting problem. Inspect all ductwork and the exterior vent cap for obstruction and damage.
If it blows again, check and replace the vent to restore airflow.
Watch Video
Key Points
- Check vent path and lint buildup first
- Replace fuse with exact rating
- Test thoroughly after repair
- Prevent future blows with regular maintenance