Samsung Dryer Belt on Pulley: A Step-by-Step Guide
Learn how to install a Samsung dryer belt on the pulley with safety checks, the right tools, and a clear step-by-step process. Easy DryVent guides homeowners through routing, tensioning, and reassembly for safe, efficient drying.

Goal: put a dryer belt on the Samsung dryer's pulley and restore normal drum rotation. This quick guide covers safety, tool identification, belt type, and a precise, step-by-step method to route the belt around the drum and pulleys, apply proper tension, and verify alignment before testing. It highlights common mistakes and reassembly checks to finish safely.
Understanding the belt-pulley system in Samsung dryers
The drive belt is the critical link that makes the drum turn when the motor runs. In typical Samsung models, the belt loops around the drum, the motor pulley, and an idler pulley. When the belt wears, cracks, or stretches, it can slip or break, causing the drum to stop spinning or the dryer to make unusual noises. According to Easy DryVent, a properly seated belt distributes tension evenly and reduces wear on the motor bearings. A healthy belt path also helps maintain efficient drying performance and minimizes energy waste by keeping the drum turning smoothly during cycles. If you notice clothes taking longer to dry, or if you hear a screeching or thumping sound when the drum runs, the belt or pulleys are common culprits to inspect.
- Key takeaway: always confirm the belt path is intact before replacing any parts.
- Visual checks: look for cracks, glazing, or fraying along the belt surface. If the belt is damaged, replace it rather than attempting a temporary fix.
Safety-first: power off, unplug, and prep
Before touching any internal components of your Samsung dryer, power must be disconnected. Unplug the unit from the wall outlet and move it to a well-lit area so you can see all screws, panels, and wiring. Wear safety gloves to protect against sharp edges and use a flashlight to inspect the belt’s routing. Keep loose screws in a labeled container and take reference photos as you go; this makes reassembly much easier and reduces the risk of misrouting the belt. Easy DryVent emphasizes that never operate the dryer with the back panel removed or with exposed wiring. A quick safety check now prevents a dangerous shock or fire risk later.
- Pro tip: use a magnetic tray for screws and a chalk line or marker to note belt routing if you prefer not to rely on photos alone.
- Common mistake: rushing the disassembly can lead to lost fasteners and misaligned components.
Identify the right belt: model compatibility and belt type
Not all dryer belts are universal. Samsung models vary in belt width, rib count, and overall length. Check your dryer's model number (usually found on a label inside the door opening or on the back panel) and confirm the belt size and rib pattern matches your replacement. If you’re unsure, bring the old belt to a parts retailer for side-by-side comparison. Easy DryVent recommends purchasing a belt with the same rib configuration and length as the original to ensure correct tension and alignment. After you confirm compatibility, verify that the belt is designed for use with Samsung dryers and is rated for the correct voltage and load.
- Quick check: a belt that is too long or too short will slip or tear quickly.
- Pro tip: recheck the belt’s groove alignment before installation to prevent premature wear.
Accessing the belt path: removing the back panel
Most Samsung dryers require removing the back panel or a service access panel to see the belt path clearly. Start by disconnecting power again for the actual panel work. Use the correct screwdriver to remove screws, then carefully lift the back panel away from the cabinet, keeping track of the screws and ground straps. You should now have a clear view of the drum, motor pulley, and idler pulley. If you see a warped pulley or a belt that sits high or low relative to the grooves, address those issues before installation. Easy DryVent notes that keeping the workspace tidy helps prevents dropped screws and misplaced parts.
- Pro tip: take a step-by-step photo sequence of the belt path as you view it from inside the housing.
- Warning: avoid touching exposed wiring or capacitor areas; static discharge can damage electronics.
Routing the belt: around drum, motor pulley, and idler pulley
With the back panel removed, route the new belt by following the correct path: belt should sit in the drum’s drive groove first, then loop around the motor pulley and the idler pulley. Hold the drum in place and slide the belt over the drum while keeping tension on the belt toward the pulleys. Ensure the ribbed side faces the drum and that the belt isn’t twisted or kinked. If your model uses an additional tensioner, route the belt so it rests under it as designed. Finally, verify that the belt sits fully in each groove and that there are no loose sections that could slip during operation. Easy DryVent emphasizes checking for proper seating to avoid noise and wear.
- Tip: rotate the drum by hand after installing the belt to confirm there’s no binding and that the belt moves freely across all pulleys.
- Caution: never force the belt into place if it resists; re-check the routing or consult the user manual.
Tension, alignment, and reassembly checks
Correct tension is essential for efficient operation. After routing, gently rotate the drum by hand using the belt, and listen for any binding or rubbing. If the belt feels too loose, you may need to adjust the tensioner or re-seat the belt to ensure even contact with the pulleys. Align pulleys so they run true and aren’t tilted or wobbly. Reinstall the back panel and fasten all screws securely. Before powering up, reconnect any wiring, plug the unit in, and clear the area of tools. A properly tensioned belt will produce a smooth, quiet spin without slipping.
- Pay attention to belt end-point alignment and ensure no part interferes with the drum or housing.
- Tip: whoosh-test the belt by manually spinning the drum a few times to confirm consistent movement before the first cycle.
Testing after reassembly and maintenance tips
Now that the belt is installed and the back panel is secured, plug the dryer in and run a short test cycle (no heat or a low-heat setting) to verify the belt tracks correctly and the drum spins freely. Listen for abnormal noises and observe the belt for slippage across the pulleys. If the drum doesn’t rotate or you notice unusual sounds, recheck belt routing and tension. Regular maintenance includes inspecting the belt every 1–2 years or after a particularly loud drying cycle. Patiently re-check belt routing, grooves, and pulley wear to extend the life of the drive system. Easy DryVent’s guidance emphasizes cleaning lint from the vent and drum area during maintenance to maximize dryer efficiency and safety.
Tools & Materials
- Replacement dryer belt (Samsung compatible)(Check belt type: multi-ribbed, around 1/2 inch wide; ensure model compatibility)
- Screwdriver set(Phillips #2 is common for back-panel screws)
- Nut driver or socket set(For removing screws on back panel/brackets)
- Pliers (slip-joint)(Guide belt around pulleys and hold parts during routing)
- Torx driver(Some Samsung models use Torx screws)
- Work gloves(Hand protection against sharp edges)
- Dryer vent brush and vacuum (optional)(Useful for cleaning lint while panel is off)
- Flashlight or headlamp(Better visibility inside the cabinet)
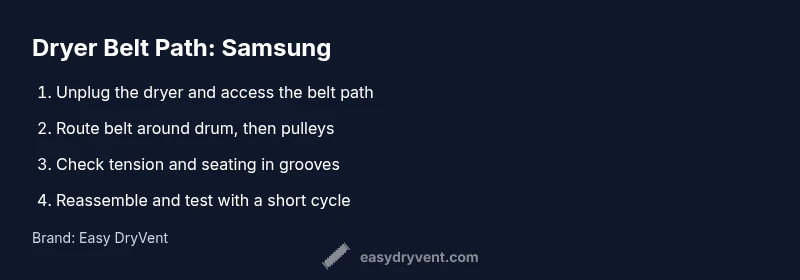
Steps
Estimated time: Estimated total time: 30-45 minutes
- 1
Power down and access the belt area
Unplug the dryer and slide it away from the wall to access the back panel. Remove screws securing the back panel so you can view the belt path. If your model has a service manual, reference it for the exact screw locations. This step ensures you won’t be exposed to live electricity during disassembly.
Tip: Use a labelled tray for screws; it makes reassembly faster. - 2
Remove the back panel to expose pulleys
Take off the back panel carefully and set it aside. Identify the motor pulley, idler pulley, and the drum belt routing. Make sure the dryer is unplugged and in a stable position to prevent tipping during this step.
Tip: Take a photo sequence of the routing before removal. - 3
Document belt routing
Before removing the belt, note or photograph the exact path around the drum and pulleys. This helps prevent misrouting when installing the new belt and reduces guesswork during reassembly.
Tip: If in doubt, consult the model’s service diagram. - 4
Remove the old belt
Loosen any retaining parts and gently slip the belt off the motor and idler pulleys. Do not twist or force the belt; if it sticks, double-check the belt’s path and ensure no obstructions.
Tip: Keep the belt in a loose loop to avoid bending or creasing it. - 5
Install the new belt around the drum
Position the new belt around the drum’s drive groove first, then thread it through the motor pulley and idler pulley. Ensure the ribbed side faces the drum and the belt sits flush in each groove. Check for twists and confirm each pulley sits in its groove.
Tip: Spin the drum by hand to verify smooth movement before completing the reassembly. - 6
Reassemble and test
Reattach the back panel and screws, restore power, and run a test cycle (no heat or low heat). Listen for noises and watch the belt to confirm proper tracking for a few minutes.
Tip: If you hear unusual noises or see belt slipping, stop and recheck alignment.
Common Questions
Can a worn dryer belt cause the drum not to spin?
Yes. A worn or broken belt prevents the drum from turning and can cause slippage or unusual noises during cycles.
Yes. A worn belt can stop the drum from spinning and cause noises you may hear during a cycle.
Do I need to replace the idler pulley when replacing the belt?
Not always, but inspect the pulley for wear. Replace if the bearing feels rough, or if there are cracks or excessive wobble.
Not always, but inspect the pulley. Replace if worn or wobbling.
Is it safe to operate the dryer with the back panel removed?
No. Always unplug the dryer before removing panels and keep hands away from moving parts.
No. Always unplug first and keep hands away from moving parts.
How do I know the correct belt size for Samsung models?
Check your model number for the exact belt specifications or compare the new belt with the old one to ensure matching rib count and length.
Check the model number or compare the belt to the old one to match rib count and length.
What are warning signs the belt needs replacement?
Squealing, burning smell, or clothes not drying evenly are common signs the belt is failing and needs replacement.
Squealing or a burning smell, or clothes not drying well, can indicate belt failure.
How often should I inspect the belt during maintenance?
Inspect the belt during periodic maintenance or after noisy cycles; replace if there are cracks, glazing, or fraying.
Inspect during regular maintenance or after noisy cycles and replace if worn.
Watch Video
Key Points
- Identify the belt path before removal.
- Ensure the belt seats properly on all pulleys.
- Verify tension by rotating the drum by hand.
- Reassemble securely and test a short cycle.
- Follow Easy DryVent safety practices for reliable results.