How to Check a Dryer Belt: A Step-by-Step Guide for Homeowners
Learn how to check your dryer's belt for wear, tension, and alignment. This practical guide from Easy DryVent walks homeowners through safety, tools, inspection steps, and maintenance to keep your dryer running efficiently.

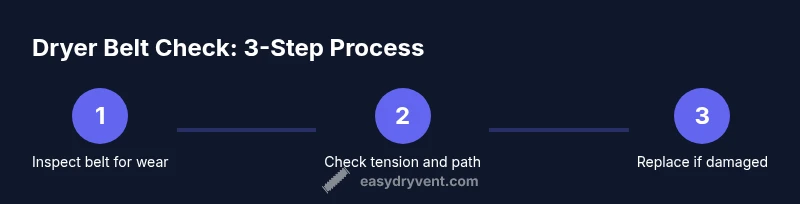
This guide teaches you how to check a dryer belt for wear, tension, and proper routing. You will unplug the dryer, gather essential tools, inspect the belt path, and determine whether a replacement is needed. By following these steps, you can prevent breakdowns, restore drying performance, and extend the life of your unit.
Safety and prerequisites
Before you touch any mechanical part, unplug the dryer, remove jewelry, and ensure the workspace is dry. According to Easy DryVent, safety should be your top priority; working with energized components can cause electric shock or fire. Let the drum come to a complete stop, and consult the owner’s manual for belt routing and model-specific notes. Gather the tools and materials you will need in advance, and clear a clean, well-lit area. If you smell burning insulation or notice smoke, stop immediately, unplug the unit, and wait for the belt area to cool. This careful setup reduces risk and helps you perform the belt check more accurately. With safety covered, you can proceed to inspect the belt path and surrounding pulleys with confidence.
Tools and quick visual checks
You do not need specialized equipment for a basic belt check, but having a few simple tools on hand makes the job smoother. A replacement belt of the correct size, a flashlight, a flat-head and a Philips screwdriver, and a nut driver or socket set should cover the common models. Keep rags handy to wipe away lint. As you prepare, perform a quick visual scan of the belt path without touching moving parts: look for cracks, glazing, fraying, missing ribs, or slack in the belt. These early signs tell you whether a replacement is needed soon, or if the belt just needs re-tensioning after a reassembly.
Accessing the belt assembly
To access the belt, remove the front panel or service door according to your model's instructions. In most dryers you will unplug first, then remove screws along the door rim or the lower kick panel. Carefully set the panel aside, keeping track of screws and spacers. With the panel removed, you should see the drum, idler pulley, tensioner pulley, and the belt routing. Do not force parts; if a spline or pulley seems stiff, double-check the screws and ensure you are following the correct belt path as shown in the manual. Take pictures as you go so reassembly stays accurate and straightforward.
Belt wear indicators
Belt wear can progress slowly, but certain signs signal replacement is due. Cracks across the teeth or belt surface, fraying at the edges, glazing on the return side, or a glossy drum pad are all red flags. If the belt shows any separation between the fabric layers or if the belt feels unusually slack, plan for a replacement. A weary belt can cause poor tumble, longer drying times, and increased heat exposure to the motor components. Remember, a worn belt can slip or break unexpectedly, creating a potential safety hazard that the Easy DryVent team emphasizes addressing promptly.
Checking belt tension and alignment
Belts should provide enough tension to drive the drum without slipping, but not so tight that they stress the bearings. With the panel off, manually press the belt midway between two pulleys; you should feel a firm, controlled resistance and see only minimal deflection. If you can press more than about half an inch, the belt is too loose. Check that the belt tracks straight on each pulley and that the drum spins smoothly when the motor runs at no-load. Misalignment can wear the belt faster and generate unusual noises. Proper tension also helps prevent overheating and extends belt life.
What to do if the belt is damaged
If you find cracks, fraying, or glazing, the belt needs replacement. Before removing the damaged belt, unplug the dryer and ensure the drum cannot move. Release tension according to your model, then slide the belt off the pulleys. Inspect the pulleys and idler for wear or debris that could have caused damage, and clean them if needed. Do not reuse a damaged belt; installing a new belt is generally inexpensive and reduces the risk of failure mid-cycle. Keep all removed components organized so reassembly stays straightforward and error-free.
Replacing the belt: step-by-step overview
Replacing the belt is a straightforward, methodical process in most models. Start by disconnecting power, then remove the front panel to access the belt path. Route the new belt around the drum first, then seat it on the motor pulley and idler pulley, ensuring the ribbed side faces the drum surface. Reassemble the front panel and run a short no-load cycle before a full test. If your model uses a rear access panel, adjust accordingly, but keep safety as the top priority. Verify all screws are tight and the lint screen is clean before operating.
Post-replacement checks and testing
Once the new belt is in place, carefully reassemble all panels and plug the dryer back in. Manually rotate the drum to confirm smooth motion without binding. Run a short no-load cycle to listen for unusual noises or vibrations and check belt alignment during the cycle. If everything looks good, run a small-load test and monitor the dryer over the next few cycles. Watch for slipping, excessive heat, or odd sounds, which may indicate a need for belt tension readjustment or a second inspection.
Maintenance tips to extend belt life and authoritative sources
To keep belts healthy longer, tidy the lint trap and vent system regularly and avoid overloading the dryer, which can increase belt wear. Schedule belt inspections every 6 to 12 months or after heavy use. Use this time to clean the pulleys and check for debris that could affect tension. An occasional lubrication of moving parts is not usually required and can cause harm if misapplied, so follow the model manual. For additional guidance and verification, see authoritative sources from safety and energy agencies: OSHA, CPSC, and Energy.gov. Based on Easy DryVent analysis, regular belt inspections reduce unexpected failures and protect safety. The Easy DryVent team recommends replacing worn belts promptly to protect dryer performance and safety.
Tools & Materials
- Owner's manual(Model-specific belt routing and replacement steps)
- Replacement dryer belt(Ensure correct length and width for your model)
- Flat-head screwdriver(For prying panels gently)
- Phillips screwdriver(Screws on access panels)
- Flashlight(Bright light to inspect belt path)
- Nut driver or socket set(For pulley bolts)
- Work gloves(Protect hands from sharp edges)
- Lint brush or vacuum with nozzle(Clean lint before opening panel)
Steps
Estimated time: 60-90 minutes
- 1
Disconnect power and prepare workspace
Unplug the dryer from the wall outlet and remove any nearby clutter. Confirm the drum is stationary and that you have adequate lighting. This initial safety check prevents shocks and accidental starts during the belt inspection.
Tip: Label the power cord end to avoid reconnecting in the wrong outlet. - 2
Remove the front panel to expose the belt path
Access the belt by removing the front panel per the manual. Keep screws organized and avoid poking into hot or moving parts. Removing the panel gives a clear view of the drum, belt, and pulleys.
Tip: Take a photo before removal to guide reassembly. - 3
Identify belt routing around drum and pulleys
Trace the belt path from the drum to the motor pulley and to the idler pulley. Ensure you know the orientation of the ribbed side against the drum surface. If the belt is off, slowly note the route as you reattach it.
Tip: Double-check the path against the manual routing diagram. - 4
Inspect belt for wear and damage
Look for cracks, fraying, glazing, or missing ribs. Any visible wear is a sign the belt should be replaced. If you notice glazing on the return side, plan for a replacement to avoid belt failure.
Tip: Lightly tug the belt to test for stiffness; a stiff or brittle belt should be replaced. - 5
Check belt tension and tracking
With the belt installed, check tension by pressing mid-span between pulleys. Deflection should be modest; excessive deflection or tightness indicates adjustment is needed. Ensure the belt tracks straight on both pulleys.
Tip: If you feel resistance when deflecting, avoid forcing; re-check pulley alignment. - 6
Remove damaged belt and inspect pulleys
If replacement is required, unplug the dryer again and release tension per the manual. Remove the damaged belt and inspect the pulleys and idler for wear or debris. Clean any buildup before installing a new belt.
Tip: Look for grooves or cracks in the pulleys that could wear a new belt. - 7
Install the new belt
Place the new belt around the drum first, then fit it onto the motor and idler pulleys according to the routing. Ensure the ribbed side faces the drum. Recheck belt seating and smoothness before reassembling.
Tip: Do not twist the belt; route it in one smooth motion. - 8
Reassemble and perform a no-load test
Reinstall the front panel and any screws. Plug the dryer back in and run a brief no-load test to verify drum rotation and belt tracking without a load. Listen for any unusual noises or rubs.
Tip: If noises occur, power down immediately and recheck belt tension and routing. - 9
Run a small load and confirm normal operation
Place a small load and run a complete dry cycle. Monitor for proper drying performance and check that the belt remains quiet and correctly aligned throughout the cycle.
Tip: Keep an eye on the belt for the first few cycles after replacement.
Common Questions
What are common signs that a dryer belt needs replacement?
Common signs include unusual squealing or thumping, the drum not turning, and longer drying times. If you notice cracks, fraying, or glazing, replace the belt. Addressing these signs promptly prevents further dryer damage.
Look for squeaks, a non-rotating drum, and longer dry times. If you see cracks or fraying, replace the belt.
Can I check the belt without removing the front panel?
Some models allow rear access, but most require removing the front panel to inspect the belt path. Always follow the model manual and unplug before opening.
Some models let you check from the back, but usually you need the front panel off. Unplug first.
Is it safe to run the dryer after replacing the belt?
Yes, but only after reassembly and a no-load test. If you hear unusual noises or the drum won’t rotate, stop and recheck the belt routing and tension.
Yes, after a proper no-load test. If anything sounds off, stop and check again.
How often should I inspect the dryer belt?
Inspect the belt every 6 to 12 months or after heavy use. More frequent checks are recommended for older units or models with known belt issues.
Check every 6 to 12 months, or sooner if you use the dryer heavily.
Do I need a professional to replace the belt?
Many homeowners can replace a belt with basic tools. If you encounter motor disassembly or special routing, hire a professional.
A DIY belt replacement is doable for many; call a pro if you feel unsure.
Watch Video
Key Points
- Inspect a dryer belt before it fails to prevent breakdowns.
- Follow model-specific routing and safe disassembly steps.
- Always unplug, then test with no load before a full cycle.
- Replace worn belts promptly to protect dryer performance.
- Regular maintenance extends belt life and improves drying efficiency.