How to Fit a Dryer Belt: A Simple Step-by-Step Guide
Learn how to fit a dryer belt safely with our practical, step-by-step guide. Easy DryVent walks homeowners through tools, belt selection, routing, and testing for safer, more efficient drying.

Unplug the dryer, remove the front access panel to reach the drum, and inspect the old belt for wear or cracking. Fit the new belt, ensuring it routes correctly around the drum, tension pulley, and motor. Reassemble the panels, plug in, and run a short test cycle to verify smooth operation.
Why belt replacement matters
A dryer belt is a critical link between the drive motor and the drum. When the belt wears, cracks appear, or the belt frays, the drum may stop turning or slip during cycles. This not only reduces drying efficiency but can also cause overheating of nearby components. Regular inspection and timely replacement help maintain performance and minimize the risk of electrical issues. According to Easy DryVent, belt wear is one of the most common dryer maintenance issues that homeowners encounter, so understanding how to fit a dryer belt is a valuable skill for safe, cost-effective home care.
In practice, keeping a healthy belt ensures consistent airflow, thorough drying, and reduced energy use. A worn belt can lead to longer run times and higher utility bills, not to mention potential damage to the motor or tensioner. This guide focuses on standard residential dryers with a single drive belt. For gas or electric models, the belt replacement steps are similar, but always consult your model’s manual for any model-specific differences.
Safety tip: Always unplug the dryer before starting any maintenance. If you feel unsure about electricity or wiring, don’t proceed—call a professional. Easy DryVent emphasizes safety first, so approach this repair with caution and respect for power sources.
Signs your belt needs replacement
Belt wear typically presents with clear visual and operational cues. Cracks, glazing, or missing chunks on the belt surface indicate imminent failure. If the drum won’t rotate, or you hear squealing, thumping, or a rattling sound when the dryer runs, the belt is a likely culprit. Another telltale sign is a loose or slipping drum, which may produce uneven drying results or longer cycle times. If you notice these symptoms, plan for belt replacement rather than waiting for a total breakdown.
To minimize risk, inspect the belt whenever you notice odd noises or reduced efficiency. At a minimum, check for visible wear after several years of service or after unusually heavy loads. Regular checks, even when it seems the unit is functioning normally, can prevent unexpected outages and improve reliability over the long term.
Choosing the right belt and model compatibility
Belt selection is model-specific. The belt must match the drum size, width, and the number of ribs or teeth on the belt, which is often printed on the belt itself. Start by recording your dryer's model number from the data plate (usually inside the door opening or on the back panel) or referencing the owner’s manual. When you purchase a new belt, verify the belt length and ribbed profile align with your model’s requirements. Mismatched belts can slip, fail early, or fail safety checks, so precision matters.
Consider keeping the old belt as a physical reference. Compare width, length, and rib spacing to ensure the new belt mirrors the original design. If available, consult the dryer manufacturer’s online resources or a reputable parts retailer’s compatibility chart. Easy DryVent notes that using the exact belt size for your model reduces the risk of improper tension and prolongs belt life.
If you’re uncertain about the belt size, contact a local appliance parts supplier with your model number. They can confirm the correct belt and help you avoid common mistakes like choosing a belt that’s too short or too long. Remember: the belt should tighten smoothly without binding when the drum is turned by hand.
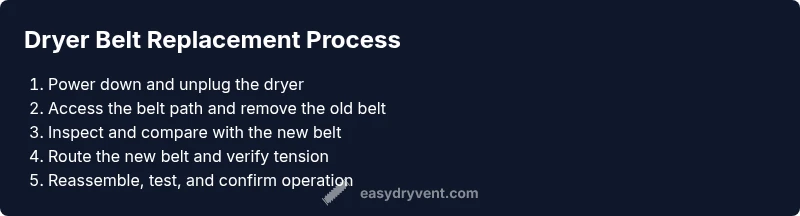
Step-by-step overview to fit the belt (high-level)
Fitting a dryer belt involves safely accessing the belt path, removing the old belt, and installing the new belt with correct routing. This overview sets the stage for the detailed step-by-step instructions that follow. You’ll want to verify the new belt is correct for your model and lay out the belt path before disassembly for easier reassembly.
Key considerations include protecting electrical components, managing screws and panels to avoid losing parts, and ensuring you rotate the drum to confirm the belt sits correctly on all pulleys after installation. With careful routing and alignment, you should see improved drum rotation and dryer performance once you test the unit.
Common mistakes and how to avoid them
Rushing the belt installation can lead to misrouting, pinch points, or a belt that doesn’t seat properly on the drum or pulleys. Another frequent error is failing to unplug the appliance or neglecting to test the belt after reassembly, which can hide issues until a cycle is started. To avoid these issues, take a moment to document belt routing with a photo before removal, and double-check the belt’s fit by rotating the drum by hand before plugging the unit back in. If your model uses a tensioner, ensure it is seated and functioning correctly before reassembly.
Finally, never force panels back into place. If you encounter resistance, stop, reassess routing, and verify all screws are accounted for. This careful approach minimizes damage to parts and reduces the risk of electrical hazards.
Tools & Materials
- New dryer belt (correct size for your model)(Check the model number and belt length; belts vary by drum size and rib pattern)
- Phillips screwdriver(For access panel screws)
- Flathead screwdriver(For prying panels or retaining clips)
- Nut driver or socket set(To remove drive belt pulley nut if present)
- Pliers(Helper for removing stubborn clips or hoses away from the belt path)
- Work gloves(Protect hands from sharp edges and hot components)
- Flashlight(Improve visibility inside the cabinet)
- Rag or small brush(Clean lint and debris from around pulleys and drums)
Steps
Estimated time: 45-60 minutes
- 1
Disconnect power and prep the dryer
Unplug the unit to ensure there is no electrical risk. Move the dryer away from the wall to access the rear and bottom panels, and gather your tools so you can work efficiently. If you have a gas dryer, confirm there is no gas line disruption before proceeding.
Tip: Label or photograph connections before disconnecting to simplify reassembly. - 2
Access the belt path
Remove the front panel or lower access panel according to your model. This typically involves removing a few screws. Lift or tilt the drum slightly to create space for belt removal, and ensure you don’t pinch any wiring.
Tip: Keep track of screws and their original locations to avoid misplacement. - 3
Remove the old belt
Note the routing of the belt as it sits around the drum and pulleys. Loosen the tensioner if present, slide the belt off the motor pulley, and remove it from the drum. Inspect the belt for cracks, glazing, or fraying.
Tip: Take a quick photo of the belt path for reference. - 4
Compare the new belt
Lay the new belt next to the old one to confirm width, length, and rib pattern match. If they differ, obtain the correct belt before continuing. A mismatched belt may slip or fail prematurely.
Tip: Double-check the model number and part number on the belt packaging. - 5
Route the new belt around the drum
Place the belt around the drum first, then guide it to the drive pulley and any idler pulley. Make sure the belt sits flat on the drum surface and sits squarely in the pulley grooves.
Tip: Keep tension on the belt when seating it on the drum to avoid slipping later. - 6
Reattach the motor pulley and tensioner
Position the belt to engage the motor pulley and resecure any tensioner or locking mechanisms. Rotate the drum by hand to verify the belt moves smoothly and stays in alignment across all pulleys.
Tip: If you feel binding, stop and recheck the belt routing. - 7
Reinstall front panel and lint trap
Reinstall the front panel, ensuring it seats flush and all screws are tightened. Return the lint trap and any ducts or hoses to their proper places, and confirm there are no loose parts that could rub the belt path.
Tip: Wipe away any loose lint from inside the cabinet to prevent debris near the belt. - 8
Test run and final checks
Plug the dryer back in and run a short cycle to observe belt operation. Listen for unusual noises and watch to ensure the drum rotates smoothly without slipping. If everything looks good, run a full dry cycle to confirm performance.
Tip: Monitor closely during the first real-use test; stop if you notice overheating or abnormal sounds.
Common Questions
Can I replace a dryer belt myself?
Yes, many belt replacements are doable by homeowners with basic tools. Follow the model-specific belt size and safety steps to avoid injury. If you’re unsure at any point, consult a professional.
Yes, you can usually replace a dryer belt yourself if you have the right tools and follow safety steps.
What if the drum won’t spin after replacement?
Recheck belt routing and tension. Verify the drum turns freely by hand and inspect the pulleys and motor for obstruction or damage. If needed, re-seat the belt or replace worn pulleys.
If the drum still won’t spin, inspect belt routing and pulleys, and test again after adjustments.
How do I know what belt size to buy?
Check the dryer's model number and refer to the manual or parts retailer’s compatibility chart. If in doubt, bring the old belt to a parts store for comparison.
Check your model number or bring the old belt to a parts store to confirm the correct size.
Is replacing a dryer belt dangerous?
There is a risk of electric shock if the dryer is not unplugged. Follow proper safety steps and, if uncomfortable, seek professional help.
There’s some risk if power isn’t disconnected; always unplug and follow safety steps.
How long does belt replacement take?
Most homeowners complete belt replacement in about 30-60 minutes, depending on model and panel access. Allow extra time for thorough testing.
Typically about 30 to 60 minutes, depending on model and access.
Can a damaged belt cause a fire?
A severely worn belt can overheat pulleys and nearby parts, but a properly replaced belt reduces this risk. Always inspect for signs of heat damage and replace promptly.
Worn belts can pose a risk, but replacing promptly minimizes danger.
Watch Video
Key Points
- Disconnect power before starting any repair.
- Verify belt size matches your model precisely.
- Route and seat the belt carefully around all pulleys.
- Test run the dryer to confirm proper operation.
- Use the correct belt and follow safety guidelines to avoid injury.