Heating Element Replacement Dryer: Step-by-Step Guide
Learn to safely perform a heating element replacement dryer task with this DIY-friendly guide from Easy DryVent. Diagnose failures, install a compatible replacement, and test performance to restore efficient drying.

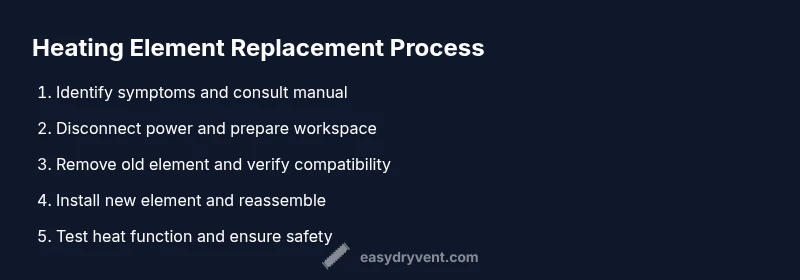
This guide shows homeowners how to replace a dryer's heating element safely and effectively. You'll learn how to diagnose a heater failure, disconnect power, access the element, replace with a compatible unit, and test. The process requires basic hand tools, a socket set, and a few safety precautions. Follow wiring diagrams and manufacturer's instructions.
Understanding the heating element and why it fails
The heating element is the hot coil inside your dryer's cabinet that generates warm air. Over time, stressed coils can break, insulation can degrade, or connections can corrode, leading to insufficient heat or no heat at all. Heating element failure is a common issue in older or heavily used dryers. According to Easy DryVent Team, addressing this problem promptly prevents longer drying times and potential lint buildup, which can raise fire risk. Knowing how the heating element operates helps you diagnose problems more accurately and avoid unnecessary replacements when a simple fix is possible.
Safety First: Prepare, unplug, and protect yourself
Before touching any dryer internals, unplug the dryer from the wall and switch off the circuit breaker. Wear safety glasses and gloves to guard against sharp edges and hot surfaces. If the dryer uses gas, ensure the area is well ventilated and avoid any ignition sources. Never bypass safety devices like thermal fuses or high-limit switches; they protect both you and your home from fires and overheating. If you’re unsure at any point, pause and consult the manufacturer’s manual or a licensed technician.
Tools and parts you'll need
Before starting, gather the following: • Replacement heating element compatible with your dryer model • Screwdrivers (Phillips and flat-head) • Nut drivers or socket set • Multimeter for continuity tests • Torx bits if required by your model • Wire crimp connectors or soldering gear as needed • Electrical tape and zip ties • The dryer's service manual or model-specific wiring diagram. Optional but helpful: replacement grommets, high-temperature silicone sealant, and a new rear panel gasket to ensure a proper seal after reassembly.
Diagnosing heating element failure
Common symptoms of a faulty heating element include no heat, insufficient heat, or a dryer that runs but never dries clothes fully. Start by checking the power supply: ensure the outlet has voltage and the dryer's plug is firmly seated. Then inspect the breaker for trips. With the dryer unplugged, use a multimeter to test the heating element for continuity; a broken coil shows no continuity. If the element tests bad, you’ll replace it. If it tests good but the dryer still won’t heat, other components like thermal fuses, thermostats, or the timer could be at fault. Easy DryVent Analysis, 2026, suggests verifying all related components to avoid unnecessary element replacements.
Removing the old heating element
Begin by accessing the element housing—this typically involves removing the back panel or the front kick panel depending on the model. Disconnect the wiring harness and note the wire colors and connector types for accurate reassembly. Remove the mounting screws or clamps securing the element housing, then carefully withdraw the old element. Inspect the area for signs of heat damage, melted insulation, or scorching around connectors, which could indicate broader issues. Keep track of small parts so nothing falls behind the drum.
Installing a new heating element and testing
Compare the new heating element to the old one to ensure compatibility with your dryer’s model and voltage rating. Install the new element in the reverse order of removal, reattach the wiring harness securely, and reseat any grommets or seals to prevent air leaks. Reassemble the cabinet, restore power, and run a heat test on a short cycle to confirm proper operation. If the dryer still won’t heat, double-check connections and test the thermal fuse. After a successful test, monitor the first load for even drying and avoid overloading the dryer as it breaks in.
Common mistakes and troubleshooting
Common mistakes include mixing up wire connections, sealing gaps with tape in places that require a gasket, and skipping a full diagnostic of thermostats and fuses. Do not replace the element without confirming model compatibility; an incompatible element can overheat or fail prematurely. If you notice persistent overheating, burning smells, or flickering heating, stop using the dryer and seek professional help. Regular maintenance—cleaning lint screens and ducts—helps the heating system perform efficiently and safely.
Tools & Materials
- Replacement heating element compatible with your dryer model(Verify model number and voltage (120V/240V) before purchase)
- Screwdrivers (Phillips and flat-head)(A variety of sizes improves access in tight spaces)
- Nut drivers or socket set(For removing mounting hardware)
- Multimeter(Test element continuity and circuit integrity)
- Wire crimps or soldering supplies(Secure wire connections with high-temp materials)
- Electrical tape or heat-shrink tubing(Insulate exposed conductors)
- Gloves and safety glasses(Personal protection against sharp edges and heat)
- Replacement grommets/seals (optional)(Maintain seal to prevent air leaks)
- Model-specific wiring diagram/manual(Essential for correct wiring and safety checks)
Steps
Estimated time: 60-90 minutes
- 1
Power down and unplug
Unplug the dryer from the outlet and switch off the circuit breaker to eliminate any risk of shock. If the dryer has a six- or four-prong connection, ensure the plug is fully disconnected and the outlet shows no voltage with a tester.
Tip: Double-check by testing the outlet and the dryer plug before touching any components. - 2
Access the heating element housing
Remove the dryer’s back panel or front kick panel according to the service manual to expose the heating element housing. Keep track of screws and panels to reinstall later.
Tip: Take a photo during removal to reference screw locations and wiring paths. - 3
Label and disconnect wiring
Label each wire and disconnect the harness from the heating element. Note wire colors and connector types to ensure exact reattachment later.
Tip: Use masking tape to label wires directly on the harness for clarity. - 4
Remove the old heating element
Unscrew mounting hardware and slide out the old element. Inspect the mounting grommets and seals for damage and replace if necessary.
Tip: Do not force the element; if it resist, recheck fasteners and fittings. - 5
Install the new element
Position the new heating element, secure it with the mounting hardware, and reconnect the wiring harness exactly as labeled.
Tip: Prefer high-temp-rated hardware and avoid overtightening which could crack components. - 6
Reassemble and seal
Reinstall the rear/front panel, ensuring all seals are seated to prevent air leaks. Restore power and set the dryer's cycle to test heat without loading clothes.
Tip: Check for any gaps or misaligned panels before running a test. - 7
Test heating function
Run a short cycle and verify heat output. Measure time to reach the set temperature and listen for abnormal noises or smells.
Tip: If heat is delayed, recheck wiring and fuses; if in doubt, pause and consult a professional. - 8
Final safety check and loading a test load
After a successful heat test, run a full dry cycle with a small load to confirm even drying and no overheating. Keep the lint filter clean for optimal airflow.
Tip: Document model, part numbers, and any observations for future maintenance.
Common Questions
What are common signs that the heating element has failed?
Common signs include no heat, very low heat, or longer-than-usual drying times. If the dryer runs but clothes stay damp, inspect the heating circuit, including the thermal fuse and thermostats, before replacing the element.
Common signs include no heat or longer drying times. Check the heating circuit and thermal fuse before replacing the element.
Is it safe to replace the heating element myself?
Yes, with proper precautions: unplug the unit, discharge capacitors if applicable, and follow the service manual. If you’re uncertain at any point, consult a licensed technician.
It can be safe if you unplug the unit and follow the manual; if unsure, get a professional.
How do I find a compatible heating element for my dryer model?
Locate the model number on the dryer’s data plate, then check the manufacturer’s list of compatible heating elements or consult a parts distributor with your model details.
Find the model number, then check compatible parts from the manufacturer or distributor.
Will replacing the heating element fix all heating issues?
Not always. If other components like thermostats, fuses, or the control board are faulty, you may still experience heating problems even with a new element.
Sometimes other parts cause heating issues; a full diagnostic helps identify the root cause.
How long does a heating element replacement typically take?
Most DIY replacements take about 60 to 90 minutes, depending on dryer access and model complexity. Allow extra time for testing and reassembly.
Most replacements take about an hour to an hour and a half with time for testing.
Should I worry about warranty after replacement?
Warranties vary by brand and service. If you perform the replacement yourself, check whether the warranty on the dryer or the replacement part remains valid and follow any manufacturer guidelines.
Warranties can vary; check guidelines before and after replacement.
Watch Video
Key Points
- Identify symptoms and test related components before replacement
- Use proper models and high-temp wiring practices
- Follow safety steps to prevent electric shock and fire risk
- Test heat function thoroughly after installation