DVE45R6100C Dryer Error Code: Urgent Troubleshooting Guide
Urgent, practical guide to dve45r6100c: learn what the error means, quick fixes you can perform safely, when to call a pro, and steps to prevent recurrence.

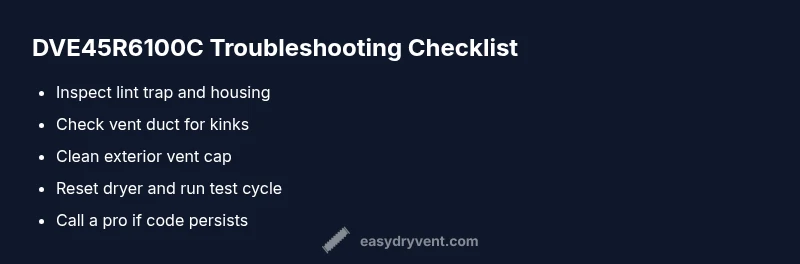
The dve45r6100c error means your dryer detected airflow or sensor trouble that could lead to overheating. The quickest fixes are to unplug, inspect the lint trap, verify vent clearance, and reset the control. If the code persists, stop using the dryer and contact a qualified technician for safe repair.
Understanding the DVE45R6100C Error Code and Urgent Implications
When a clothes dryer displays the dve45r6100c code, it signals that the appliance has detected a fault related to airflow or a sensor input. In practical terms, this means the dryer may be overheating or unable to exhaust moisture efficiently, which can escalate fire risk if left unaddressed. According to Easy DryVent, this code is most commonly triggered by lint buildup, a blocked vent, or a compromised exhaust path. The Easy DryVent team found that the presence of long drying cycles, especially in humid or dusty environments, correlates with higher incidence of airflow-related codes. Homeowners should treat this as urgent, unplug the unit if you suspect a blockage, and avoid running the dryer until the path is clear and the sensors verified.
Note: While codes vary by brand, dve45r6100c consistently points to airflow or sensor issues. Prioritize exhaust access and lint control before attempting heat-related tests, and always follow safety precautions.
Quick Visual Diagnostic: What You Can Observe
Look for signs like unusually long dry times, clothes that remain damp after a full cycle, or a dryer that feels excessively hot to the touch. You may also hear cycling that sounds irregular, or see the drum light dimming as airflow falters. Start with the lint screen: if it’s heavily soiled, remove lint and clean the housing. Then inspect the exterior vent for blockages, nests, or crushed ducts. A restricted path is a common trigger for dve45r6100c and should be addressed promptly to prevent overheating.
Immediate Actions to Stabilize Safety and Prevent Damage
First, power down the dryer by unplugging it, or switch off the circuit breaker to remove all energy sources. If you can safely access the vent, pull the unit slightly away from the wall to inspect the duct. Clean the lint trap thoroughly and inspect the blower housing for lint buildup or fiber accumulation near moving parts. Do not attempt a test run until the vent path is clear and the exterior vent opens freely to allow proper exhaust.
Most Common Causes in Home Dryers for This Code
- Lint buildup inside the lint trap housing or vent hose (high likelihood).
- Blocked or kinked vent duct or exterior vent cap (medium).
- Damaged ductwork or crushed vent lines (medium).
- Sensor, thermostat, or control board fault (low).
These causes are not mutually exclusive; multiple issues can occur simultaneously, especially in older installations with degraded ductwork or frequent lint buildup. Addressing airflow is typically the most effective first step.
How to Verify Venting and Lint Build-Up
Begin with the lint screen: remove and clean, then inspect the area around the blower housing for hidden lint. Trace the vent path from the dryer to the outside, checking for kinks, crushed sections, or disconnections. If possible, disconnect a section of vent (only with power off) to look for compacted lint inside the duct. Go outdoors to inspect the vent hood; ensure it slides open and is unobstructed by debris. A clear vent path often resolves dve45r6100c without expensive repairs.
Basic Reset and Filter Maintenance
Reset the dryer by unplugging for a minute or two, then plugging back in and reselecting your cycle. Run a short test cycle with no load to observe whether the airflow sounds steady and the drum spins evenly. Clean the lint screen after every use and perform a more thorough vent check every 6–12 months, depending on usage. Regular maintenance reduces the risk of recurrence and extends the life of the appliance.
When to Consider Replacing Components and Costs
If you identify a damaged duct, crushing, or significant lint buildup that cannot be cleared, replacement of sections of the vent may be required. Sensor or thermostat failures generally require professional diagnosis and part replacement. Cost ranges vary by location and extent of work: simple vent cleaning may be in the tens to low hundreds of dollars, while duct repair or sensor replacement can rise into the hundreds or low thousands, depending on parts and labor.
Prevention and Maintenance Plan
Create a simple ongoing maintenance routine: inspect the lint trap after every load, clean the vent at least every 6–12 months, and replace any damaged ducts promptly. Use the dryer with appropriate load sizes to avoid overworking the motor and heat. Keep the area around the dryer free of dust and debris to minimize intake contamination. Regular maintenance lowers the chance of dve45r6100c recurring and improves overall performance.
Steps
Estimated time: 25-60 minutes
- 1
Power down and unplug
Unplug the dryer or switch off the circuit breaker to remove all power. This prevents shock or short circuits while you inspect the vent and lint areas. If you can access a service panel safely, disconnect power to the unit before touching internal components.
Tip: Use a powered flashlight and keep track of screws and panels; take photos for reassembly. - 2
Inspect lint trap and housing
Remove the lint screen and clean it completely. Check the housing for hidden lint buildup that can limit airflow. Vacuum or brush away lint from the blower housing area, paying attention to corners near the drum seal.
Tip: Have a small brush or vacuum with a crevice tool ready to reach tight spaces. - 3
Check the vent path
Follow the duct from the dryer to the outside. Look for kinks, crushed sections, or disconnected joints. If you can safely access the duct, remove any lint blockages using a vent brush or vacuum; do not forcefully bend or crush the duct back into shape.
Tip: Avoid using metal objects that could damage the duct; use a flexible vent brush instead. - 4
Test the exterior vent
Go outdoors to inspect the vent cap. Remove any leaves or nests and ensure the damper opens freely when air is pushed from the inside. Reconnect the vent path and confirm there are no leaks around joints.
Tip: Perform a gentle airflow test with the dryer running on a cool/unloaded cycle. - 5
Reset and run a test cycle
Reconnect power and set the dryer to a short cycle with no load. Observe airflow and temperature; if the unit runs normally and the code does not reappear, you may have cleared a partial blockage. If the code returns, proceed to professional service.
Tip: Document the steps you took; this helps when talking to a technician.
Diagnosis: Dryer displays dve45r6100c and stops mid-cycle or overheats
Possible Causes
- highRestricted vent or lint buildup
- mediumDamaged or blocked vent duct
- lowSensor or thermostat fault
Fixes
- easyClean lint trap and exhaust vent; remove lint from vent hose
- mediumInspect and clear the vent duct and external vent cap; repair or replace damaged ducts
- hardTest/replace faulty sensor or thermostat; consult manual and professional
Common Questions
What does the dve45r6100c code mean on a dryer?
The dve45r6100c code indicates airflow or sensor trouble, which can lead to overheating. It usually requires checking vents and lint buildup before proceeding with repairs.
The dve45r6100c code means airflow or sensor trouble that can cause overheating. Check the vent and lint buildup, then reset the unit.
Is it safe to run the dryer after seeing this code?
Not until you address the blockage or sensor fault. Running it could worsen overheating and raise fire risk.
No, don’t run the dryer until you clear blockages and verify sensors are functioning.
What are typical repair costs for dve45r6100c repairs?
Costs vary by fix. Vent cleaning is usually inexpensive, while duct replacement or sensor repair can rise into higher ranges depending on parts and labor.
Prices vary; simple vent cleaning is affordable, more extensive repairs cost more.
Can I fix it myself safely?
You can perform lint and vent checks yourself, but avoid electrical or sensor work unless you’re confident and have safety measures in place.
You can do basic lint and vent checks, but electrical components should be handled by a pro.
How often should I clean the lint trap and vent to prevent this code?
Lint trap should be cleaned after every load; vent cleaning every 6–12 months depending on usage helps prevent recurrence.
Clean the lint trap after every use and service the vent annually or as needed.
When should I replace the vent or dryer parts?
If ducts are crushed or discolored, replace. Sensors or thermistors may require professional service and part replacement.
Replace damaged ducts and consult a pro for sensor or thermostat issues.
Watch Video
Key Points
- Inspect and clean the vent path regularly.
- Address lint buildup before attempting complex repairs.
- Never ignore overheating indicators or persistent error codes.
- Consult a professional if the code persists after basic maintenance.