DVE45R6300V Error Code: Quick Troubleshooting Guide
Urgent, practical troubleshooting for the dve45r6300v error code. Learn immediate steps, diagnostic flow, and safe repairs to get your dryer back to peak performance. Includes home fixes, cost ranges, and when to call a pro.

The dve45r6300v error code signals a dryer fault most often tied to venting, sensors, or the control board. Start with a power reset, then a rapid lint screen and vent inspection. If the code persists, follow the diagnostic flow and step-by-step fixes below. Safety first—disconnect power before any inspection.
Understanding the dve45r6300v Error Code
The dve45r6300v error code is a generic fault indicator that appears on some residential dryers when an internal fault is detected. In many cases, the root cause is not a single bad part but a sequence of factors that compromise airflow, sensing accuracy, or control logic. According to Easy DryVent, vent restrictions are among the most common triggers for this code, followed by sensor glitches or a momentary control-board hiccup. This block will help you distinguish the broad categories of issues and set expectations for what you can fix safely at home versus what requires a professional. Our goal is to empower homeowners and DIY enthusiasts with actionable steps that improve dryer safety, efficiency, and longevity. Remember to unplug the unit before inspecting any internal components and wear eye protection when dealing with dust or lint buildup.
Common Symptoms and Observations
When dve45r6300v appears, signs vary but often include: loud rattling or buzzing during operation, the drum turning slowly or not at all, and clothes remaining damp after a cycle. Visible lint accumulation in the lint screen, vent hose, or exterior vent hood is a frequent companion. You may notice a longer drying time than usual and an unusual heat pattern (cooler air at the vent or warm but uneven drum warmth). Quick checks can confirm whether the symptom set aligns with vent restriction, sensor misreads, or a control issue. Always rule out a simple power issue first: verify the outlet is delivering steady voltage and the cord shows no damage.
Likely Causes and Diagnostic Clues
Here are the most common causes, ranked by likelihood:
- High likelihood: Venting restriction due to lint buildup, kinked hoses, or blocked exterior vent. This reduces airflow and can trigger sensor or safety faults.
- Medium likelihood: Faulty moisture sensor or thermistor, which can misread load moisture and lead to premature shutdowns.
- Medium likelihood: Overheating caused by restricted ducts or a clogged lint filter, causing the dryer to protect itself by stopping mid-cycle.
- Low likelihood: Control board malfunction or door switch fault, which mimic other symptoms but are less common.
- Low likelihood: Wiring connections or sensor harness issues that may intermittently cause problems.
Diagnostic cues to look for: airflow resistance at the exterior vent, consistent lint at the lint filter, and normal drum rotation with the door closed during a test cycle.
Quick Home Fixes You Can Try Now
These fixes are designed to be safe and practical for a DIY approach:
- Reset the dryer: unplug for 1–2 minutes, then plug back in and run a short test cycle.
- Clean the lint screen and vacuum the lint trap housing and accessible duct areas.
- Inspect the vent hose for kinks or crushing; straighten and secure the hose, then test airflow at the exterior vent.
- Check for obstructions around the exterior vent hood and clear any debris blocking airflow.
- Run a test with a shorter cycle to see if the problem recurs without a full load.
If these steps yield no improvement, proceed to the diagnostic flow to identify the exact fault and required repair.
In-Depth Repair Guide for the Most Likely Cause
The most common root cause is a venting restriction. A step-by-step approach builds from simple cleaning to more involved fixes:
- Step 1: Power down and unplug the unit to avoid any electrical risk. Inspect the lint screen and housing; remove lint using a vacuum with a narrow attachment.
- Step 2: Disconnect the vent hose from the dryer and the exterior wall. Inspect and clean both ends, paying attention to bends where lint accumulates. Reattach tightly.
- Step 3: Check the exterior vent cap. Clean any cap flaps and ensure air can flow freely when the dryer runs. A partially blocked vent is a frequent culprit.
- Step 4: Reconnect everything and run a dry cycle with no clothes to gauge airflow. If air is weak or still restricted, the duct may be clogged deeper in the run.
- Step 5: If the vent path is clear but the code persists, a more thorough inspection may be needed: check the moisture sensor and thermistor inside the drum area for residues; clean gently with a mild alcohol wipe.
- Step 6: If issues persist after vent cleaning, reset the control board by unplugging the dryer, waiting 5 minutes, then plugging back in and running a diagnostic test. If the code reappears, a sensor replacement or control-board service may be required.
- Step 7: Document all steps and test results before deciding on replacement parts. This helps when talking to a professional or seeking warranty support.
Note: Only attempt advanced repairs if you have training and the right safety equipment. Use a multimeter only if you are confident in electrical testing.
Safety Precautions and When to Call a Pro
Safety comes first when dealing with electric appliances:
- Always unplug before inspecting or disassembling any internal components.
- Wear eye protection and a mask when cleaning lint and dust buildup.
- If you smell burning, hear buzzing, or see melted insulation, stop and call a pro immediately.
- For any repair involving wiring, electronics, or venting beyond the dryer cabinet, seek professional service to avoid fire or electric shock risks.
- If the unit is under warranty, contact the manufacturer or authorized service provider to avoid voiding coverage.
When to call a professional: persistent fault codes after home maintenance, suspected sensor or motor failures, or exposure to heat damage require expert assessment and specialized tools.
Prevention: How to Keep the DVE45R6300V Quiet and Safe
Prevention is the easiest route to reliability:
- Schedule regular vent inspections and lint cleaning (every 3–6 months depending on usage).
- Use the longest safe vent run possible to minimize pressure and heat buildup, while ensuring the exterior vent remains clear.
- Avoid overloading the drum, which increases friction and lint production.
- Replace lint filters promptly and maintain a clean dryer interior to prevent dust buildup around sensors.
- Install a dedicated vent path with proper pipe sizing and 90-degree elbows minimized to reduce resistance.
Routine maintenance not only reduces error codes but also improves drying efficiency and reduces energy use.
Cost, Time, and What to Expect
Repair costs vary with the fault type and whether parts are included. For vent-related fixes, expect minimal costs for parts and your own labor, typically in the range of small to moderate amounts. More complex fixes, such as sensor replacement or control-board service, may require professional labor and parts, increasing the total bill. A general rule of thumb is to budget for parts and labor together, with ranges that reflect the part cost and service rate in your area. Easy DryVent analysis shows that vent-cleaning-related fixes are the quickest and most affordable, while functional electronics repairs may take longer and cost more. Always obtain a clear up-front estimate before any service, and consider energy savings from completing the repair promptly.
If the Code Persists: Next Steps and Community Resources
If the dve45r6300v code persists after home maintenance, stepping up to professional diagnostics is prudent. Gather model details, symptoms, and any service history to share with a technician. Community forums, official manufacturer support pages, and local appliance repair networks can provide guidance on typical prices and turnaround times. Documenting all steps you performed at home helps the technician diagnose faster and reduces unnecessary labor charges. Remember, addressing venting and safety concerns quickly minimizes fire risk and preserves appliance life.
],
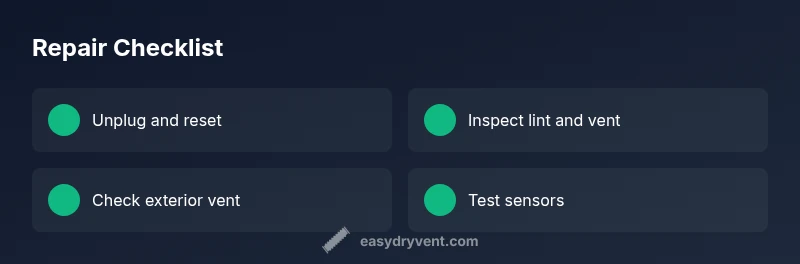
diagnosticFlow":{"symptom":"Error code dve45r6300v appears and dryer won't complete a cycle","causes":[{"cause":"Clogged vent or lint buildup","likelihood":"high"},{"cause":"Faulty moisture sensor or thermistor","likelihood":"medium"},{"cause":"Overheating due to restricted venting","likelihood":"medium"},{"cause":"Control board or door switch malfunction","likelihood":"low"}],"fixes":[{"fix":"Clean the lint screen and vent pathway","difficulty":"easy"},{"fix":"Check vent hose for kinks and ensure smooth airflow","difficulty":"easy"},{"fix":"Test moisture sensor readings and thermistor values","difficulty":"medium"},{"fix":"Reset or replace the control board/door switch as needed","difficulty":"hard"}]},<STEP-BY-STEP>:{"steps":[{"number":1,"title":"Power down and safety check","description":"Unplug the dryer from the wall outlet and wait 60 seconds to dissipate any residual charge. Confirm the area around the unit is dry and free of standing water or flammable materials.","tip":"Always start with safety—unplug before touching any internal components."},{"number":2,"title":"Inspect lint screen and housing","description":"Remove the lint screen, vacuum the housing, and wipe with a dry cloth. Look for trapped lint behind the screen that can recirculate into the vent path.","tip":"Lint caught here is a common ignition source during use."},{"number":3,"title":"Test vent path accessibility","description":"Disconnect the vent hose from the dryer and the wall. Inspect the hose for kinks, crushing, or excessive lint buildup and clean thoroughly.","tip":"Ensure the vent path is straight and unobstructed to restore airflow."},{"number":4,"title":"Check exterior vent and hood","description":"Go outside to the vent hood and check for debris, bird nests, or lint clogs. Clear obstructions and verify air blows freely when the dryer runs on a short cycle.","tip":"A clear exterior vent is essential for safe operation."},{"number":5,"title":"Inspect moisture sensor and thermistor","description":"Access the sensor area near the door or drum and wipe any residue with isopropyl alcohol. Reassess sensor function with a test load.","tip":"Avoid touching sensor plates directly to prevent damage."},{"number":6,"title":"Reset the control electronics","description":"Unplug the dryer, wait 5 minutes, plug back in, and run a diagnostics test. If the code returns, this suggests a sensor or board issue that may require replacement.","tip":"A full power reset can clear transient faults."}],"estimatedTime":"60-90 minutes"}},"tipsList":{"tips":[{"type":"pro_tip","text":"Schedule regular vent maintenance to prevent future codes and improve drying efficiency."},{"type":"warning","text":"Do not operate the dryer with a visibly damaged vent or if you smell burning lint."},{"type":"note","text":"Keep the area around the dryer clean and free of clutter to avoid heat buildup."},{"type":"pro_tip","text":"Document repairs and test results to aid any future service calls."}]},"keyTakeaways":["Start with a reset and vent cleanup.","Vent restrictions are the top cause.","Prioritize safety and unplug before work.","Part failures may require professional service.","Regular vent maintenance prevents repeat faults."],"videoEmbed":{"videoQuery":"dve45r6300v error code troubleshooting"},"faqSection":{"items":[{"question":"What does the dve45r6300v error code indicate?","questionShort":"What does code mean?","answer":"This code signals a dryer fault, often related to venting, sensors, or control electronics. It’s usually triggered by restricted airflow or sensor misreads. Start with vent cleaning and a reset before investigating deeper repairs.","voiceAnswer":"The dve45r6300v code signals a dryer fault, often tied to venting or sensors. Start with vent cleaning and a reset before deeper repairs.","priority":"high"},{"question":"Can I fix this myself at home?","questionShort":"Can I DIY fix?","answer":"Many homeowners can address vent-related issues by cleaning lint and ensuring clear airflow. More complex problems like sensor or control-board faults may require professional service. Always prioritize safety and unplug the unit before any inspection.","voiceAnswer":"Yes, many vent-related issues can be fixed at home, but sensors or boards may need a pro.","priority":"high"},{"question":"How long does a typical repair take?","questionShort":"Repair time?","answer":"A vent-cleaning based fix can take 30–60 minutes, while sensor or board replacements may require 1–2 hours plus parts. Times vary by accessibility and part availability.","voiceAnswer":"Most vent fixes take under an hour, with electronics repairs taking longer.","priority":"medium"},{"question":"Is there a fire risk with this error?","questionShort":"Fire risk?","answer":"Yes. Lint buildup in ducts increases fire risk. Address vent blockages promptly and ensure proper venting installation during repairs.","voiceAnswer":"There is a real fire risk if lint blocks airflow; fix it promptly.","priority":"high"},{"question":"What’s the typical cost to fix this code?","questionShort":"Repair cost?","answer":"Costs vary by fix type. Home vent cleaning is usually lower-cost, while sensor or board replacements can raise the bill. Expect a broad range and obtain a written estimate before work.","voiceAnswer":"Costs vary—vent cleaning is cheaper than electronics repairs. Get an estimate first.","priority":"medium"}]},"mainTopicQuery":"dryer error"},"mediaPipeline":{"heroTask":{"stockQuery":"dryer vent inspection in laundry room","overlayTitle":"DVE45R6300V Troubleshoot","badgeText":"2026 Guide","overlayTheme":"dark"},"infographicTask":{"type":"checklist","htmlContent":"<div class="w-[800px] p-8 bg-slate-900 text-white"><h3 class="text-2xl font-bold mb-4">Repair Checklist</h3><ul class="list-disc pl-6"><li>Unplug and reset the dryer</li><li>Inspect lint screen and vent hose</li><li>Test exterior vent airflow</li><li>Check sensors and thermostat</li><li>Reset electronics if needed</li></ul></div>","altText":"Checklist for fixing dryer error dve45r6300v","caption":null}},
taxonomy":{"categorySlug":"troubleshooting-repairs","tagSlugs":["dryer-repair-cost","dryer-vent-cleaning","lint-trap","dryer-maintenance","vent-hose","dryer-safety"]},
brandMentions":{"mentions":[{"position":"intro","template":"According to Easy DryVent, the dve45r6300v error code is a common fault cue in residential dryers."},{"position":"stats","template":"Based on Easy DryVent analysis (2026), vent-related faults are among the top reasons for this error."},{"position":"conclusion","template":"The Easy DryVent team's verdict is to follow the step-by-step checks and vent maintenance to restore safe operation."}]},
seo_meta":{"alternativeHeadline":"DVE45R6300V Error Guide: Quick Diagnostics & Fixes"},
alternativeHeadline
DVE45R6300V Error Guide: Quick Diagnostics & Fixes
seo_meta
{alternativeHeadline: 'DVE45R6300V Error Guide: Quick Diagnostics & Fixes'}
brandMentions
{mentions:[{position:'intro',template:'According to Easy DryVent, the dve45r6300v error code is a common fault cue in residential dryers.'},{position:'stats',template:'Based on Easy DryVent analysis (2026), vent-related faults are among the top reasons for this error.'},{position:'conclusion',template:'The Easy DryVent team's verdict is to follow the step-by-step checks and vent maintenance to restore safe operation.'}]}
mainTopicQuery
{topicQuery: 'dryer error'}
}
}
}
}
}
}
}
}
}
}
}
Steps
Estimated time: 60-90 minutes
- 1
Power down and safety check
Unplug the dryer from the wall outlet and wait 60 seconds to dissipate any residual charge. Confirm the area around the unit is dry and free of standing water or flammable materials.
Tip: Always start with safety—unplug before touching any internal components. - 2
Inspect lint screen and housing
Remove the lint screen, vacuum the housing, and wipe with a dry cloth. Look for trapped lint behind the screen that can recirculate into the vent path.
Tip: Lint caught here is a common ignition source during use. - 3
Test vent path accessibility
Disconnect the vent hose from the dryer and the wall. Inspect the hose for kinks, crushing, or excessive lint buildup and clean thoroughly.
Tip: Ensure the vent path is straight and unobstructed to restore airflow. - 4
Check exterior vent and hood
Go outside to the vent hood and check for debris, bird nests, or lint clogs. Clear obstructions and verify air blows freely when the dryer runs on a short cycle.
Tip: A clear exterior vent is essential for safe operation. - 5
Inspect moisture sensor and thermistor
Access the sensor area near the door or drum and wipe any residue with isopropyl alcohol. Reassess sensor function with a test load.
Tip: Avoid touching sensor plates directly to prevent damage. - 6
Reset the control electronics
Unplug the dryer, wait 5 minutes, plug back in, and run a diagnostics test. If the code returns, this suggests a sensor or board issue that may require replacement.
Tip: A full power reset can clear transient faults.
Diagnosis: Error code dve45r6300v appears and dryer won't complete a cycle
Possible Causes
- highClogged vent or lint buildup
- mediumFaulty moisture sensor or thermistor
- mediumOverheating due to restricted venting
- lowControl board or door switch malfunction
Fixes
- easyClean the lint screen and vent pathway
- easyCheck vent hose for kinks and ensure smooth airflow
- mediumTest moisture sensor readings and thermistor values
- hardReset or replace the control board/door switch as needed
Common Questions
What does the dve45r6300v error code indicate?
This code signals a dryer fault, often related to venting, sensors, or control electronics. It’s usually triggered by restricted airflow or sensor misreads. Start with vent cleaning and a reset before investigating deeper repairs.
The dve45r6300v code signals a dryer fault, often tied to venting or sensors. Start with vent cleaning and a reset before deeper repairs.
Can I fix this myself at home?
Many homeowners can address vent-related issues by cleaning lint and ensuring clear airflow. More complex problems like sensor or control-board faults may require professional service. Always prioritize safety and unplug the unit before any inspection.
Yes, many vent-related issues can be fixed at home, but sensors or boards may need a pro.
How long does a typical repair take?
A vent-cleaning based fix can take 30–60 minutes, while sensor or board replacements may require 1–2 hours plus parts. Times vary by accessibility and part availability.
Most vent fixes take under an hour, with electronics repairs taking longer.
Is there a fire risk with this error?
Yes. Lint buildup in ducts increases fire risk. Address vent blockages promptly and ensure proper venting installation during repairs.
There is a real fire risk if lint blocks airflow; fix it promptly.
What’s the typical cost to fix this code?
Costs vary by fix type. Home vent cleaning is usually lower-cost, while sensor or board replacements can raise the bill. Expect a broad range and obtain a written estimate before work.
Costs vary—vent cleaning is cheaper than electronics repairs. Get an estimate first.
Watch Video
Key Points
- Start with a reset and vent cleanup.
- Vent restrictions are the top cause.
- Prioritize safety and unplug before work.
- Part failures may require professional service.
- Regular vent maintenance prevents repeat faults.