Dryer and Washer Repair: DIY vs Professional Solutions
A data-driven comparison of DIY dryer and washer repair versus professional service, with practical maintenance tips, cost ranges, safety considerations, and maintenance best practices for homeowners.

DIY repair for a dryer or washer can save time and money on simple fixes, but it carries safety risks and may void warranties. For complex issues or safety-critical components, professional repair is usually the safer, faster choice. The best approach is to assess the problem and choose DIY for straightforward tasks, or hire a pro for gas dryers, electrical faults, or suspected warranty-covered issues.
Overview: DIY Repair vs Professional Repair
When facing dryer and washer problems, homeowners typically choose between two paths: DIY repair and professional repair. Both options have merits, depending on the issue, your skill level, and safety considerations. According to Easy DryVent, understanding the scope of the failure and the potential risks helps you decide the most effective route, balancing cost, downtime, and safety. The Easy DryVent team found that most common maintenance tasks can be tackled by confident DIYers with proper precautions, while more complex or safety-critical faults benefit from professional intervention. This article compares the two options in terms of cost, time, risk, and outcomes, and provides practical steps to help you choose wisely for dryer and washer repair.
When DIY Repair Makes Sense
DIY repair is suited for straightforward maintenance tasks or fixes that you can safely perform without specialized tools. For laundry appliances, this often means routine maintenance, basic cleaning, and minor component checks. The goal is to extend the life of your units and prevent small issues from becoming larger problems. Practical DIY work should focus on items where you can verify symptoms, follow the user manual, and isolate the issue without posing a safety hazard. Easy DryVent emphasizes starting with the manufacturer’s guidance, inspecting accessible components, and stopping if you encounter unfamiliar wiring, gas connections, or high-voltage parts. If done carefully, DIY fixes can be effective and educational for homeowners and DIY enthusiasts.
When to Call a Professional
Professional repair is recommended for safety-critical problems or issues involving electrical safety, gas lines, refrigerant systems, or sealed components. If you identify gas-related odors, persistent unusual noises, overheating, or error codes that you cannot confidently diagnose, a licensed technician should handle the repair. Pro technicians also bring warranty considerations into play: many manufacturers and service plans require professional service to preserve coverage. The Easy DryVent team notes that a professional diagnosis can prevent misdiagnosis, avoid potential damage, and ensure that repairs comply with local codes and safety standards.
Common Failure Modes in Laundry Appliances
Dryers commonly present issues such as no heat, failure to start, or the drum not turning. Washers can fail to drain, spin, or fill properly, or leak water. Noting specific symptoms helps narrow possibilities: a dryer that runs but doesn’t heat may indicate a heating element or thermal fuse problem; a washer that shakes or leaks could point to belt or pump issues. Understanding typical failure modes helps you decide whether a DIY fix is feasible or if a pro should intervene. Consistent symptom documentation accelerates diagnosis and reduces unnecessary part replacements.
Tools and Safety Essentials
A basic toolset, a multimeter, and protective gear are essential for DIY repair. For vent-related tasks, a dryer vent cleaning kit and a small brush can improve efficiency and safety. Always unplug the appliance, turn off gas if applicable, and follow manufacturer warnings. When dealing with electrical components or high-heat areas, caution is critical. Easy DryVent recommends an upfront safety assessment: know your limits, read the manual, and avoid steps that require live wiring, gas connections, or refrigerant handling without proper credentials.
Step-by-Step: Basic Vent Cleaning and Belt Check
Follow these steps for common DIY tasks that do not require professional service:
- Unplug the appliance and disconnect the venting hose from the back of the dryer. 2) Use a vent brush to clean the vent duct and lint trap housing, removing built-up lint. 3) Inspect the drive belt for cracks or wear; if you find damage, replace the belt following the manufacturer’s instructions. 4) Reassemble, reconnect venting, and run a test cycle with a thin towel to catch any residual lint. 5) If the dryer still doesn’t heat or the belt slips, seek professional help. This routine maintenance helps prevent overheating and reduce fire risk.
Troubleshooting vs Diagnosis: What’s Feasible at Home
Home troubleshooting focuses on symptom observation and safe, low-risk tasks. Diagnosis, however, often requires testing circuits, reading diagnostic codes, and testing components under load. When you encounter unfamiliar codes or suspect a faulty control board, it’s wise to stop and consult a professional. Documentation of symptoms, noises, smells, and error codes speeds up the diagnostic phase and improves repair accuracy.
Cost and Time Considerations: DIY vs Pro
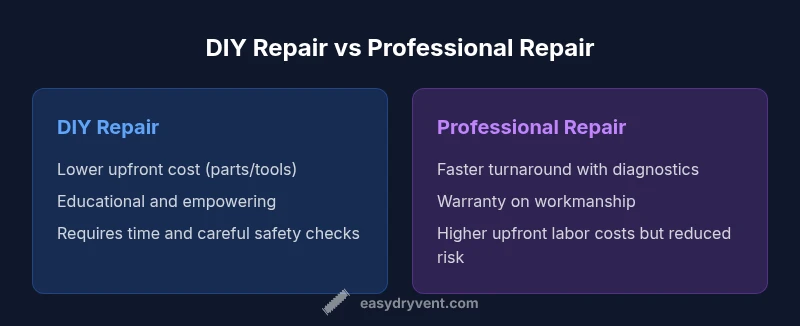
DIY repairs generally cost less in parts and tools and can be completed on your schedule, but time investment and trial-and-error may extend the process. Professional repair includes labor costs but offers faster turnaround, diagnostic accuracy, and often a warranty on workmanship. When weighing costs, consider the value of your time, the potential risk of misdiagnosis, and any warranty implications. Easy DryVent emphasizes that savings vary with the issue and your skill level, so plan for both effort and outcome.
Warranty and Service Guarantees: What to Expect
Many manufacturers require authorized service to keep warranties valid. DIY work performed on a unit under warranty can void coverage for certain components or the entire appliance. Before starting a DIY repair, check your warranty terms and service agreements. If you are unsure, contact the manufacturer or your service plan provider to confirm what is covered and for how long. The warranty implications are a critical factor when deciding between DIY and professional repair.
Maintenance Habits to Extend Life
Proactive maintenance can dramatically reduce the likelihood of breakdowns. Clean the lint screen regularly, inspect the vent duct for blockages, and schedule periodic professional inspections for gas appliances or high-use washers. Use proper detergents and avoid overloading the washer, which stresses belts and pumps. Keep the area around both appliances clean and dry to reduce slip and electrical hazards. Routine checks can extend appliance life and improve drying performance.
Real-World Scenarios and Checklists
Scenario A: Dryer not heating
- Check: power supply, circuit breaker, venting, and lint buildup before contacting a pro.
- Checklist: confirm there is no error code, inspect the vent, and test with a safety-first approach. Scenario B: Washer not draining
- Check: pump screen, drain hose kinks, and detergent residue.
- Checklist: run a diagnostic cycle if available, verify pump operation, and consider professional help if not resolved. Real-world checklists help homeowners decide when to tackle a task themselves or seek professional assistance. These checklists focus on safety and efficiency and align with the practical guidance from Easy DryVent.
How to Prepare for a Repair Appointment
Before booking a service visit, gather essential information: model and serial numbers, a concise description of symptoms, any error codes, and a list of recent repairs or maintenance. Photograph any visible damage and prepare access to the area around the appliances. This preparation speeds up the diagnostic process and helps the technician bring the right parts the first time. For safety reasons, confirm that gas shutoff valves are accessible if you suspect a gas appliance issue. A well-prepared homeowner can reduce downtime and minimize service costs by enabling quick, accurate diagnostics.
Comparison
| Feature | DIY Repair | Professional Repair |
|---|---|---|
| Cost range | $50–$300 for parts/tools; labor is your time | $100–$500+ for labor; parts vary by issue |
| Turnaround time | Same day to 2–3 days for parts and testing | 2–5 days depending on scheduling and parts backorder |
| Skill level required | Low to moderate for simple tasks | High for gas, sealed systems, or complex electronics |
| Warranty/guarantee | Often no warranty on DIY work; limited part warranty | Typically 90 days–1 year on workmanship; parts may have manufacturer warranty |
| Safety risk | Moderate risk if dealing with electrical components or heating elements | Lower personal safety risk when performed by a licensed tech |
| Best for | Minor fixes, maintenance tasks, and learning | Complex faults, safety-critical repairs, or uncertain diagnoses |
The Good
- Lower upfront costs for simple fixes
- Educational and empowering for homeowners
- Flexible scheduling and rapid starts on small tasks
- Opportunity to prevent future issues with proactive maintenance
- Immediate action for minor problems
Negatives
- Higher long-term risk of damaging components if misdiagnosed
- Safety hazards with electrical, gas, or refrigerant components
- Potential warranty voiding on DIY repairs
- Time-intensive and may require repeated attempts
DIY is best for simple, clearly diagnosed issues; professional repair is recommended for safety-critical faults or complex diagnostics
Choose DIY for straightforward problems and learning, but defer to a pro for gas appliances, electrical faults, or ambiguous diagnostics to minimize risk and ensure lasting results.
Common Questions
Is DIY repair safe for gas dryers?
Gas dryers involve fuel lines and combustion safety. DIY work on gas components should be limited to non-hazardous cleaning and inspection tasks. If you detect any gas odor or potential gas line issues, contact a licensed technician immediately and do not attempt gas-related repairs yourself.
Gas dryers require professional handling for anything beyond basic cleaning. If you smell gas or suspect a line issue, call a licensed technician now.
What tasks can I safely handle on a clothes washer?
You can handle basic maintenance like cleaning the lint trap, running a cleaning cycle, inspecting hoses for wear, and clearing minor clogs from accessible areas. Avoid opening sealed components or handling electrical boards without proper training.
Basic maintenance is usually safe for washers, like cleaning and hose checks. Avoid opening sealed parts or electrical boards unless you’re trained.
How long does a typical professional repair take?
Most professional repairs take a few hours to a day, depending on diagnosis complexity and part availability. The technician may need to order parts, which could extend the turnaround. Clear symptom reporting helps speed this process.
Most repairs are completed within a day, but parts availability can add time.
Are there warranty considerations for DIY repairs?
DIY repair can affect warranty coverage. Manufacturer terms often require professional service to keep warranties valid. Always verify warranty terms before proceeding with DIY work.
DIY work can void warranties; check terms before you start.
What are common signs that I should call a professional?
Signs include persistent no-heat in a dryer, gas odors, unusual smells, electrical shocks, frequent error codes, and complex mechanical noises. If you’re unsure about the fault or safety risks, a professional diagnosis is prudent.
Call a pro for gas smells, electrical risks, or unfamiliar error codes.
Do I need special tools or manuals for DIY repair?
Basic tools and the appliance manual are usually enough for simple tasks. For vent cleaning or belt replacement, use manufacturer-approved parts and follow safety guidelines. If you lack a multimeter or the correct part, seek professional help.
A basic toolkit and the manual cover most simple tasks; more complex diagnostics require professional tools.
Key Points
- Assess risk and read manuals before starting
- Document symptoms clearly to aid diagnosis
- Choose DIY for simple tasks; call a pro for safety-critical issues
- Understand warranty implications before DIY
- Maintain regular cleaning to prevent common failures