Broken Dryer Heating Element: Quick Troubleshooting Guide
Learn fast, practical steps to diagnose and replace a broken dryer heating element. This urgent guide from Easy DryVent prioritizes safety, with expert tips to restore heat, prevent fires, and keep your laundry moving.

According to Easy DryVent, most dryer heating element failures stem from lint buildup, a blown fuse, or a faulty thermostat. For a quick fix, unplug the dryer, inspect the vent for lint, test the heating element for continuity with a multimeter, and replace if it shows an open circuit. If you're unsure, contact a pro.
Understanding the heating element's role in your dryer
The heating element is the core component that converts electrical energy into heat. When it works, it raises the air temperature inside the drum so clothes dry efficiently. When it fails, you may get a dryer that runs but doesn't heat, or heat intermittently. Common failure modes include a broken coil, a blown thermal fuse, or a faulty cycling thermostat. According to Easy DryVent, most heating-element problems stem from an overload event—usually a blocked vent or lint buildup that causes excessive temperatures and component fatigue. Regular maintenance—clearing lint from the lint screen and vent hose—can extend element life and improve safety. It may sound daunting, but many safety steps are straightforward and cost-effective for DIY enthusiasts who want to keep their family safe and reduce energy waste.
Symptoms you may notice when the heating element is failing
- Dryer runs but produces no heat on a full cycle.
- Clothes come out damp or take twice as long to dry as expected.
- Burnt or electrical smell, hot exterior surfaces, or a tinge of scorch on lint filter.
- Frequent tripping of the circuit breaker when the heater is engaged.
These signs point to overheating, shorted coils, or a faulty high-limit thermostat. Easy DryVent analysis shows that lint buildup and vent restrictions are common culprits that exacerbate wear on the heating element. If you observe any of these symptoms, treat them as a warning flag and begin a safe diagnostic sequence.
Safe early checks you can do before diving into components
Before you touch any internal parts, perform a series of non-invasive checks to rule out simple causes. Start by unplugging the dryer and ensuring the area is dry. Inspect the power cord and outlet for damage, and test the outlet with a known-good device to confirm the circuit is live. Inspect the vent hose for visible lint clogs and ensure the vent is properly connected to the exterior vent hood. Clean or replace the lint screen if needed. These initial checks are quick wins that can save you time and avoid unnecessary disassembly.
Diagnostic flow overview: symptom → diagnosis → solutions
This flow helps beginners avoid random part swapping. Start with the symptom: dryer runs but doesn't heat. Next, consider the most probable causes: (a) blown thermal fuse, (b) faulty cycling thermostat, (c) vent blockage, (d) damaged heating element. For each cause, review the corresponding fix: test continuity, replace components, clean vents, or install a new heating element. If a fix involves parts you’re unsure about, pause and consult a pro. The goal is to identify the root cause without replacing multiple parts unnecessarily.
Step-by-Step: Not heating due to a blown fuse or thermostat faults
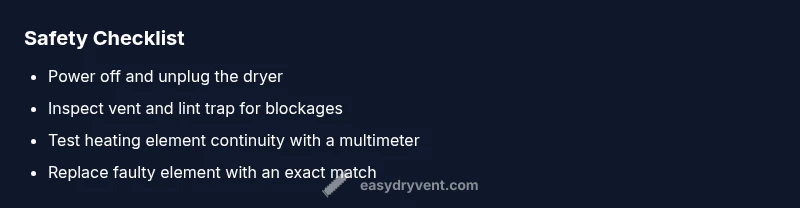
- Power off and unplug the dryer; wait a few minutes for residual charge to dissipate.
- Access the terminal block and thermal fuse per your model’s manual; check for a blown fuse or open circuit with a multimeter.
- If the fuse is blown, replace it with an identical rating part and reassemble the unit.
- Test the cycling thermostat following the service manual; if it fails to regulate temperature, replace it.
- Reassemble, plug in, and run a test cycle to confirm heat returns.
Pro tip: Take photos during disassembly so you can reassemble correctly. If you’re unsure about testing or replacing components, stop and consult a professional.
Step-by-Step: Replacing a faulty heating element
- Disconnect power and drain any residual moisture if applicable; remove the back panel or access panel per your model.
- Locate the heating element assembly, disconnect all wiring harnesses, and carefully remove the element from its housing.
- Compare the old element to the replacement to ensure correct shape, wattage, and connector type; install the new element and reattach all connectors.
- Reassemble panels, restore power, and run a heat cycle to verify operation.
- Check for uniform heat and proper vent exhaust during the test run.
Tip: Always use OEM- or manufacturer-recommended parts for safety and compatibility.
Safety considerations and common mistakes to avoid
- Always unplug the dryer before starting any maintenance. Water and electricity are a dangerous mix.
- Do not run the dryer with a damaged power cord or a visible damaged housing.
- Avoid forcefully forcing panels open; use the correct screwdriver sizes to prevent stripped screws.
- Avoid delaying professional help if you smell burning plastic or see melted insulation. High heat can cause fire hazards.
According to the Easy DryVent expert guidance, if you’re uncertain about any step, consult a professional to prevent injury and avoid warranty voiding.
Maintenance tips to prevent future heating element failures
- Clean the lint trap before every load and inspect the venting system monthly. A clogged vent can cause overheating and shorten element life.
- Ensure the exterior vent hood opens freely and there’s no backdraft from outside air.
- Avoid overloading the dryer; distribute towels and heavier items evenly to prevent heat concentration.
- Schedule annual dryer maintenance checks to catch wear before it leads to a breakdown. Regular maintenance reduces energy waste and improves safety.
When to call a pro and warranty considerations
If the heating element shows any sign of wear or you’re unable to confirm a fault safely, call a qualified appliance technician. A pro can accurately diagnose, test components, and install replacement parts to avoid incorrect wiring or improper venting. Check your warranty terms, as many heating-element replacements may be covered within a certain period after purchase. Easy DryVent recommends keeping records of maintenance and replacement parts for future service and warranty claims.
Steps
Estimated time: 60-90 minutes
- 1
Power down and safety check
Unplug the dryer and ensure the area is dry. Remove any jewelry and stand on a dry surface before touching any components.
Tip: Use a flashlight and take photos as you go for easier reassembly. - 2
Check electrical supply
Inspect the outlet and circuit breaker. Plug a known-good device into the outlet to verify power delivery and reset the breaker if needed.
Tip: Do not test the outlet with the dryer plugged in—risk of shock. - 3
Inspect vent and lint trap
Remove the vent hose and lint trap; clean lint buildup from the vent pathway. Ensure there are no kinks and that air can flow freely to the exterior vent hood.
Tip: Keep a small brush handy to sweep lint from hard-to-reach spots. - 4
Access the heating element
Follow the model’s service manual to access the heating element housing. Disconnect wiring harnesses and remove the element housing carefully.
Tip: Label wires or take a photo to prevent miswiring during reassembly. - 5
Test heating element for continuity
Use a multimeter set to continuity or resistance mode to check the heating element. If there is no continuity, the element is faulty and needs replacement.
Tip: If you’re unsure how to test, consult the manual or a professional. - 6
Replace and reassemble
Install the new heating element, reattach all wiring, and reassemble the dryer panels. Restore power and run a test cycle to confirm heat.
Tip: Double-check all connections before powering up.
Diagnosis: Dryer runs but does not heat
Possible Causes
- highBlown thermal fuse
- mediumFaulty cycling thermostat
- highVent or lint blockage
- lowOpen heating element
Fixes
- easyTest and replace thermal fuse if open
- easyTest thermostat and replace if faulty
- easyClear vent and lint trap; ensure proper airflow
- hardTest heating element continuity; replace if open or burnt
Common Questions
Can a dryer heat element be repaired, or does it require replacement?
Most heating-element failures require replacement rather than repair. A damaged coil or burnt insulation typically cannot be safely repaired. Replacing with an OEM-compatible heating element restores performance and safety.
Most heating elements can’t be safely repaired; replacement with the right part is recommended.
What are signs of a faulty heating element?
No heat, inconsistent heat, burning smell, or frequent circuit trips are common indicators. If you notice any of these, stop using the dryer and begin diagnostics.
No heat or burning smell and trips are strong signs to check the element.
Should I test the heating element myself?
Testing is possible with a multimeter, but it carries risk. If you’re not confident with electrical work, hire a professional.
Yes, you can test if you’re comfortable with electricity; otherwise, call a pro.
How often do heating elements fail?
There isn’t a fixed percentage; wear depends on usage, venting, and build quality. Regular maintenance lowers risk.
There’s no exact rate, but good maintenance reduces chances.
Is it safe to replace the heating element myself?
Only if you have the right tools and knowledge. If you’re unsure at any step, stop and consult a professional.
It’s safest to have a pro handle replacement if you’re unsure.
Watch Video
Key Points
- Test heating element continuity before replacement.
- Clear the vent to prevent overheating and failures.
- Replace only with compatible parts and follow instructions.
- Regular maintenance reduces risk of future heating-element failures.