Broken Dryer Troubleshooting Guide
Learn how to diagnose and fix a broken dryer with a practical, safety-first troubleshooting guide. Step-by-step checks, common causes, and when to call a pro from Easy DryVent.

Facing a broken dryer? Start with the basics: ensure the unit is plugged in, the door switch works, and the thermostat fuse isn’t tripped. The most common causes are lint buildup, blocked vents, and blown fuses. Follow this step-by-step flow to identify the root issue safely. If the dryer remains unresponsive after these checks, avoid risky repairs and contact a professional. Our guide from Easy DryVent helps you decide next steps quickly.
What a broken dryer really means
A broken dryer is more than a single symptom; it’s a sign that a few interrelated components may be failing. When a clothes dryer stops working, homeowners often assume a major repair is needed. In reality, many issues are caused by simple maintenance gaps or safety-related safeguards tripping. The phrase broken dryer can refer to no power, no heat, unusual noises, or a door that won’t latch. In any case, quick, careful diagnosis is essential to avoid making the problem worse. According to Easy DryVent, most breakdowns stem from basic causes that are easily tested and addressed with household tools. A targeted approach saves time, reduces cost, and minimizes safety risks. By starting with the simplest checks, you protect your home and your clothes while keeping your laundry on schedule.
Common causes of a broken dryer
There isn’t a single culprit behind every dryer failure. The most frequent issues include a dead outlet or tripped circuit, a faulty door switch, a blown thermal fuse, lint buildup, and a blocked exhaust vent. In some cases, worn belts or damaged drum rollers can create noise or poor operation. Easy DryVent analysis shows that addressing lint and venting first resolves a surprising number of problems, often restoring performance without tools beyond common household items. If you notice a burning smell, smoke, or heat outside normal operation, stop using the appliance immediately and seek professional help. A systematic approach helps you differentiate between a simple fix and a more serious repair, ensuring safety and efficiency.
Safety first: do's and don'ts before you touch a dryer
Before you attempt any maintenance, unplug the dryer and turn off the circuit breaker if accessible. Never operate a dryer with wet hands or around standing water. Avoid using metal tools to pry components and never bypass safety devices like fuses or thermal sensors. Keep children and pets away while diagnosing. If you smell burning insulation or see sparks, evacuate and call emergency services. When in doubt, err on the side of caution and contact a licensed technician.
Diagnostic flow at a glance
A well-structured diagnostic flow helps you move from symptoms to a solution with confidence. Start with a visual check (external cords, plug, door latch), then proceed to safe power-related tests. If power is present, assess heat output, drum movement, and sound clues. For each symptom, map to a likely cause and a corresponding fix, noting whether the fix is easy, medium, or hard. Always document your steps in case you need professional help later. The flow keeps you organized and reduces guesswork in the middle of a stressful situation.
Quick checks you can do in minutes
- Confirm the unit is plugged in and the outlet is live. - Test the door switch with the door closed; if the drum doesn’t start, the switch may be the issue. - Inspect the lint trap and vent hose for blockages; a clogged vent is a major efficiency and safety risk. - Check the drum for obstructions or foreign objects. - Look for tripped breakers or blown fuses in the main panel. - Listen for unusual noises that hint at belt or roller wear. If any basic check fails, stop and reassess before attempting a deeper fix.
Step-by-step: best-practice fixes for the most common issue (venting/clog)
- Unplug the dryer and disconnect the vent at the back. 2) Use a dryer vent brush or vacuum to remove lint from the vent and vent hood. 3) Reattach securely and test for airflow with a tissue at the vent exterior. 4) If airflow remains weak, inspect the exhaust hose for kinks and weight, replacing if needed. 5) Reconnect power and run a short cycle to verify performance. 6) Schedule a professional inspection if heat is still weak or the unit overheats.
No heat or poor drying performance: common culprits
Heat dysfunction is frequently tied to a blown thermal fuse, a faulty heating element, or a malfunctioning thermostat. These parts protect the dryer from overheating, but when they fail, clothes stay damp and energy use increases. If you encounter this issue, do not attempt a DIY repair beyond basic checks. The recommended path is to test the fuses and heating components with appropriate tools and to replace any defective parts only if you’re confident in the procedure. Easy DryVent emphasizes safety: if you’re unsure, call a pro.
Avoiding repeat problems: maintenance that pays off
Regular lint removal, vent cleaning, and mindful loading practices dramatically extend a dryer's life. Clean the lint screen after every use and inspect the vent duct for obstructions. Use the dryer with properly sized loads; overloads increase wear on belts and motors. Periodically check the vent exterior for birds’ nests or blockages and ensure the outdoor vent cap opens freely in windy conditions. Consistent maintenance minimizes breakdown frequency and keeps your laundry routine smooth.
When to replace parts versus the whole unit
Many common failures are addressable by replacing small components: door switches, fuses, belts, or thermostats. If the drum won’t spin despite fixes, or you hear grinding noises that worsen quickly, belt and roller assembly wear may require professional service or a complete replacement. If the appliance is nearing the end of its lifecycle or efficiency is severely compromised, consider a replacement with updated energy-saving features.
Steps
Estimated time: 60-90 minutes
- 1
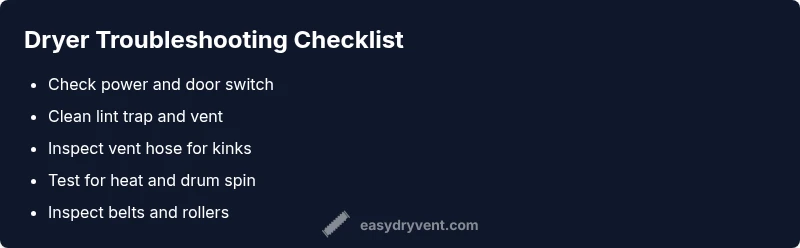
Check power and door
Unplug the unit, inspect outlet and cord for damage, and verify the door switch activates the drum. If the dryer does not respond, the issue is likely power-related or a faulty switch.
Tip: Use a quick outlet test device to confirm power. - 2
Inspect lint trap and vent
Remove lint screen and clean lint buildup. Check exterior vent for blockages and ensure airflow can exit freely.
Tip: Never run the dryer with a clogged vent; it’s a major fire risk. - 3
Test for heat and cycling
Run a short cycle to observe if heat is produced and if the drum spins. Note if the cycle stops early or the heat is low.
Tip: If there is heat but poor airflow, focus on venting issues. - 4
Check fuses and heating element
If the dryer has no heat, inspect the thermal fuse and heating element for continuity. Replace faulty parts with compatible models.
Tip: Only perform electrical tests if you’re comfortable with basic meter use. - 5
Inspect drive belt and rollers
If the drum doesn’t spin or makes slapping noises, examine the belt and rollers for wear. Replace as needed.
Tip: Always disconnect power before removing panels. - 6
Reassemble and test
Reconnect all parts, reattach the vent, and run a full cycle to verify operation. Listen for unusual noises or smells.
Tip: Document each step for future maintenance.
Diagnosis: Dryer won't start or stops mid-cycle
Possible Causes
- highPower issues (outlet, cord, or circuit breaker)
- highDoor switch malfunction
- mediumTripped thermal fuse or overheating protection
- highLint buildup in lint trap or vent
- mediumBlocked vent causing poor airflow
- lowWorn drive belt or drum roller
Fixes
- easyCheck outlet with another device; reset/replace circuit breaker as needed
- easyInspect door switch for movement and continuity; replace if faulty
- mediumTest/replace thermal fuse; allow the unit to cool before replacing
- easyClean lint trap and vent; remove blockages and ensure vent hood opens freely
- easyInspect vent hose for kinks and replace if damaged
- mediumCheck belt/roller for wear; replace with a compatible kit if spin is intermittent
Common Questions
Why won't my dryer start?
Most often the issue is power-related, a faulty door switch, or a tripped circuit. Check the outlet, cord, and door latch, then test the switch for continuity. If these basics pass and the dryer still won’t start, a professional should inspect internal components.
Most often the issue is power-related or a faulty door switch. Check the outlet and door latch, then test the switch for continuity. If it still won’t start, call a pro.
Why is there no heat in my dryer?
No heat usually points to a blown thermal fuse or a faulty heating element. Inspect and replace these parts if you’re comfortable with electrical testing. If the appliance continues to run without heat after basic checks, professional service is recommended.
No heat often means the thermal fuse is blown or the heating element is faulty. Inspect and replace as needed, and consult a pro if unsure.
My dryer makes a loud squealing noise. What’s wrong?
Unusual noises typically indicate worn drum rollers, a failing belt, or motor bearings. Stop using the dryer if the noise worsens and seek professional diagnosis to prevent further damage.
A loud squeal usually means worn rollers or a bad belt. Stop using it and get a pro to check.
Is it safe to clean the lint vent myself?
Yes, with basic tools and careful steps. Always unplug the unit, disconnect the vent, and use a vent brush or vacuum to remove lint. Wear a mask to avoid inhaling dust and lint.
Yes, but unplug first and use a vent brush or vacuum to clear lint. Be careful and wear a mask.
How often should I replace a dryer belt?
Belt wear depends on usage. If the drum won’t rotate or you hear thumping, inspect and replace the belt. Regular maintenance can prevent unexpected belt failures.
If the drum won’t spin or you hear thumps, check the belt and replace if worn.
When should I call a professional?
If you’re unsure about electrical testing, if there is burning smell, or if the dryer still functions poorly after basic checks, contact a licensed technician. Safety comes first with electrical and venting work.
Call a pro if you’re unsure about testing or if there are burning smells or persistent performance issues.
Watch Video
Key Points
- Start with safety and power basics.
- Lint and vent blockages are the top culprits.
- Use a systematic, symptom-to-diagnosis flow.
- Call a pro for electrical or high-risk fixes.