How to Hook Up a Gas Dryer
Learn how to hookup a gas dryer safely with a practical, code-conscious approach. This Easy DryVent guide covers gas line readiness, venting, leak testing, and safety checks for homeowners and DIY enthusiasts.

This guide shows you how to hookup a gas dryer responsibly, including safety checks, gas line readiness, venting, and electrical basics. Before you begin, confirm local codes and manufacturer's instructions. Because gas connections involve CO risk, we strongly recommend contacting a licensed professional for final connections or if you smell gas.
Gas Dryer hookup safety foundations
According to Easy DryVent, learning how to hookup a gas dryer begins with respect for safety and code requirements. The task combines gas line readiness, venting to the outdoors, electrical readiness, and a careful leak-check process. This phase emphasizes that carbon monoxide risks demand deliberate planning, correct materials, and thorough testing before running the appliance. Start by confirming the dryer is listed for your gas type and that the installation space has adequate clearance and ventilation. Ensure there is easy access to the shut-off valve and a clear path to the exterior vent. By grounding installation in safety and manufacturer guidance, you protect your family and improve long-term performance.
Planning and compliance considerations
Local codes and the dryer's manufacturer instructions are your best resource for a safe hookup. Easy DryVent recommends verifying that a dedicated gas supply line exists and that a manual shut-off is located near the dryer for quick access. Avoid faulty or damaged connectors, and avoid overly long flexible hoses that can kink or leak. If your home uses older or non-ideal connectors, replace them with code-approved rigid or semi-rigid options. This reduces the risk of leaks and ensures a stable connection over time. Always review the vent path to ensure it vents cleanly outdoors with minimal bends, which lowers lint buildup and improves dry times.
Typical hookup workflow overview
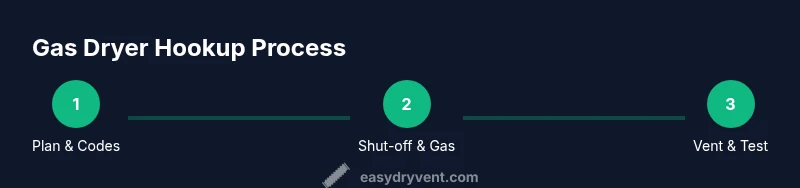
A typical gas dryer hookup involves securing the gas supply, attaching the dryer’s gas inlet connector with an approved gas-rated connector, routing the exhaust vent to the outdoors with proper clamps, and reconnecting power as required by the dryer's manual. After connections are made, perform a leak test using a soap-and-water solution and observe for bubbles at every joint. Confirm that airflow is unobstructed at the vent opening and that the exterior vent cap can open and close freely. As a safety precaution, consider installing a carbon monoxide detector near the appliance to provide early warning of any potential issue.
Maintenance and post-install checks
Post-install checks help ensure the hookup remains safe and efficient. Recheck all gas and vent connections after a few dryer cycles, and inspect for signs of wear or damage. Periodically verify that the shut-off valve functions correctly and that the exterior vent remains free of obstructions. Maintain a simple log of maintenance tasks and any unusual odors or signs of wear. Regular inspections improve safety and help extend the life of the dryer and its vent system.
Tools & Materials
- Gas appliance connector (gas-rated)(Ensure length matches the distance between dryer inlet and shut-off valve; use only gas-rated connectors.)
- Gas shut-off valve(Located near the dryer; keep accessible for emergency shut-off and maintenance.)
- Soapy water leak-test solution(Used to verify joints for gas leaks; bubbles indicate a leak that must be repaired.)
- Vent duct (4-inch metal), clamps, and supports(Rigid or semi-rigid metal duct is preferred; avoid foil or plastic ducts.)
- Electrical outlet or dedicated circuit per dryer manual(Most gas dryers still require 120V power for fans or controls; follow the manual.)
- Personal protective equipment(Gloves and eye protection recommended for handling gas components and ductwork.)
Steps
Estimated time: 60-120 minutes
- 1
Verify codes and read manuals
Check local gas and building codes and read the dryer's installation manual. Confirm adequate ventilation and access to the shut-off valve. This ensures the installation will be compliant and safe before any hardware is touched.
Tip: Consult the manufacturer’s instructions first; do not improvise connections. - 2
Shut off gas and power
Before disconnecting or connecting components, shut off the gas at the appliance shut-off and disconnect power to prevent sparks or accidental movement during work.
Tip: Double-check that gas is truly off at the valve before proceeding. - 3
Attach the gas supply connector
Connect the dryer’s gas inlet using an approved gas-rated connector. Do not overtighten; ensure a snug, leak-free fit without stressing the inlet.
Tip: Hand-tighten first, then run a wrench only enough to snug without deforming fittings. - 4
Vent the exhaust to outdoors
Install a 4-inch metal vent duct from the dryer to the outdoors. Use proper clamps and support straps; avoid long horizontal runs where lint can accumulate.
Tip: Keep the vent as straight and short as possible for optimal airflow. - 5
Perform a leak test and restore power
Turn on the gas supply and use a soapy solution to check joints for bubbles. If no leaks are detected, reconnect power and run a test cycle while listening for unusual sounds or smells.
Tip: If you smell gas at any point, shut off the gas and evacuate; contact emergency services.
Common Questions
Do I need a professional to hook up a gas dryer?
Gas hookups involve carbon monoxide risk and code compliance. Many jurisdictions require a licensed technician for final connections. Always follow local code and manufacturer guidance.
Gas hookups carry CO risks and code requirements. A licensed professional is often required for final connections.
Can I reuse a previous gas line connection?
Do not reuse old gas fittings or connectors. Use approved, code-compliant parts and check for wear or damage before installing.
Don’t reuse old fittings; use new approved parts and check for wear.
What venting material should I use?
Use a rigid or semi-rigid metal vent with proper clamps. Foil or plastic ducts are not recommended due to fire and lint buildup risk.
Choose metal vent ducts for safety and performance.
Is a CO detector required near a gas dryer?
CO detectors near gas appliances are recommended and may be required by code in your area. Check local regulations.
A carbon monoxide detector near the appliance helps warn of dangerous buildup.
What should I do if I smell gas after installation?
If you smell gas, evacuate immediately and call your gas company or emergency services. Do not operate electrical switches.
If you smell gas, leave the area and call for help.
How important is venting direction?
Vent runs should be as short and straight as possible, with minimal bends to maximize airflow and prevent lint buildup.
Keep the vent straight and short for best airflow.
Watch Video
Key Points
- Follow local codes and manufacturer instructions.
- Use approved gas connectors and proper venting.
- Test all joints for leaks before running the dryer.
- Consider adding a CO detector for safety.