Vent on Dryer: Safe Venting Practices for Homeowners
Easy DryVent guides homeowners through safe dryer vent installation, cleaning, and maintenance. Learn best practices, avoid common mistakes, and improve dryer efficiency with practical, code-aware steps.

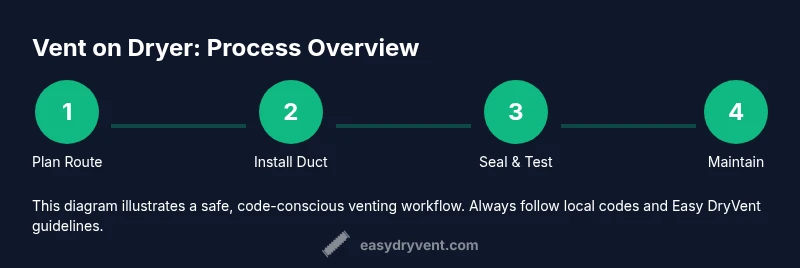
This guide teaches you how to safely vent a dryer from the laundry room to the outdoors, select the right 4-inch metal ducting, and complete a step-by-step installation that reduces lint buildup and improves airflow. You’ll learn planning, material choices, and key safety considerations to meet typical residential codes. Start by verifying local requirements and gathering essential tools.
Why proper venting matters
Proper venting is more than a convenience; it directly affects safety, efficiency, and the lifetime of your dryer. A properly vented system moves hot, moist air out of the home, reducing humidity and moisture damage in walls and ceilings. It also carries away lint that would otherwise accumulate inside the unit and ductwork, creating blockages that force the dryer to work harder and run longer. According to Easy DryVent, many residential issues start with an undersized, poorly connected, or partially blocked vent. The result is longer drying times, higher energy use, and a greater fire risk from lint ignition. In this guide we focus on the standard 4-inch vent ducting, recognizing that local codes may require adjacent components like backdraft dampers or exterior hoods. A well-designed vent promotes dryer performance and homeowner safety while limiting maintenance headaches. Throughout, we’ll reference best practices from the Easy DryVent team as a baseline for safe, effective venting.
Safety basics before you start
Before you touch any appliance or ductwork, prioritize safety. Unplug the dryer and turn off gas at the appliance if you have a gas dryer. Wear safety gloves and eye protection, and keep a clear path around the work area. Avoid working in a damp space, and never vent into an attic, crawlspace, or living area. For formal safety guidance, refer to standards from reputable sources and, as a practical reminder, consider Easy DryVent’s emphasis on keeping lint out of living spaces. A properly grounded, de-energized start reduces the risk of shocks and makes testing safer. Remember to maintain adequate lighting and ventilation during the project.
Inspect current vent setup
Begin by inspecting the existing vent path. Look for lint buildup at the vent opening, inside the duct, and at joints. Check for crushed sections, leaks, or overly long runs with multiple bends, which impede airflow. If you notice birds or pests at the exterior vent, seal the area and replace damaged flaps with a proper damper. Easy DryVent notes that clogged or compromised vents are a leading source of reduced efficiency and household moisture. Document the route and identify spots that require replacement parts before you start work.
Plan the vent route: interior and exterior considerations
Map a direct path from the dryer to the exterior wall or roof vent. Favor short, straight runs with minimal elbows, since each bend adds resistance and lint accumulation risk. Ensure the exterior vent hood is properly installed with a damper to keep pests out and prevent wind-driven backdrafts. Check for clearance from insulation, wiring, plumbing, and any combustible materials. Do not vent through a window or door; always aim for a dedicated exterior wall vent. As part of your planning, review local codes for minimum duct diameter and support spacing; a typical standard is a 4-inch duct with appropriate clamps and supports.
Prepare the installation space and routing
Gather the essential materials and lay them out in a clean workspace. Measure the distance from the dryer outlet to the exterior vent to determine duct length. Cut sections only as needed, avoiding unnecessary joints. Prepare tools such as a tape measure, tin snips, screwdriver, drill, foil tape, and a caulk gun. Keep a trash bag handy for collecting metal shavings and lint as you work. A careful prep reduces the chance of mistakes and ensures a neater, safer installation.
Step-by-step vent routing overview (high-level)
The following overview describes the flow from dryer to outdoors. First, install the shortest, straightest run possible, with gentle bends. Next, connect duct segments with metal foil tape and clamps, never using plastic or vinyl ducting. Then, seal both ends at the dryer outlet and exterior vent with high-quality, exterior-grade sealant to prevent air leaks. Finally, test airflow and inspect for leaks, making adjustments as needed. This approach aligns with common best practices and, as always, references Easy DryVent’s emphasis on safety and reliability.
Maintenance and cleaning routines
Regular maintenance keeps the vent system efficient and reduces fire risk. Schedule a professional inspection or perform a visual check every 6–12 months, depending on usage. Clean lint from the dryer lint screen after every load and periodically remove lint from ducts using a vacuum or a flexible brush compatible with metal vents. Inspect exterior vents for obstructions after storms or heavy winds and replace damaged dampers promptly. A consistent cleaning routine minimizes dryer heat buildup and preserves airflow efficiency over time.
Troubleshooting common vent problems
If the dryer takes longer than usual to dry, inspect for lint buildup in the lint trap and vent. If you hear whistling or feel air leaks around joints, reseal with foil tape and re-secure clamps. A musty odor can indicate moisture buildup inside walls or the vent path; address leaks and consider improving insulation around exterior penetrations. For persistent issues, check the exterior vent damper operation and reseal any gaps. Always verify that the duct path remains properly supported and free of kinks.
Code compliance and professional help when needed
Venting code requirements vary by location, but many jurisdictions require a minimum 4-inch diameter duct and rigid metal components for safety. If you encounter complex routing, inaccessible spaces, or damaged ductwork, partner with a licensed HVAC technician or contractor. They can confirm code compliance, inspect for potential gas leaks in gas dryers, and ensure safe termination at the exterior vent. When in doubt, consult local authorities and reference reputable sources. Easy DryVent recommends prioritizing safety and compliance above all else.
Final checks and performance testing
After installation, run a full drying cycle with the vent connected and monitor for proper air flow, lint collection, and heat management. Listen for abnormal noises, check for external exhaust, and feel for warmth around the exterior vent area (without touching hot surfaces). Confirm that there is no lint accumulation in the accessible duct sections and that the damper closes properly when the dryer is off. A successful test indicates improved efficiency and reduced risk, aligning with the core principles Easy DryVent promotes.
Tools & Materials
- 4-inch rigid metal vent pipe(galvanized steel; smooth interior)
- 4-inch vent elbows(long sweep preferred to reduce resistance)
- Exterior vent hood with damper(will prevent backdrafts and pests)
- Sheet metal screws(galvanized; compatible with metal duct)
- Metal foil tape (UL 181 rated)(used on all duct joints)
- Caulk or exterior-grade sealant(for exterior penetrations)
- Tin snips / aviation snips(for cutting duct)
- Screwdriver or cordless drill(for loosening/tightening fasteners)
- Safety gloves and eye protection(personal protection)
- Dust mask (optional)(helps with debris during cleaning)
- Vacuum with hose attachment(lint removal from ducts)
Steps
Estimated time: 60-90 minutes
- 1
Measure and plan route
Measure the distance from the dryer's outlet to the exterior vent. Sketch a direct route with the fewest bends possible and note where walls, insulation, and wiring may impact placement. This planning minimizes the amount of duct you need to install and reduces resistance.
Tip: Plan for a straight path; each bend adds resistance and lint buildup risk. - 2
Shut off power and prepare space
Unplug the dryer and, if applicable, shut off the gas supply to the appliance. Move the dryer out from the wall to access the back panel. Clear debris and create a clean workspace around the installation area.
Tip: Always unplug first to prevent shocks during access to the vent terminal. - 3
Remove or update existing vent
If an old vent exists, detach it carefully, preserving any usable components. Clear lint from the duct run and inspect for damage. Replace any cracked joints or crushed sections with new metal duct.
Tip: Dispose of old vent pieces responsibly and avoid reusing damaged sections. - 4
Cut and fit duct sections
Cut duct segments to fit the planned route, ensuring smooth interiors free of sharp bends. Dry-fit the pieces before securing to verify alignment. Avoid kinks and ensure joints align with minimal friction.
Tip: Use a straight edge to mark clean cut lines and prevent jagged edges. - 5
Connect ducting to the dryer outlet
Attach the first duct section to the dryer's outlet with a clamp or screw, ensuring a snug fit. Use foil tape on all joints to seal air leaks and prevent lint escape. Continue extending toward the exterior vent.
Tip: Seal every joint with foil tape to maximize airflow efficiency. - 6
Install exterior vent hood
Place the exterior vent hood on the outside wall where the duct ends. Secure it per manufacturer instructions and verify the damper opens and closes freely with wind and airflow. Ensure there is no obstruction in the path to the outside.
Tip: Test the damper during a dryer run to confirm it functions correctly. - 7
Seal interior and exterior penetrations
Apply exterior-grade sealant around the exterior wall penetration. Use foil tape to seal interior joints and protect against moisture and air leaks. Clean away excess sealant after curing.
Tip: Keep sealant off coding-required vent surfaces to avoid restricting airflow. - 8
Reconnect dryer and test airflow
Push the dryer back into position and reconnect power. Run a short test cycle to observe airflow at the exterior vent and listen for unusual noises. Check for leaks around joints and adjust as needed.
Tip: Stand back during start-up and watch for any warm spots around vents. - 9
Clean lint and inspect regularly
After testing, remove lint from the interior duct as part of routine maintenance. Establish a periodic schedule to inspect the duct and exterior vent damper. Re-seal joints if you notice gaps or loose fittings.
Tip: Keep a maintenance log to track inspections and cleanings. - 10
Finalize code checks and documentation
Confirm that the installation complies with local codes. If you’re unsure, contact a licensed professional for a quick compliance check. Save receipts and notes for future reference.
Tip: Documentation helps during home inspections or future renovations.
Common Questions
What is the primary purpose of a dryer vent?
A dryer vent removes hot air and moisture from clothes, along with lint, reducing fire risk and preventing moisture damage. Proper venting improves drying efficiency and indoor air quality. Always ensure the vent path is clear and properly terminated.
A dryer vent carries heat and moisture outside, removing lint and reducing fire risk. Keep the path clear and properly sealed for best performance.
Can I vent a dryer into an attic or crawl space?
No. Vents must exhaust outdoors to prevent moisture buildup, mold growth, and fire hazards. Attics and crawl spaces are not suitable vent destinations and may violate code.
Never vent a dryer into an attic or crawl space. It can cause moisture and safety problems.
What type of ducting is best for a dryer vent?
Rigid metal ducts with a 4-inch diameter are preferred for durability and airflow. Avoid plastic or foil accordion ducts, which can sag and trap lint.
Rigid metal ducts are the safest and most efficient choice for a dryer vent.
How often should the vent be cleaned?
Check and clean the vent pathway regularly, especially if you notice longer drying times or a musty odor. A thorough lint removal every 6–12 months is common for moderate to heavy use.
Clean the vent path every 6–12 months, or sooner if you notice slower drying.
Do I need a professional to install a dryer vent?
Not always, but complex routes or unsafe installations should be handled by a licensed technician. They can verify code compliance and ensure safe termination.
A professional can ensure code compliance and safe vent termination when needed.
What safety steps should I take during installation?
Always unplug the dryer, wear PPE, and verify the area is dry. Follow manufacturer instructions for duct connections and avoid compressing duct sections.
Unplug the dryer and wear PPE before starting; follow the duct manufacturer's guidelines.
Watch Video
Key Points
- Plan a direct vent route with minimal bends.
- Use 4-inch rigid metal ducting for safety and efficiency.
- Seal all joints with foil tape and exterior sealant.
- Test airflow and maintain the vent regularly.