Dryer Vent Set Up: Safe and Efficient Guide for Homeowners
A comprehensive step-by-step guide to set up a dryer vent safely and efficiently, including planning, materials, installation steps, maintenance, and safety considerations from Easy DryVent.

According to Easy DryVent, this guide helps you set up a safe, code-compliant dryer vent. You’ll learn to plan a straight path, choose rigid metal duct, seal joints properly, and test airflow. Following these steps reduces fire risk, improves drying performance, and simplifies maintenance.
What you’ll accomplish with a proper dryer vent set up
A well-executed dryer vent set up is more than just pushing a hose outside the wall. It reduces the risk of lint fires, improves dryer efficiency, and lowers energy use by ensuring optimal airflow. According to Easy DryVent, a safe vent path starts with a short, straight run and ends with a properly sealed exterior vent. In this section you’ll learn the core objectives: minimize turns, use rigid metal duct, maintain easy access for cleaning, and confirm exterior venting is clear of obstructions. A thoughtful plan sets you up for success and helps you avoid common mistakes that lead to reduced performance or safety hazards. By the end, you’ll understand how the vent path, materials, and exterior components come together to deliver a reliable dryer vent set up that stands up to seasonal weather and everyday use.
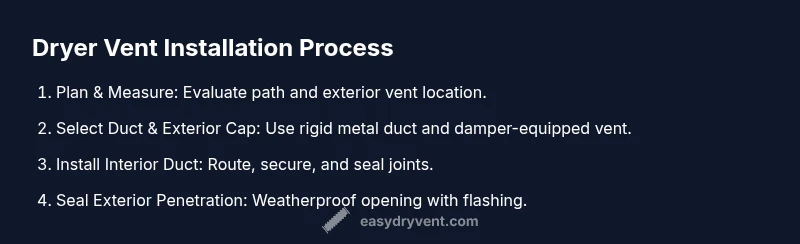
Planning your vent path for safety and efficiency
Planning is the foundation of any durable dryer vent set up. Start with the shortest possible path from the dryer to the exterior, aiming for the fewest 90-degree turns. Each elbow adds resistance, reducing airflow and increasing lint buildup. Keep the duct path away from cluttered spaces, avoid running ducts through attic or living areas where heat or moisture could cause damage, and choose a 4-inch diameter rigid metal duct for the best airflow. Before installation, map out the exterior vent location to balance wind exposure, snow, and debris. If you must run the vent through walls, select a straight-through approach and plan for weatherproof flashing and a securely sealed exterior cap. Finally, confirm that your plan complies with local building codes and that the vent does not terminate into closed soffits or crawlspaces, which can trap hot air and moisture.
Materials and components you should use
The right materials are essential for a safe dryer vent set up. Use rigid metal duct (prefer aluminum or galvanized steel) with a smooth interior and a 4-inch diameter for optimal airflow. Avoid plastic or foil flexible ducts, which collect lint and pose a higher fire risk. At the exterior, install an vent cap with a damper and bird screen to prevent pests and weather intrusion. Seal all joints with metal foil tape (not duct tape) and secure sections with duct clamps or screws to prevent leaks. For long exterior runs, consider wall or roof flashing to protect the penetration from water intrusion. Keep a small bag of replacement clamps and tape handy for quick fixes. Finally, ensure you have a drill, a suitable hole saw, and basic safety gear for a smooth installation.
Exterior venting: location, weatherproofing, and aesthetics
Exterior vent location is a balance between practicality and weather exposure. Choose a wall or soffit that allows a short, direct route from the interior, avoiding shaded or densely vegetated areas where lint can collect. The vent cap should sit flush against the wall with a damper that closes when the dryer is not in use, reducing drafts and energy loss. Weatherproofing matters—apply flashing and caulk around the vent opening on exterior walls to keep out rain and ice. A well-placed vent improves not only safety but also home comfort by reducing moisture buildup in walls. Consider aesthetic factors as well: a clean, unobtrusive vent cap minimizes wind resistance and keeps the appearance of your home neat.
Safety considerations and code compliance
Safety is the core of any dryer vent set up. Lint buildup and improper venting are common fire hazards, so follow best practices for duct routing, sealing, and exterior termination. Easy DryVent analysis shows that rigid metal ducts with properly sealed joints significantly reduce lint accumulation and airflow resistance. Always check for local codes concerning vent location, insulation, and exterior termination requirements. Use only approved exterior vent caps with dampers and screens, and never vent into enclosed spaces like attics or crawl spaces. If you’re replacing an existing vent, ensure old duct sections are removed and disposed of properly to prevent lint pockets and moisture issues. Finally, educate household members about not obstructing the vent with furniture, laundry, or storage items.
Common mistakes and how to avoid them
Common mistakes include using flexible foil ducts, over-tightening joints, or burying duct runs behind walls where inspections are difficult. Flex ducts create lint buildup and increase fire risk due to kinks and sharp bends. Always secure joints with clamps and seal with metal foil tape on all connections. Don’t cut corners by skipping exterior flashing or neglecting damper operation; a stuck or blocked damper defeats the purpose of exterior venting. Avoid venting through a window or into a garage, as this wastes energy and creates moisture and mold hazards. Lastly, plan for regular maintenance; a neglected vent can quickly lose efficiency and performance.
Maintenance, inspection, and troubleshooting
Maintenance is a critical, ongoing part of a successful dryer vent set up. Schedule a periodic inspection to remove lint buildup and check for crushed or separated duct sections. Use a vent brush or flexible rod to clean the interior of ducts, paying attention to turns where lint tends to accumulate. If you notice longer drying times or clothes emerge hotter than usual, inspect the vent for obstructions or leaks. Easy DryVent emphasizes keeping a log of maintenance activities and exterior vent checks after severe weather. Regular inspections help catch issues early, before they become safety risks.
Final checks before use
Before you power up the dryer for the first test, double-check all joints for security and airtight seals. Confirm the exterior vent is clear of snow, leaves, or nests, and verify the damper opens freely when the dryer runs. Test for airflow by feeling the outside vent or using a tissue to detect draft; if airflow is weak, recheck duct connections and the path for sharp bends. Finally, run a short dry cycle to confirm there are no leaks and that lint is not accumulating at joints. If anything looks off, pause and reassess the installation rather than proceeding with a full test load.
Tools & Materials
- Rigid metal vent duct (4-inch diameter, aluminum or galvanized steel)(Avoid flexible foil or semi-rigid ducts; choose smooth interior for best airflow.)
- Exterior vent cap with damper and bird screen(Prevents pests and weather intrusion; ensure damper operates freely.)
- Duct clamps or sheet-metal screws(Secure joints; do not rely on tape alone.)
- Metal foil tape(Seal all duct joints to prevent leaks and lint escape.)
- Flashing for exterior wall penetration(Waterproofing when venting through exterior walls.)
- Caulk or weatherproof sealant(Seal gaps around exterior vent opening.)
- Safety gear (gloves, safety glasses)(Protect hands and eyes during cutting and securing steps.)
- Vent cleaning brush or flexible rod(Helpful for routine maintenance and lint removal.)
Steps
Estimated time: 2-5 hours
- 1
Plan the vent path
Survey the route from the dryer to the exterior; aim for the shortest, straightest path with the fewest bends. Mark exterior vent location and check for potential obstructions or hidden utilities. Use this planning to determine cut locations and how to route the duct inside walls or closets.
Tip: Sketch a quick diagram showing the route to minimize surprises during installation. - 2
Measure and prepare duct sections
Measure the required duct length and account for joints and bends. Cut duct sections as needed using appropriate tools, ensuring clean, straight cuts for tight joints. Dry-fit sections before final assembly to verify fit.
Tip: Leave extra slack at interior corners to accommodate future maintenance. - 3
Prepare exterior vent location
Choose a wall or low-lying exterior spot with minimal wind exposure, ensuring the vent cap will sit flush against the siding. Install the exterior vent, flashing, and damper, and ensure the opening is clear of debris. Check that the exterior cap’s screen is intact.
Tip: Install a bird screen to prevent wildlife from entering the duct. - 4
Assemble and secure interior duct
Connect interior duct sections with clamps, then seal joints with metal foil tape. Avoid crimping ducts and maintain a smooth interior surface to prevent lint buildup. Ensure all sections are aligned and there are no gaps.
Tip: Tighten clamps firmly but avoid crushing the duct. - 5
Seal exterior penetrations
Apply caulk or weatherproof sealant around the exterior wall opening to prevent water intrusion. Ensure flashing is properly sealed and overlaps the wall surface for a clean water barrier.
Tip: Check for gaps after the first winter freeze; reseal if needed. - 6
Test airflow and damper function
Run the dryer on a short cycle and observe airflow at the exterior vent. Confirm the damper opens fully when the dryer runs and closes when it stops. Address any obstructions or misalignment before a full load test.
Tip: If airflow is weak, inspect for kinks or tight bends and reseat joints. - 7
Final inspection and cleanup
Check all joints again, secure any loose straps, and clean up the installation area. Record the installation details and set a maintenance reminder for lint cleaning and vent inspection.
Tip: Keep the area around the exterior vent clear of snow and debris. - 8
Schedule ongoing maintenance
Create a maintenance plan that includes annual exterior vent checks, lint removal, and duct inspection. Regular upkeep helps prevent clogs and preserves efficiency.
Tip: Set reminders in your calendar to stay on track.
Common Questions
Do I need a permit for dryer vent installation?
Permit requirements vary by locality. Check with your city or county building department to confirm whether a permit is required for dryer vent installation or replacement. Even if not required, follow code guidelines and use approved materials.
Permit rules vary by location. Check with your local building department to confirm requirements and always follow code guidelines.
What type of duct is best for a dryer vent?
Rigid metal duct (aluminum or galvanized steel) with a smooth interior is the preferred choice for efficiency and safety. Avoid flexible foil ducts, which trap lint and increase fire risk or reduce airflow.
Rigid metal duct is the best choice for safety and efficiency.
Can I vent a dryer through a window or attic?
Venting through a window or attic is unsafe and generally not allowed by codes. Exterior venting to the outdoors is essential to prevent moisture buildup, mold, and fire risk.
No, venting indoors or into an attic is unsafe; vent outside instead.
How often should I clean the dryer vent?
Inspect the vent and lint trap regularly and clean the ducting at least once a year, or sooner if you notice longer drying times or reduced airflow.
Inspect regularly and clean at least once a year, or whenever airflow seems reduced.
What are signs of a clogged dryer vent?
Signs include longer drying times, clothes feeling hotter than usual, a visible buildup of lint near the vent, and a burning smell. If you notice these, stop using the dryer and clean or inspect the vent.
Look for longer dries times, hot clothes, or a burning smell as signs of clog.
Watch Video
Key Points
- Plan a straight, short vent path.
- Use rigid metal ducts with proper sealing.
- Test airflow and validate exterior vent operation.
- Follow local codes and perform regular maintenance.