Dryer Vent Installation Guide
Learn how to install a dryer vent safely and efficiently. This guide covers duct selection, routing, exterior hood setup, airflow testing, and maintenance for a code-compliant, fire-safe installation.

By the end of this guide, you will be able to install a dryer vent safely and code-compliantly, ensuring efficient airflow and reduced lint risk. You’ll select the right duct, plan a short, straight route with minimal bends, seal all joints, and test the system from indoors to outdoors. Easy DryVent emphasizes safety and proper venting.
Why proper dryer vent installation matters
A dryer vent installed correctly is foundational to home safety, energy efficiency, and appliance longevity. When the vent is installed properly, hot, moist air escapes quickly, reducing drying times and overall energy use. According to Easy DryVent, many homes have overlooked venting basics, leading to lint buildup, moisture in the laundry area, and increased fire risk. A well-planned vent installation also minimizes backdraft and pest intrusion, supporting better indoor air quality. In practice, the goal is a dryer vent installed that complies with local codes and manufacturer recommendations, ensuring the system vents outdoors and remains accessible for routine maintenance. Proper venting also plays a key role in preventing moisture-related problems inside walls and ceilings. By prioritizing airflow, you protect your home and your clothes from wear and inefficiency, while giving yourself peace of mind. The result is a safer, more efficient laundry routine with fewer headaches.
Planning the route before you cut a single hole
Before you pick up any tools, map the route from the dryer to the exterior vent. Favor the shortest path with the fewest bends, avoiding windows, doors, attic spaces, and other enclosed areas where lint can accumulate. Check for obstacles like joists, pipes, or wiring, and confirm exterior clearance to prevent snow buildup and debris from blocking airflow. Document the planned path with notes or photos so you can reference it during installation. A thoughtful plan reduces the risk of unnecessary wall penetrations and makes the final “dryer vent installed” job cleaner and safer. This planning phase also helps you determine whether you’ll pass through an exterior wall, the ceiling, or a basement wall, and whether you’ll vent through a wall cap or a roof vent. For most homes, a straight, short run with 90-degree turns only where absolutely necessary offers the best airflow and easiest maintenance.
Duct choices and exterior vent hood: what works best
Duct material matters. Choose rigid or semi-rigid metal ducts with smooth interiors to minimize lint buildup and maximize airflow. Avoid plastic or foil accordion ducts, which trap lint and are prone to crushing and fire hazards. The exterior vent hood should include a damper to prevent backdrafts and moisture infiltration; look for a unit with a vent flap and a backdraft damper that closes when the dryer isn’t in use. The connection between the indoor duct and the exterior vent should be tightly sealed with foil tape and clamps. A well-sealed joint not only improves performance but also reduces the chance of pests entering the home. In this section, you’ll also consider exterior weatherproofing and the need for a through-wall pass-through that keeps the interior wall protected from moisture and temperature changes.
Safety, code considerations, and basic inspections
Vent installation is not just a DIY task—it’s a safety-critical one. Local codes typically govern duct size, routing, and clearances from combustibles. Use a metal duct that’s rated for high heat, ensure all joints are properly connected, and avoid any overlap that creates creases or kinks. If you’re unsure about codes in your area, consult your local building department or a licensed professional. Safety gear like eye protection and gloves is essential during cutting and fastening. Easy DryVent’s guidance emphasizes keeping the area around the worksite clear and stable, especially when you’re drilling through exterior walls or working on a ladder.
Workspace preparation, access, and weatherproofing basics
Prepare your workspace by laying out tools and materials, securing pets and kids, and ensuring the area is well ventilated. If you’re running a through-wall vent, you’ll need to drill a clean, round hole and seal the exterior pass-through with weatherproof caulk or flashing to prevent water intrusion. For lofted spaces or upper-floor installations, consider a through-roof vent with proper flashing and condensation control. Plan for accessibility: you should be able to inspect and clean the vent from both ends without removing major sections of the wall. A clean, accessible vent reduces maintenance time and helps keep airflow consistent throughout the life of the system.
Typical connections: clamps, tape, and alignment
Assemble duct sections with minimal overlaps, ensuring the seams face away from the interior to avoid lint catching in the joints. Use steel clamps and UL 181-rated foil tape to seal every seam; never rely on duct tape alone, which can degrade over time. Align sections so the airflow can flow in a straight line with the fewest turns. If a bend is necessary, use long-radius elbows rather than sharp 90-degree turns. Label the route on accessible sections to help future maintenance like lint removal and replacement. A properly connected system reduces the chance of leaks and improves performance when the dryer is in use.
Testing, commissioning, and ongoing maintenance mindset
Once installed, test the system to verify airflow from the dryer to the outdoors. Run the dryer on an empty load and observe the exterior vent for airflow and backdraft dampers. Check for air leaks at joints and seals; listen for whistling sounds that indicate leaks or misalignment. A simple airflow check is to hold a tissue at the exterior vent and see if it moves visibly when the dryer is running. Finally, plan for regular maintenance: inspect inside the duct connections annually and clean lint from the lint screen and accessible duct segments every few months to prevent buildup and fire risk.
Tools & Materials
- Rigid metal dryer vent duct (4 inch diameter)(Smooth interior, code-compliant length)
- Semi-rigid metal duct (optional)(Use only where bending is necessary)
- 4-inch duct clamps(Metal clamps rated for heat)
- Tin foil tape (UL 181 compliant)(For sealing joints; avoid duct tape)
- Metal duct cutter or snips(Cut cleanly; avoid crushing ducts)
- Measuring tape(Accurate routing length)
- Exterior vent hood with damper(Weatherproof and backdraft resistant)
- Safety goggles(Protect eyes during cutting)
- Work gloves(Protect hands from sharp edges)
- Caulk or flashing for exterior pass-through(Waterproofing at exterior wall)
- Smoke pencil or incense (optional)(Visualize airflow during testing)
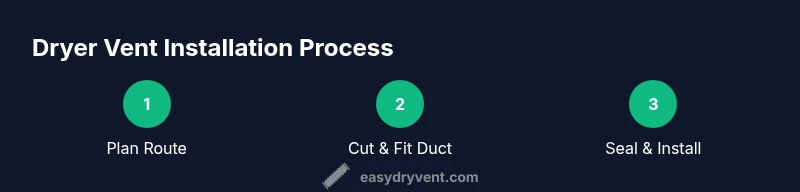
Steps
Estimated time: 60-90 minutes
- 1
Plan the route and prepare
Assess the space between the dryer and the exterior vent. Confirm the shortest, straightest path with the fewest bends and identify any obstacles. Gather all tools and ensure the work area is safe, well-lit, and clear of clutter.
Tip: Take photos of the planned route to reference during installation. - 2
Measure and cut the duct
Measure the determined length along the planned path and cut the duct sections accordingly. Ensure clean cuts to avoid sharp edges, which can snag lint. Dry-fit sections before final assembly to verify fit.
Tip: Leave a slight extra length to allow for securing joints without tension. - 3
Assemble and align duct sections
Connect duct sections with minimal overlaps, orient seams away from indoor air to reduce lint catching. Slide on clamps and ensure the alignment is straight with the interior surface smooth for airflow.
Tip: Check for kinks and smooth any bends to maximize efficiency. - 4
Seal joints with foil tape
Wrap each seam with UL 181 foil tape and tighten clamps. Do not rely on duct tape alone, as it degrades and loses grip over time. Ensure there are no gaps that could leak lint or moisture back into the living space.
Tip: Apply tape in a single, continuous strip for a clean seal. - 5
Pass through walls and install exterior hood
Create a clean through-wall pass-through or through-roof installation with proper flashing. Install the exterior vent hood with a backdraft damper and seal around the exterior to prevent water entry.
Tip: Use weatherproof flashing and sealant to protect against leaks. - 6
Test airflow and finalize
Run the dryer on a test cycle and observe airflow at the exterior vent. Check for leaks, backdrafts, or visible lint around joints. Document the process and plan regular maintenance checks.
Tip: Consider a smoke test to visualize any hidden leaks.
Common Questions
What duct material is best for a dryer vent installed?
Use rigid metal or semi-rigid metal ducts. They resist crushing, lint buildup, and heat better than plastic or foil accordion ducts.
The best duct material is rigid or semi-rigid metal, which resists crushes and lint buildup.
How long can a dryer vent run be safely?
There is no universal length limit; codes usually allow a maximum length with allowances for bends. Plan for the shortest route with the fewest bends.
Code often sets a length limit plus bend allowances; keep the route short with as few bends as possible.
Can I install a dryer vent myself, or should I hire a pro?
A DIY installation is possible for many homeowners when following manufacturer guidance and local codes. If routes are complex or you’re unsure about code requirements, consult a licensed professional.
You can install it yourself if you follow the code and manufacturer instructions; otherwise, hire a pro.
What maintenance is required after installation?
Inspect the vent annually, clean lint from the duct and lint trap regularly, and test airflow to ensure no leaks or blockages.
Clean the duct and lint trap annually and test airflow regularly.
What if the vent exits near a window or door?
Avoid venting directly into living spaces or near operable windows. Select a routing path that vents outdoors away from windows, doors, and fresh air intakes.
Vent outdoors away from windows and doors to avoid recirculation.
What are common signs of a faulty dryer vent?
Excessive lint buildup, longer drying times, or heat near the exterior vent area can indicate a blockage or poor installation.
Lint buildup, slow drying, or heat near the vent can signal a problem.
Watch Video
Key Points
- Plan the shortest route with minimal bends.
- Use rigid metal duct and a proper exterior hood.
- Seal joints and test airflow after installation.
- Maintain the vent annually to prevent lint buildup and fire risk.