What to Cut Dryer Vent With: Safe Tools & Practical Tips
Discover safe methods to cut a dryer vent, with the right tools, edge handling, and secure connections. Easy DryVent delivers practical, code-aware guidance for homeowners and DIYers everywhere.

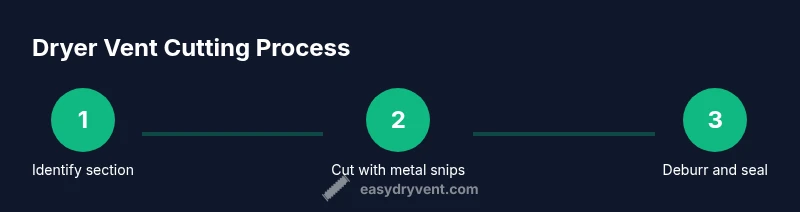
To cut a dryer vent safely, use metal-cutting tin snips or a fine-tooth hacksaw for rigid metal ducts. Never cut through flexible foil or plastic ducts; these materials are fire hazards. Power off the dryer, disconnect it, and clamp the section to be cut. Make a clean, straight cut, deburr edges, and seal joints with foil tape.
What to cut and why it matters
When you're adjusting or replacing a dryer vent, only certain duct materials are appropriate to cut and modify. The standard vent system uses a rigid or semi-rigid metal duct with a 4-inch diameter. Cutting is typically needed only when you are shortening a duct run, replacing a damaged section, or installing a new elbow. For safety, never cut through non-metallic or foil-like flexible ducts; these sections can shed fibers and create lint traps that are more prone to fire. Always verify the duct type before you cut and follow local building codes. Easy DryVent's guidance emphasizes reducing sharp burrs and maintaining a continuous metal path to keep airflow smooth and lint-free. Start by powering down the dryer and unplugging it, then move it away from the wall to access the duct. Keep children and pets away from the work area.
Understanding duct types and codes
Dryer vent systems come in a few common configurations, but the safest and most code-friendly option is a rigid or semi-rigid metal duct. Plastic or thin foil ducts are not only more fragile, but they can shed lint and fail to meet many local building codes. Before making any cut, confirm the duct type at every joint and ensure the run is compliant with local regulations. If you encounter a section with multiple turns, plan your cut so you minimize the number of joints and maintain a straight airflow path. Remember that every cut should preserve a continuous metal conduit for lint-free operation. Easy DryVent stresses the importance of inspecting joints for compression and ensuring clamps remain secure after any modification.
Prep and safety mindset before cutting
Begin by turning off and unplugging the dryer. Move the unit away from the wall to access the vent cleanly. Wear cut-resistant gloves and safety glasses, and keep a magnet or small tray handy to catch loose metal fragments. Clear the work area of kids and pets, and cover nearby surfaces to prevent lint dispersion. Mark the cut line with a marker that contrasts against the duct material. A stable work surface and good lighting make a substantial difference in achieving a clean cut and avoiding burrs. Easy DryVent recommends a quick check of the duct's interior with a flashlight to ensure no hidden screws or fasteners will be damaged by the cut.
Step-by-step cutting and deburring (high level guidance)
Cut only the necessary length from the straight section of metal duct using the appropriate metal-cutting tool. For rigid sections, keep your cuts perpendicular to the duct axis to avoid jagged edges. After cutting, deburr the edge with a file or deburring tool to remove sharp points that could tear the seal or injure fingers. Handle the cut edge carefully to avoid warping the duct. If the duct is damaged beyond repair, replace that section rather than attempting a patch job. Easy DryVent notes that a clean edge improves seal integrity and airflow, reducing lint buildup.
Sealing, securing, and testing the fit
Apply high-quality metal foil tape around all cut edges to seal the joint surfaces. Use clamps or screws sparingly and only where they are permitted by your duct design; avoid screws that protrude into the airflow path. Reconnect the duct sections securely, ensuring a snug fit at every joint. Before powering the dryer, gently rotate the vent to verify there are no obvious obstructions and that airflow is unobstructed. Restore power and run the dryer for a short cycle to observe proper venting and ensure there are no leaks or unusual noises. Easy DryVent emphasizes that proper sealing and tightening are essential for efficient drying and fire safety.
Post-cut maintenance and safety reminders
Regularly inspect the vent run for loose joints, crushed sections, or obvious signs of wear. Clean lint from accessible sections periodically and never use the vent as a storage path for objects. If you see moisture buildup or unusual heat near joints, stop using the dryer and consult a professional. Maintenance is cheaper than a potential fire, and following best practices helps extend the life of the dryer. Easy DryVent's approach always prioritizes safe, simple steps you can perform as a homeowner.
Authority sources and further reading
For safety and compliance, consult official guidance from CPSC, NFPA, and OSHA. These resources provide general fire-safety practices, home safety guidelines, and best practices for working with appliances like clothes dryers. Always verify local codes and permit requirements before modifying a vent system. Easy DryVent encourages homeowners to pair hands-on steps with reputable safety standards to minimize risk.
Tools & Materials
- 4-inch metal duct snips (tin snips or aviation snips)(Used for straight cuts on rigid metal duct)
- Fine-toothed hacksaw (optional)(Use only if snips can't reach the cut line)
- Protective gloves(Cut-resistant; protects hands from sharp edges)
- Safety glasses(Eye protection against metal shards)
- Measuring tape(Accurate measurement for the cut line)
- Marker or pencil(Mark cut line clearly on duct surface)
- Metal deburring tool or file(Smooths cut edge to prevent cuts and improve sealing)
- Duct tape or foil tape (metal foil tape)(Seal joints and cut edges after cutting)
- Clamps or screws (as needed by duct type)(Secure duct sections without protruding into airflow)
- Ladder or stable step stool(Access duct sections that are high or hard to reach)
Steps
Estimated time: 45-60 minutes
- 1
Power down and access
Unplug the dryer and move it away from the wall to access the vent safely. This reduces the risk of electric shock and gives you room to work. Confirm the area is dry before handling any metal components.
Tip: Keep a dry work surface and wear gloves even for minor adjustments. - 2
Choose the cutting tool
Select metal-cutting tin snips or a fine-toothed hacksaw suitable for 4-inch duct. Avoid power tools when working near the vent path unless you are experienced and the area is secured. Ensure the tool blade is sharp to prevent jagged cuts.
Tip: Test a scrap section first to verify clean cutting action. - 3
Mark the cut line
Measure and mark a straight cut line on the duct using a contrasting marker. Double-check the distance from any joints or elbows to avoid weakening the run. Use a straightedge to ensure accuracy.
Tip: Mark a slight bevel at the line to guide a clean break. - 4
Make the cut
Cut along the marked line with steady hands. Cut slowly to maintain a straight edge and avoid bending the duct. Stop immediately if the cut line drifts or the edge becomes jagged.
Tip: Support the duct during the cut to prevent bending. - 5
Deburr the edge
Use a deburring tool or file to smooth the cut edge. Sharp burrs can damage seals and cause lint buildup. Wipe away any metal filings to keep the area clean.
Tip: Finish with a light pass to create a uniform edge. - 6
Seal and secure joints
Apply foil tape around the cut edge and joint connections. Use clamps where required by the duct design, ensuring a tight, airtight seal. Do a quick check for gaps or folds that could cause leaks.
Tip: Avoid over-tightening screws that may distort the duct path. - 7
Reinstall and test airflow
Reassemble the sections and slide the duct back into place. Restore power and run a brief dry cycle to listen for air leaks and check for proper airflow. If you notice reduced airflow, inspect joints again.
Tip: Run a short test first to minimize dust and lint spread. - 8
Clean up and inspect
Clear the work area of metal shavings and lint. Inspect the entire vent path for any signs of damage after the cut. Keep a routine maintenance plan to check for wear and tear at regular intervals.
Tip: Document changes with photos for future reference.
Common Questions
Is it safe to cut the dryer vent myself?
Yes, with proper precautions, correct tools, and adherence to local codes. Do not attempt if you encounter electrical components or gas connections; in those cases, hire a professional. Always power down and unplug the dryer before any work.
Yes, you can DIY, but only with the right tools, safety steps, and local code compliance. If unsure, consult a professional.
Can I use foil or plastic ducts after cutting?
No. Foil and plastic ducts are more prone to damage and lint buildup and are not recommended by most codes. Use rigid or semi-rigid metal ducting for any cut sections.
No, avoid foil or plastic ducts; metal ducts are safer and more code-friendly.
What if the cut section is damaged beyond repair?
Replace the damaged section rather than patching. A repaired duct can fail under heat and lint buildup, posing a fire risk. Ensure the entire run remains straight and secure.
If damaged, replace that section instead of patching; it keeps airflow safe and efficient.
How long does the cutting process take?
In typical cases, the process takes about an hour, depending on duct layout and accessibility. Plan extra time for resealing and testing
Typically about an hour, depending on layout and accessibility.
Do I need special permits to modify the vent?
Permit requirements vary by location. Check your local building department before starting any modification. Following professional guidelines ensures compliance and safety.
Check local permits; if in doubt, contact your building department.
What are signs I should stop and call a pro?
If you encounter damaged joints, gas lines nearby, or uncertain duct routing, stop and consult a professional. A wrong cut can reduce airflow or create a fire hazard.
Call a pro if you see gas lines, uncertain routing, or significant damage.
Watch Video
Key Points
- Use metal-cutting tools on metal ducts.
- Avoid cutting non-metal ducts to reduce fire risk.
- Deburr and seal joints for optimal airflow.
- Test airflow after reinstalling to confirm safety.