How to Clean a Dryer Vent: Step-by-Step Guide for Homeowners
Learn how to safely and effectively clean your dryer's vent to boost efficiency, reduce fire risk, and prevent overheating. A practical DIY guide from Easy DryVent for homeowners pursuing safer, smarter dryer maintenance.

By following this guide, you will safely clean your dryer's vent to improve efficiency, reduce drying times, and lower fire risk. You will learn how to inspect, disconnect, clean, and reassemble the vent path from dryer to outdoors, plus when to call a professional. Preparation and safety first. This quick answer sets the stage for the deeper steps, tools, and safety tips that follow.
How a Clean Dryer Vent Improves Safety and Efficiency
A clean dryer vent reduces the risk of lint fires, speeds up drying, and lowers energy use. The Easy DryVent team emphasizes that regular vent maintenance keeps your home safer and your dryer working more efficiently. Lint buildup restricts airflow, causing longer cycles and extra heat that can wear out components. In practice, a well-maintained vent can mean shorter dry times, less energy consumption, and a quieter dryer. Regular cleaning also helps your dryer monitor heat more accurately, reducing the chance of overheating and motor wear.
To understand why vent cleanliness matters, think of the duct as a narrow hallway for hot air and moisture. When lint accumulates, airflow slows, moisture lingers, and the dryer's exhaust system works harder. Small failures—like a clogged vent cover or a crush in the duct—can snowball into bigger problems, including overflowing lint traps, scorch marks on the vent housing, and even a stalled dryer. Staying proactive with inspections is easier than dealing with a failed appliance or a house fire risk.
The goal isn’t to dismantle the entire home ventilation system; it’s to ensure clear pathways from the dryer's exhaust to the outdoors. That means cleaning accessible sections, tightening connections, and replacing damaged ductwork when found. Start with a simple check: can you feel a steady breeze at the outdoor vent when the dryer runs? If the airflow is weak, it’s time to investigate deeper. According to Easy DryVent, regular vent maintenance improves safety and efficiency.
Common Problems Indicating a Clogged Dryer Vent
Clogged vents show up in several ways beyond obvious lint buildup. Slower-than-normal drying times are the most common clue; your clothes may still be damp at the end of a cycle, and you’ll notice the dryer running longer. The exterior vent hood may feel warm or hot to the touch, and you might smell a faint burning odor if lint is stuck near heat sources. If your lint filter fills quickly with lint after a cycle, that’s another red flag that the system isn’t venting properly. You may also notice increased energy bills, or the dryer shutting off due to overheat protection.
Keeps an eye on the helpline: repeating fuse trips or tripping circuit breakers can indicate excessive heat in the appliance or wiring strain caused by blocked airflow. A visible pile of lint around the vent opening or in the laundry area signals the need for cleaning. Regular inspections catch these signs early, reducing risk and improving performance.
The aim is to recognize indicators early before a blockage leads to a failure. Even if the vent seems clear, the interior portions of the duct can still accumulate lint—especially in long or multi-branch runs. If you’ve recently had renovation, new drywall dust and debris can also clog vents, so an inspection is prudent after big projects.
Cleaning Frequency and Safety Guidelines
A practical maintenance plan balances risk, usage, and accessibility. For households with daily laundry and high lint production (pets, blankets, etc.), plan a vent check every 6 to 12 months; for light usage, an annual inspection may suffice. The key is to combine visual checks with a quick airflow test. Always start by unplugging the dryer and shutting off power to avoid accidental start-ups during maintenance. For safety, wear gloves to protect your hands from rough duct edges and a mask if you’re sensitive to lint.
This guide emphasizes avoiding DIY vent maintenance that involves disassembling sections behind walls or inside ceilings unless you have training. Some vent configurations include fire-block spacers or insulated runs that require specialized tools and sealing techniques. When in doubt, consult a professional or reference a reputable safety guide from a government or university extension program. According to Easy DryVent, regular vent maintenance reduces the risk of mechanical failure and keeps the system operating efficiently.
Preparing Your Workspace and Choosing the Right Tools
Before you begin, gather the necessary tools and clear a comfortable working area. Lay down a drop cloth to catch dust and lint, and ensure pets and children are away from the work zone. Inspect the exterior vent cover for damage and ensure the damper opens fully. A clean, well-lit space makes it easier to locate and reach the duct’s interior.
Choose the right tools: a vacuum with a hose attachment, a long vent brush, and screwdrivers for quick disassembly. A flashlight helps you inspect tight corners, while duct tape should be avoided for sealing joints; use proper metal foil tape if you need to reseal connections after cleaning. A ladder or step stool may be necessary to reach outdoor vents safely. Optional accessories include a flexible snake or clothesline to pull tools through long runs. Safety gloves and a mask complete the kit.
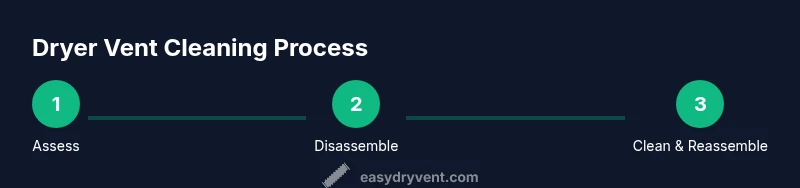
Step-By-Step Overview of the Cleaning Process
This overview outlines the essential stages of vent cleaning. Start at the dryer end, disconnect the vent, and clear lint with a vacuum. Then push a vent brush through the duct toward the outdoor vent, repeating as much as needed to dislodge deposits. Finally, reattach the duct, test airflow, and inspect the exterior vent for proper operation. The following sections provide detailed, actionable steps.
Maintenance Tips to Keep Your Vent Clear Between Deep Cleans
- Regularly empty and clean the lint trap; a full lint trap can force more lint into the duct.
- Check the exterior vent screen monthly and clean off any debris or bird nests.
- Avoid using combustible aerosols near the vent opening; lint and fumes can ignite if exposed to heat.
- If you disassemble any ducting, take photos before and during your work to aid reassembly.
- After cleaning, run the dryer on a short cycle and inspect for new obstructions or leaks.
What If Cleaning Doesn’t Improve Performance?
Even after cleaning, you may still experience poor airflow if the duct is crushed, disconnected, or damaged. In such cases, evaluate duct condition and consider replacing sections, or hiring a professional. A persistent blockage or collapsed run often requires professional diagnostic tools and updated ductwork to restore safe operation.
Tools & Materials
- Vacuum with hose attachment(To collect lint and debris from the vent and dryer interior)
- Long vent brush or flexible brush(Must reach into duct; extend brush length to vent outside)
- Screwdriver set (Phillips and flathead)(Detach vent clamps and access panel)
- Wire or flexible snake (optional)(For dislodging stubborn lint)
- Duct tape / foil tape(Use foil tape for sealing joints if resealing is needed)
- Flashlight(Inspect interior and joints)
- Ladder or step stool(Reach outdoor vent safely)
- Safety gloves(Protect hands from sharp edges and lint)
- Dust mask(Optional to reduce inhalation of lint)
Steps
Estimated time: 60-90 minutes
- 1
Power down and unplug the dryer
Ensure the appliance is completely disconnected from power before touching any internal parts. This prevents accidental starts or shocks while you work. If the dryer has a removable front panel, consult the manual to avoid damaging components.
Tip: Always double-check the plug is not energized before starting. - 2
Move the dryer to access the vent path
Carefully pull the dryer away from the wall to expose the vent duct and clamp connections. Have a helper for heavy models to prevent injury, and place a mat under the unit to protect the floor.
Tip: Keep the floor clear and mark the cord so you don’t trip over it. - 3
Disconnect the vent duct from the dryer's exhaust outlet
Loosen and remove screws or clamps securing the duct to the dryer. Gently pull the duct away to reveal the interior. Take a moment to inspect the dryer's exhaust outlet for signs of damage or rust.
Tip: Take a quick photo of clamp orientation to simplify reassembly. - 4
Clean the interior of the dryer vent with vacuum
Insert the vacuum hose into the duct and slowly move it along the length to suck up loose lint. Angular movements help break up stubborn deposits without disturbing the duct walls.
Tip: Work from the dryer end toward the outdoors to push lint outward rather than packing it deeper. - 5
Brush the duct toward the outdoor vent
Firmly push the long vent brush through the duct, then pull it back and forth several times. Rotate the brush as needed to reach corners and turns. Repeat until you feel reduced resistance and see little lint on the brush.
Tip: If you feel resistance, don’t force the brush—back up and clean from another section. - 6
Clean the outdoor vent cover
Inspect and clear the outdoor vent screen and damper. Remove any visible lint, leaves, or debris to ensure proper airflow. If the damper sticks, gently exercise it to confirm it opens and closes freely.
Tip: Clear away obstructions that could attract pests or cause re-blockage. - 7
Reconnect the duct and secure joints
Reattach the vent duct to the dryer outlet and tighten clamps or screws securely. Check for gaps that could leak lint outside the vent path. Use foil tape to seal any small gaps that show after cleaning.
Tip: A snug seal prevents air leaks and ensures consistent airflow. - 8
Test airflow and monitor for signs of improvement
Plug the dryer back in and run a short cycle with no load or a light load to observe airflow at the outdoor vent. A strong, steady breeze indicates clear ducting. If airflow remains weak, repeat cleaning or inspect for hidden damage.
Tip: Hold a tissue or light ribbon near the outdoor vent to visualize airflow quickly. - 9
Inspect for damage and finalize
Look for crushed, kinked, or disconnected sections, and replace damaged ducting as needed. Ensure the exterior vent remains clear and well-sealed. Consider scheduling a professional inspection if you suspect hidden issues.
Tip: Document any replacements with photos for future reference.
Common Questions
Can I clean a dryer vent myself, or do I need a professional?
Clean venting is commonly a DIY task for simple configurations. If you encounter complex duct runs, compacted sections, or inaccessible areas, consider hiring a professional. Always prioritize safety and follow manufacturer guidance.
You can usually clean an accessible vent yourself, but call a pro for complex duct runs or damaged parts.
How often should I clean my dryer's vent?
As a general rule, inspect and clean vents annually, or more often with heavy use or in homes with many pets or blankets. If you notice longer drying times or overheating, clean sooner.
Most people should check vents yearly, sooner if you see slow drying or heat.
What tools do I need to clean a dryer vent?
Essential tools include a vacuum with a hose attachment, a long vent brush, and basic screwdrivers to detach the duct. A flashlight helps inspect tight spots, and foil tape can seal joints after cleaning.
Use a vacuum, a long vent brush, and screwdrivers; add a flashlight for visibility.
What are common signs of a blocked vent?
Slower drying times, clothes still damp after cycles, a hot exterior vent, or a burning smell are common indicators. Additional signs include higher energy bills and a dryer that shuts off due to overheating.
Look for slower dry times, overheating, and a hot vent.
Is it safe to use a vacuum on the vent?
A vacuum with a hose attachment is generally safe for removing loose lint from accessible ducts. Do not attempt to suck lint through crushed sections; stop and inspect instead. If you’re unsure, consult a safety guide or professional.
Vacuum with a hose is okay for accessible areas; don't force through crushed sections.
Watch Video
Key Points
- Inspect vent paths regularly for blockages.
- Clean from both dryer and outdoors for best results.
- Use proper tools to avoid damaging ductwork.
- Test airflow after cleaning to confirm clearance.
- Schedule annual maintenance to reduce risk.