How Is Dryer Vent Cleaning Done: A Practical DIY Guide
Explore how is dryer vent cleaning done with a safe, step-by-step approach. Learn tools, methods, safety tips, and when to call a professional to reduce fire risk and improve drying efficiency.

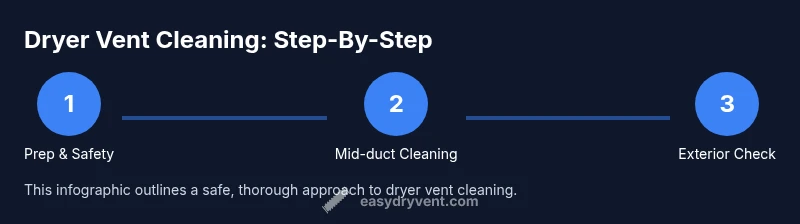
By following a careful, step-by-step process, you can clean a dryer vent safely and effectively. The goal is to remove lint and debris from the lint trap, internal ducts, and vent exterior, using a combination of vacuum, brushes, and flexible rods. Key requirements: disconnect power, move the dryer, choose the right tools, and wear a mask to reduce dust exposure.
What is dryer vent cleaning and why it matters
Dryer vent cleaning is the systematic removal of lint, dust, and debris from the dryer’s venting system, spanning the lint trap, blower housing, interior ducts, and the exterior vent hood. This maintenance is essential because lint buildup can restrict airflow, extend drying times, waste energy, and pose a serious fire hazard. In many homes, lint quietly accumulates behind and above the dryer, where it’s easy to overlook. The question of how is dryer vent cleaning done becomes a practical, safety-first process that keeps your laundry routine efficient and safe. Easy DryVent has seen firsthand how regular cleaning reduces risks and improves dryer performance, especially in households with high laundry throughput. By integrating routine checks into your home maintenance schedule, you protect your family and extend the life of your appliance.
How lint and ducts affect performance and safety
Lint accumulation is not just a nuisance; it changes the physics of airflow. A clogged section acts like a partial dam, reducing suction from the blower and forcing the dryer to work harder. This leads to longer cycles, higher energy use, and more heat near combustible lint. The ducts themselves vary in size, shape, and material, from rigid metal runs to flexible plastic segments. Each joint and bend is a potential lint trap where debris can settle. Exterior vent caps may become blocked by leaves, nests, or even small animals, creating a backpressure that worsens airflow. Understanding the layout of your system helps tailor the cleaning approach and determine whether DIY methods are adequate or if a professional service is warranted. Easy DryVent emphasizes inspecting both indoors and outdoors as part of any cleaning plan.
Tools, materials, and cleaning approaches
A safe, effective cleaning uses a combination of mechanical agitation and suction. Basic DIY kits include a vacuum with a hose attachment, lint trap brushes, flexible cleaning rods, and a long vent brush. Always gather a flashlight, screwdriver, masks, and eye protection. Use metal ducts only if they’re designed for cleaning; plastic ducts can be damaged by aggressive rods. There are pros and cons to different methods: manual brushing is inexpensive and flexible but slower; power-assisted rods can reach deeper sections but require careful technique. If your system includes long or complex runs, a professional service may be worth the investment to ensure all segments are accessible and free of obstruction. Easy DryVent recommends starting with the simplest method and escalating only if you can safely access all parts of the vent.
Safety practices and best practices for your home
Before you begin, unplug the dryer and disconnect any gas supply in the case of gas-powered units. Move the appliance at least a few inches away from the wall to access the vent and access panels. Wear a dust mask and safety glasses, and use a drop cloth to catch falling lint. Work in short, controlled bursts and take breaks if needed. Never use high-pressure air or liquids to push debris into the duct; moisture can encourage mold growth and damage components. When cleaning, document the path from the dryer toward the exterior, so you don’t miss hidden segments. After you finish, reattach the vent cover securely and test the system by running a short dry cycle and observing airflow at the exterior vent. If you notice reduced airflow or odd smells, stop and reassess.
When to call a professional and what to expect
Even with care, some situations are best left to pros. Long or labyrinthine ductwork, or ducts that have never been cleaned, may require specialized tools and experience. If you see persistent lint buildup behind the dryer, notice heat at the wall, or detect a burning odor, contact a qualified technician. A professional dryer vent cleaning typically includes a thorough inspection, rod-and-brush cleaning of all accessible ducts, exterior vent clearance, and a final airflow test. Always request a written report of findings and recommended maintenance intervals.
Tools & Materials
- Vacuum with hose attachment(HEPA-filter preferred, long hose to reach ducts)
- Lint trap brush(Cylindrical or conical brush designed for lint removal)
- Flexible cleaning rods(1 ft – 2 ft sections that connect securely)
- Long vent brush(With adjustable head to reach bends)
- Screwdriver or nut driver(To remove access panels or duct clamps)
- Flashlight(Inspect dark duct runs and joints)
- Dust mask or respirator(Protect lungs from lint and dust particles)
- Safety glasses(Eye protection during brushing and lifting)
- Drop cloth or old sheet(Catch lint and protect flooring)
Steps
Estimated time: 60-90 minutes
- 1
Power down and prep the area
Unplug the dryer from the wall outlet and disconnect the vent line if accessible; gently pull the dryer away from the wall to gain space behind it. If you have a gas dryer, shut off the gas supply following local codes. Clear the workspace and lay down a drop cloth to catch lint.
Tip: Double-check the outlet is not controlled by a switch that could cut power during cleaning. - 2
Inspect exterior vent and access points
Go outside and remove the exterior vent cover. Clear any debris, nests, or leaves that obstruct airflow. Inspect the duct run from the exterior to the first interior bend and confirm you can access it from the inside.
Tip: Take a before photo of the vent area to compare after cleaning. - 3
Remove lint from the lint trap and housing
Remove the lint screen and thoroughly vacuum the lint trap housing. Wipe down the area with a damp cloth and inspect for any signs of damage or wear. Dispose of lint in a sealed bag to prevent dispersion.
Tip: Replace the lint trap screen if it shows signs of wear or damage. - 4
Clean interior ducts with rods and brush
Attach a cleaning rod to the vent brush and insert it from the dryer toward the exterior in short passes. As you push, pause to vacuum lint collected at the rod and reinsert. Repeat until you see minimal lint and smooth airflow.
Tip: Work slowly through each bend to avoid dislodging joints or crimping the duct. - 5
Clean exterior vent hood and secure connections
Reinstall or clean the exterior vent cover; ensure the mesh screen is clear and that clamps and joints are tight. Replace damaged hardware and secure all connections with metal tape if needed. Clear any debris around the hood to maintain airflow.
Tip: Avoid using fabric or duct tape for structural repairs; use proper duct clamps or metal tape. - 6
Test run and reassembly
Reconnect power (and gas, if applicable) and slide the dryer back into place. Run a short 15-minute drying cycle and observe airflow at the exterior vent. If airflow is weak or uneven, recheck for kinks, crushed sections, or overlooked debris.
Tip: Document the process and plan a follow-up check in 6–12 months.
Common Questions
What are the signs that my dryer vent needs cleaning?
Common signs include longer drying times, clothes that remain damp, excessive heat at the dryer, and a musty odor. If you notice these symptoms, inspect and consider cleaning the vent.
If you notice longer drying times or heat at the dryer, you may need to inspect and possibly clean the vent.
Can I clean a dryer vent myself, or should I hire a professional?
DIY cleaning is doable for basic vents with proper safety measures and tools, but complex layouts or gas dryers may require a professional service.
You can clean some vents yourself if you’re careful, but for complex ducts or gas dryers, hire a pro.
How often should dryer vents be cleaned?
Frequency depends on usage. Homeowners with heavy use should inspect yearly and clean as needed; for lighter use, annual checks are common.
If you run a lot of loads, check yearly and clean as needed; for light use, annually is common.
Is it safe to use a vacuum to clean the vent?
Vacuuming is a common method to capture lint near the dryer, but avoid forcing debris deeper into the duct. Use a brush attachment to help loosen lint first.
Yes, a vacuum helps collect lint near the vent, but don’t push debris further into the duct.
What equipment is needed for DIY dryer vent cleaning?
Essential items include a vacuum, vent brush, flexible rods, flashlight, and protective gear. Avoid aggressive metal scrapers that can damage ducts.
You’ll need a vacuum, vent brush, flexible rods, and safety gear.
When should I call a professional for dryer vent cleaning?
If you see persistent lint buildup behind the dryer, unusual heat on the wall, or a burning odor, contact a qualified technician. Complex or long duct runs are also good reasons to hire a pro.
Call a professional if the duct is long, bent, or you’re unsure about handling gas lines.
Watch Video
Key Points
- Unplug the dryer before starting.
- Inspect the exterior vent for obstructions before cleaning.
- Use the correct tools to avoid damaging ducts.
- Schedule annual vent checks for safety and efficiency.