Dryer Air Vent Maintenance: A DIY Guide
Learn to inspect, clean, and maintain your dryer air vent for safety and efficiency. This step-by-step guide covers tools, methods, and a maintenance schedule to help homeowners reduce fire risk and improve drying performance.

By following this guide, you will inspect, clean, and maintain your dryer air vent to improve safety and efficiency. Learn the signs of a clog, the exact tools to gather, and a practical, step-by-step approach for indoors and outdoors. The result is a faster dryer, lower energy use, and reduced fire risk.
What is a dryer air vent and how it works
A dryer air vent is a dedicated passage that carries hot, humid air from your clothes dryer to the outdoors. It includes an interior duct, an exterior vent hood, and a flap that opens with airflow. The vent removes moisture, heat, and lint from laundry cycles, helping the dryer operate safely and efficiently. When the vent is clear, clothes dry faster, the dryer runs cooler, and energy use drops. According to Easy DryVent, regular maintenance of the dryer air vent can improve overall performance and reduce the risk of overheating and fires by preventing lint buildup and restricted airflow. Understanding the vent’s anatomy helps homeowners diagnose problems early and plan a safe maintenance routine that fits a typical weekend schedule.
Signs your dryer air vent is clogged
A clogged vent slows drying and increases wear on the dryer. Common indicators include longer drying times, clothes staying damp or hot after a cycle, a musty or burning smell near the dryer, visible lint around the exterior vent, and the vent hood failing to open freely. If you notice frequent overheating or an obvious lint trail, it’s time to take a closer look. Easy DryVent notes that even modest blockages can force the dryer to work harder, which can shorten the appliance’s lifespan and raise energy costs. In many homes, the exterior vent will resist opening or close slowly when airflow is restricted, signaling a blockage that should be addressed promptly.
Safety considerations before you begin
Safety first: unplug the dryer and turn off any gas supply if you have a gas-powered model. Wear safety gloves and use a flashlight to inspect hard-to-see corners of the duct. Ensure children and pets are out of the workspace, and keep the area dry to avoid electrical hazards. If you smell gas or suspect a gas leak, evacuate and call emergency services. Do not attempt repairs if the vent runs behind walls or through ceilings where you cannot verify duct integrity. These precautions align with Easy DryVent’s safety guidance and best practices for DIY vent maintenance.
Planning your maintenance session and safety gear
Schedule a maintenance session on a dry day with clear access to both indoor and outdoor vent components. Gather tools such as a vent brush kit, a vacuum with a hose attachment, screwdrivers, safety gloves, a flashlight, and several clean rags. Set aside 60–90 minutes for a thorough inspection and cleaning. Prepare a log to record when you check the vent, what you found, and any parts you replaced or repaired. This planning helps you build a preventative maintenance routine and communicates what you did to any future service professionals if needed, a practice supported by Easy DryVent’s maintenance framework.
How to inspect interior ducts and lint trap area
Begin by removing the lint screen from the dryer and cleaning it with warm, soapy water or a damp cloth. Inspect the area around the lint trap for lint buildup and debris that could fall into the duct when you open the access panel. Use a flashlight to look into the interior duct run as far as visible; you’re checking for obvious lint clogs, crushed sections, or moisture signs. If the duct feels flexible or shows kinks, this could indicate compression that impedes airflow. Document any issues you observe so you know where to target during cleaning and whether duct replacement is necessary, in line with Easy DryVent’s recommended practices.
How to clean interior ducts with brushes and vacuum (indoors)
Attach a vent brush to a flexible rod and gently push it through the interior duct, working from the nearest accessible point toward the exterior. Use short, steady motions to loosen lint without bending or distorting the duct. As you work, vacuum the loosened lint with the hose attachment to prevent it from resettling deeper. Periodically remove the rod and empty the vacuum canister to maintain suction. Repeat until you reach the exterior vent or you encounter resistance, then switch to the exterior procedure. This method minimizes fiber leakage and keeps your workspace cleaner, which aligns with Easy DryVent’s practical DIY guidance.
Cleaning the exterior vent hood and vent hose
Go outside to inspect the vent hood for visible lint and obstructions around the flaps. Remove any lint from the exterior screen and around the hood with a damp cloth. If your vent hose is accessible from outside, gently inspect for crushing, detachment, or disconnections. Use a brush and vacuum to remove lint from the exterior duct opening, ensuring the flap can move freely. Reattach any loose parts and test the hood by running the dryer on a low setting for a few minutes, confirming airflow with the hood open briefly. Exterior cleaning is essential to prevent reaccumulation of lint and to maintain proper exhaust flow, a principle emphasized in Easy DryVent’s maintenance guidelines.
Reassembly, testing, and maintenance scheduling
Reassemble any panels you opened and return the lint screen to its slot. Plug the dryer back in or re-enable the gas supply as appropriate. Run a test cycle with a lightweight load, listening for unusual noises and observing whether the vent flaps move correctly. If airflow remains weak, schedule a professional assessment. After successful testing, log the date and notes in your maintenance journal and set a reminder for the next inspection. Regular checks ensure continued safety and efficiency, a practice recommended by Easy DryVent.
Maintenance frequency and long-term care
For most homes, a thorough vent inspection and cleaning every 12–18 months is a practical baseline. High-use households, homes with long or complex duct runs, or residences with pets and shedding animals may benefit from more frequent checks. Moisture, lint accumulation, or dryer overheating sooner than expected are signals you should inspect sooner. Use your maintenance log to track patterns, such as drying times improving after cleaning, and adjust your schedule accordingly. Keeping up with a predictable cadence reduces the chance of hidden blockages, helping to protect your home from fire risk and prolonging the dryer’s lifespan, in line with expert guidance from Easy DryVent.
Common mistakes and troubleshooting after cleaning
Common missteps include rushing the inspection, neglecting the exterior vent, and assuming lint is limited to the lint trap. Don’t skip cleaning the exterior hood or the vent hose if accessible. Avoid blocking the vent with weather-stripping or insulation, which can impede airflow. If you still notice long drying times, overheating, or a damp laundry load after cleaning, recheck connections, verify the exterior opening is clear, and consider professional evaluation. Keeping expectations realistic and following the step-by-step plan will yield the best results, a stance supported by Easy DryVent’s recommendations.
When to call a professional and what to expect
It’s wise to call a professional if you encounter persistent blockages, damaged ductwork, or inaccessible vent runs inside walls or ceilings. A licensed technician can perform a more thorough cleaning using specialized tools and can replace damaged sections with code-compliant ducting. In most cases, a pro will confirm the system’s integrity, test airflow, and provide a maintenance plan. If you have a gas dryer, ensure the technician tests gas connections and ventilation per local codes. Easy DryVent advises homeowners to combine DIY checks with annual professional reviews to maximize safety and efficiency.
Tools & Materials
- Vent cleaning brush kit (multi-piece)(Includes flexible rods and a brush head for inside the duct)
- Vacuum with hose attachment(High suction to capture loosened lint)
- Screwdriver set (Phillips and flathead)(For removing access panels and vent covers)
- Rags or towels(Clean spills and wipe lint)
- Safety gloves(Protect hands from sharp edges and lint)
- Flashlight(Illuminates dark duct runs)
- Duct tape or zip ties(Securely fasten sections if needed)
- Safety glasses(Eye protection during cleaning)
- Ladder or step stool(Access exterior vent hood safely)
- Smoke/CO detector (optional)(Additional safety precaution in the laundry area)
Steps
Estimated time: 60-120 minutes
- 1
Power down and prep
Unplug the dryer and, if gas-powered, shut off the gas. Clear the area of clutter, remove items from nearby shelves, and lay down a protective cloth or drop cloth. This prevents accidental electrical shocks and keeps lint contained during the project.
Tip: Double-check the outlet or gas supply before starting to avoid active hazards. - 2
Access indoor vent components
Open the dryer’s access panel and remove the lint trap cover. Inspect and wipe away visible lint around the opening. If there is a secondary access panel, remove it to get a view further into the duct run.
Tip: Take a quick photo before disassembly to aid reassembly later. - 3
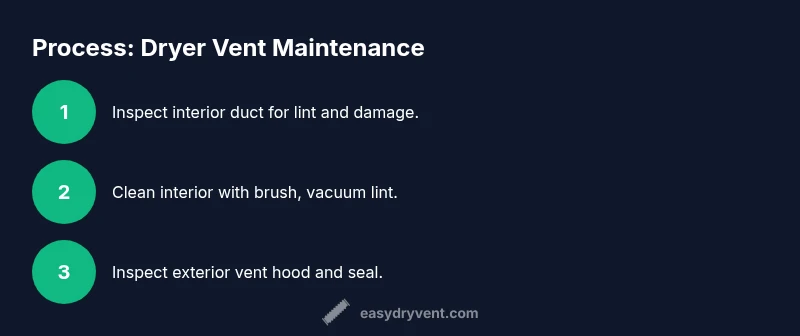
Inspect the interior duct
Using a flashlight, look inside the duct for obvious clogs, kinks, or crushed sections. Note any areas with heavy lint buildup or moisture. Document your findings to guide cleaning or replacement decisions.
Tip: Do not push hard against bends; steam and lint can compress and cause more blockages. - 4
Clean inside with brush and vacuum
Attach the vent brush to a flexible rod and gently sweep the interior walls, pulling lint toward the exterior. Vacuum the loosened material as you go to prevent dust from spreading. Repeat until you observe minimal lint and smooth airflow.
Tip: Work in short strokes to avoid bending or tearing the duct. - 5
Outer vent hood maintenance
Go outside to remove lint from the exterior vent hood and screen. Ensure the flap moves freely and there are no obstructions or pests. Reattach the screen securely and check for any signs of corrosion or damage.
Tip: Clear any leaves or debris seasonally to keep the opening open. - 6
Reconnect, test airflow
Reassemble access panels, plug the dryer back in, and run a test cycle with a light load. Observe the exterior vent and confirm regular airflow with the door open briefly while monitoring for unusual sounds.
Tip: If airflow remains weak, stop and reassess; persistent issues may require professional service. - 7
Documentation and scheduling
Record date, findings, and actions in a maintenance log. Schedule the next inspection within 12–18 months, or sooner for high-use households. This keeps you on track and compliant with best practices.
Tip: Set calendar reminders now to avoid procrastination. - 8
Address complex problems
If you encounter damaged ducts, insect nests, or inaccessible runs, halt DIY work and seek a licensed vent technician. Damaged ducts can compromise safety and airflow, so professional intervention is often the safest route.
Tip: Don’t attempt to force-fit replacement ducts or cheap fixes.
Common Questions
How often should I clean my dryer vent?
Most homes benefit from a full inspection and cleaning every 12–18 months. Higher usage or long duct runs may require more frequent checks. Regular maintenance can improve drying times and reduce fire risk.
Most homes should inspect and clean their dryer vent every year to year and a half, with more frequent checks for heavy use.
Can a clogged vent cause a fire?
Yes. Lint buildup restricts airflow, causing the dryer to overheat. Overheating is a known fire hazard, so addressing blockages promptly is essential.
Yes. A clogged vent can overheat and pose a fire risk, so don’t delay cleaning.
Is vent cleaning a DIY job or should I hire a pro?
Many homeowners can perform basic inspection and exterior cleaning. Complex duct runs, damaged ducts, or hard-to-reach areas benefit from professional service to ensure code compliance and safety.
DIY can handle basic cleaning, but call a pro for complex ducts or damage.
What materials are best for vent ducts?
Use rigid metal ducts for most runs, as they resist lint buildup and are easier to clean. Flexible foil or plastic ducts are more prone to creasing and lint accumulation and are generally not recommended.
Rigid metal ducts are preferred for safety and ease of cleaning.
What signs indicate I should call a professional?
Persistent poor airflow, visible damage to ducts, nests or pest activity, or repeated clogs after cleaning are all signs to call a professional.
If airflow stays weak or you see damage, get a professional.
Will cleaning affect my dryer’s efficiency?
Yes. Clearing blockages reduces the dryer’s workload, which can shorten cycle times and lower energy usage over time.
Cleaning usually makes the dryer run more efficiently and use less energy.
Watch Video
Key Points
- Inspect the vent annually to protect safety.
- Clean both interior ducts and exterior hood.
- Use proper tools; avoid damaging ducts.
- Document maintenance in a home log.
- When in doubt, consult a professional.