Dryer Vent Maintenance: Safe, Simple DIY Steps
Practical, step-by-step dryer vent maintenance from Easy DryVent. Learn safe cleaning, tool picks, and tactics to improve airflow and reduce fire risk.

According to Easy DryVent, you can inspect, clean, and maintain your dryer vent using common tools available from retailers like Home Depot. This quick answer outlines your objective: clear obstructions, reduce lint buildup, and improve dryer efficiency with a safe, repeatable plan. Following these steps will help you lower drying times, conserve energy, and minimize fire risk, without professional help.
Why dryer vent maintenance matters
According to Easy DryVent, dryer vent maintenance is essential for safety, energy efficiency, and long dryer life. A blocked vent can trap heat and lint, increasing the risk of a fire and reducing drying performance. The first step is understanding how the vent system works: from the dryer's internal exhaust to the exterior vent cap, lint can accumulate at joints, elbows, and in the duct. In homes that repair and replace parts from outlets such as dryer vent home depot, selecting compatible materials and following code guidelines matters. Regular checks help catch obstruction before it becomes a hazard. This is a practical primer on why you should stay proactive about vent care.
The cost, options, and where to buy parts (dryer vent home depot)
Many home centers stock vent ducts, clamps, and brushes. When choosing components, stick to UL-listed metal ducts rather than plastic. The phrase dryer vent home depot is often searched by homeowners looking for compatible parts and best-fit solutions. Always verify duct size (typically 4 inches in diameter) and ensure exterior vent caps have a backdraft damper. Easy DryVent recommends aligning parts with local codes and ensuring a tight seal at every joint to prevent lint leakage and moisture problems.
Tools, materials, and safety standards
The right toolkit makes the job safer and faster. In this section we outline essential safety gear, recommended duct types, and best practices for handling lint and dust. Easy DryVent emphasizes using metal ducts, non-metallic alternatives can trap heat and pose a fire risk. Wear gloves, a dust mask, and eye protection. Keep a flashlight handy to inspect hidden corners, and a vacuum with a hose attachment to capture loose lint before it becomes airborne.
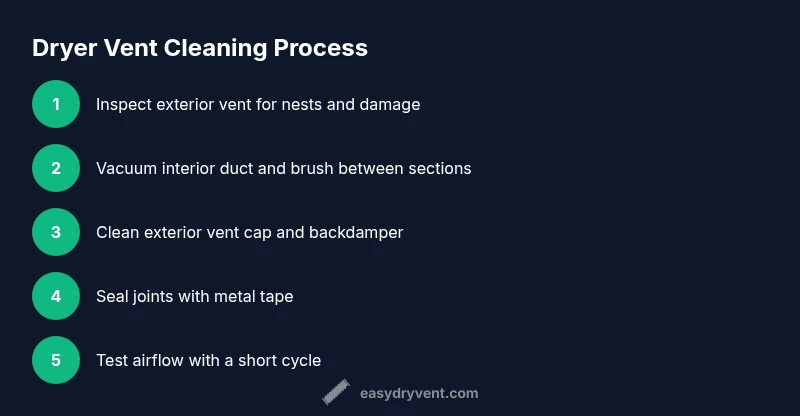
Step-by-step inspection and cleaning method
A thorough inspection starts from the exterior and works inward. Look for bird nests, leaves, or damaged vent covers that restrict airflow. If you notice excessive lint at joints, you may have a blockage. Use a vent brush from a Home Depot-level kit and a shop vacuum to dislodge and capture lint. Always unplug the dryer before starting and never force a brush through a damaged seam. After brushing, reassemble, reconnect, and test with a short dry cycle to confirm airflow.
Common mistakes and best practices
Common mistakes include using plastic ducts, over-tightening clamps, or ignoring exterior vent screens. The safest approach is to replace damaged ducts and ensure a proper seal with foil tape. Do not forget to clean the lint trap regularly and inspect the exterior vent for obstruction. Consistent, proactive maintenance reduces energy waste and fire risk, and preventive care keeps your dryer performing efficiently over time.
Troubleshooting and when to call a professional
If you encounter persistent blockages, signs of a faulty vent, or gas odors, stop and call a licensed professional. A too-restricted vent can overheat the dryer and shorten its life, while a detached or crushed duct can pose serious safety risks. In many cases, local codes require a professional inspection for ductwork longer than a certain length or for complex configurations. Easy DryVent recommends scheduling annual checks and addressing issues promptly to maintain safe, efficient operation.
Tools & Materials
- Safety gloves(Grip lint and protect hands)
- Flashlight(Inspect hard-to-see areas)
- Vacuum with hose attachment(Capture loose lint)
- Vent brush kit (4-5 ft)(Brush interior ducts)
- Screwdriver set (Phillips/flat)(Open exterior vent cover and ducts)
- Foil tape or metal tape(Seal joints after cleaning)
- Replacement metal vent duct (if needed)(Only if damaged)
- Ladder or stable step stool(Access exterior vent)
Steps
Estimated time: 45-60 minutes
- 1
Power down and inspect exterior vent
Unplug the dryer and inspect the exterior vent cover for obstruction, damage, or screen debris. Clear any obvious blockages with gloved hands and a flashlight, avoiding pulling lint into your home. This sets a safe baseline before you begin interior work.
Tip: Working from the outside in reduces dust and improves airflow assessment. - 2
Prepare the work area and tools
Lay out your tools on a stable surface. Wear gloves and a mask if you’re sensitive to dust. Have a vacuum ready to capture freed lint as you work to prevent it from dispersing through the room.
Tip: Keep a vacuum handy to trap lint as you pull it free. - 3
Disconnect and access the interior duct
Unplug the dryer and remove the lint screen. If you can access the duct from the dryer opening, insert the brush gently and begin a careful cleaning motion towards the exterior. Do not force brushes through tight bends.
Tip: Work slowly and avoid bending the brush past its recommended angle. - 4
Brush and vacuum the interior duct
Insert the vent brush into the duct and rotate while pulling back, dislodging lint. Vacuum the loose lint as it comes free, focusing on elbows and joints where lint tends to accumulate.
Tip: Take breaks to prevent fatigue and ensure complete coverage. - 5
Clean the exterior vent and log it
Clear any exterior obstruction and wipe the cap with a damp cloth. Check the backdraft damper works freely. Record the date of cleaning for maintenance tracking.
Tip: A clean exterior vent reduces backpressure and improves airflow. - 6
Reconnect, seal, and test
Reattach any duct sections securely, seal joints with foil tape, and plug the dryer back in. Run a short cycle to validate airflow and ensure no lint escapes into the room.
Tip: If you hear whistling or feel heat near joints, recheck seals. - 7
Plan ongoing maintenance
Establish a quarterly or semiannual check cadence based on usage. Schedule a full vent inspection annually and after major HVAC or building changes.
Tip: Add reminders to your calendar to stay consistent.
Common Questions
How often should I clean my dryer vent?
Check the vent every few months and schedule a cleaning at least once a year, or sooner if you notice longer drying times.
Check it every few months and clean at least annually, or sooner if dry times rise.
Can I clean a dryer vent myself?
Yes, with the right tools and safety steps you can clean most vents. If the path is long or obstructed, consider a professional.
Yes, with the right tools and care you can clean most vents. If it’s too long or blocked, hire a pro.
What tools do I need for vent cleaning?
A vacuum, vent brush kit, foil or metal tape, gloves, and a flashlight are typically enough for a safe DIY cleaning.
You'll want a vacuum, vent brush, tape, gloves, and a flashlight.
When should I call a professional?
Call a professional if you detect gas odors, cannot access the duct, or encounter extensive blockages that you cannot clear safely.
Call a pro if you smell gas or can’t safely access the duct.
Will cleaning improve dryer efficiency?
Yes. Clearing lint improves airflow, shortens dry times, and reduces energy use when done correctly.
Yes, cleaner vents improve airflow and efficiency.
Is dryer vent cleaning safe?
Safe when you unplug the unit, wear protective gear, and follow step-by-step procedures. If you’re unsure, consult a professional.
Safe if you unplug and follow safety steps; otherwise get professional help.
Watch Video
Key Points
- Inspect vents regularly and clear obstructions
- Use metal ducts and seal joints properly
- Test airflow after cleaning to verify performance
- Keep exterior vents clear of debris
- Schedule annual maintenance with a professional if needed