Dryer Maintenance Guide: Safe Venting and Efficient Drying
Learn practical dryer maintenance and venting guidance to improve safety, reduce drying times, and extend your appliance life. Easy DryVent walks homeowners through lint care, vent cleaning, and best practices.

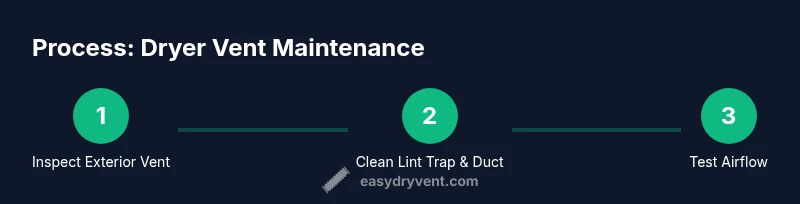
Learn to safely inspect and maintain a clothes dryer and its venting system to boost efficiency and reduce fire risk. This guide covers lint trap care, vent inspection, duct cleaning, and safe startup practices. You’ll need basic tools, a flashlight, a vacuum, and a dry workspace to complete the maintenance with confidence.
Why Dryer Maintenance Matters
According to Easy DryVent, a regular dryer maintenance routine is essential for safety and efficiency. The term dryer hair dryer may sound odd, but many homeowners mix the two in casual conversation. The core ideas—airflow, lint capture, and vent safety—apply whether you’re drying clothes or styling hair.
A neglected dryer vent can push hot, moist air into walls or ceilings, leading to mold growth and hidden damage. More importantly, lint buildup is a leading fire hazard in homes. Regular checks help you catch loose connections, worn seals, and crushed ducts before they cause problems. Energy efficiency also improves when airflow remains unobstructed, letting the dryer work at its rated heat with shorter run times.
This guide is designed for homeowners and DIY enthusiasts who want practical steps they can perform safely on a weekend. You’ll learn how to inspect exterior vents, clean lint filters, and tackle duct sections with simple tools. With consistent care, you’ll reduce drying times, lower energy bills, and prolong the life of your clothes dryer.
Not all homes have perfectly straight vent runs; you’ll learn how to assess your layout and prioritize sections that most affect performance. Keep in mind that exterior conditions and building codes matter. Always verify that your approach complies with local requirements and manufacturer instructions.
Understanding Venting Basics
Every clothes dryer relies on a clear path for hot, moist air to exit the home. The vent system should be as straight and short as possible, with few bends. Long or crimped runs force the dryer to work harder, increasing energy use and wear on the blower motor. When lint accumulates in ducts, airflow decreases and the risk of a fire grows.
Vent materials matter. Rigid metal ducts are preferred over flexible foil, which can sag and trap lint. Exterior vent hoods should open freely and resist wind-driven backflow. Regular exterior checks ensure the vent screen is not clogged by leaves, bird nests, or insects. And, if you notice a musty smell or heat coming from the laundry area, treat it as a warning sign that airflow is compromised.
For safety-minded homeowners, this aligns with guidance from NFPA and CPSC standards. Easy DryVent’s approach emphasizes planning the vent route, verifying clearances from combustibles, and scheduling professional inspection if you have long duct runs or complex layouts. These practices also complement energy-saving tips from Energy.gov to minimize heat loss.
Lint Trap and Filter Care
The lint trap is your first line of defense against fire risk and dryer inefficiency. Clean the lint screen after every load, and inspect the area around the screen for wear or damage. Use a damp cloth to wipe away any residue that builds up on the screen housing. A neglected lint trap not only slows drying times but can also contribute to overheating.
In addition to the trap, inspect the dryer's interior filter and any accessible lint collectors. Some models have reversible panels; gently remove and vacuum to remove lint lodged in crevices. If you have pets or high-shedding loads, consider a quick weekly check to keep airflow unobstructed. Regular lint care improves airflow and reduces the risk of lint migration into ducts.
Cleaning the Dryer Vent and Ducts
Vent cleaning is the most impactful maintenance task. Start by unplugging the dryer and ensuring the area is dry. From the exterior, remove the vent cover and clean the screen with a stiff brush. Inside, disconnect the duct from the dryer if you can access it safely and use a vacuum with a long wand to remove lint. For longer runs, a dryer vent cleaning brush can help reach deep into the duct without disassembling joints.
Always work from the dryer to the exterior vent so lint travels away from the appliance. If you encounter crushed sections, excessive lint buildup, or wildlife nests, schedule a deeper cleaning or call a professional. Use metal ducts whenever possible; avoid plastic ducts that can pose a fire hazard.
Drying Efficiency Tips
Optimizing airflow directly translates to shorter cycle times and lower energy consumption. Keep the lint trap clean and ensure the exterior vent is free of obstructions. Dry heavier fabrics in pairs to balance airflow and help the drum move air more efficiently. Consider using moisture-sensing cycles on compatible models to prevent over-drying, which wastes energy and can damage fabrics. If your dryer runs hot, but clothes remain damp, inspect the vent for blockages or leaks around joints.
Troubleshooting Common Issues
If a dryer takes twice as long to dry, start with lint filters and exterior vent. A noticeable increase in run time often signals reduced airflow or a blocked exhaust. If the drum is turning but clothes stay damp, inspect the vent path for kinks or crushed sections. For unusual odors, check for mold in the drum or vent, and ensure the air is escaping freely. If you see scorch marks or melted plastic on the vent, stop using the appliance and seek professional service.
Safety First: Electrical and Fire Risks
Dryer safety hinges on preventing heat buildup and ensuring proper electrical connections. Always unplug before service, and do not operate a damaged cord or outlet. Keep combustibles away from the unit, and avoid using the dryer with a damaged vent duct. Use metal ducts, secure all joints with clamps, and verify that the exterior vent is properly sealed to prevent backdrafts. If you smell burning or notice smoke, exit and call emergency services.
Maintenance Schedule and Quick Checks
Create a simple maintenance calendar: quarterly lint trap cleaning, biannual external vent inspection, and annual duct cleaning for longer runs. Maintain a log with dates and any observed issues. This routine helps catch developing problems before they become major repairs and keeps your dryer performing at peak efficiency.
Tools & Materials
- Vacuum with attachment(Prefer a vacuum with a narrow nozzle for tight ducts)
- Lint brush or flexible drill brush(Use a brush designed for lint removal)
- Flashlight(Bright, focused beam to inspect ducts)
- Screwdriver set (Phillips and flathead)(For removing access panels and duct clamps)
- Microfiber cloths(Wipe surfaces and wipe down lint housing)
- Work gloves(Protect hands while handling ducts)
- Step ladder(Optional if vents are high or hard to reach)
- Metal duct tape(Seal small gaps after cleaning (avoid duct tape in ductwork))
Steps
Estimated time: 60-90 minutes
- 1
Power down and prep
Unplug the dryer and pull it away from the wall to access the vent area. Clear the surrounding space and gather your tools. This prevents shocks and gives you room to work safely.
Tip: Test the outlet with a multimeter if you’re unsure about the circuit. - 2
Check exterior vent cover
Inspect the exterior vent hood for obstructions and ensure the flapper opens freely. Remove any debris like leaves or bird nests before testing airflow.
Tip: Do this on a dry day to avoid slipping while accessing the exterior vent. - 3
Clean lint trap and housing
Remove the lint screen and clean it thoroughly. Wipe the housing with a damp cloth to remove residual lint that can harbor moisture or mold.
Tip: Do not use water on the dryer’s internal components. - 4
Disconnect and inspect the duct
If you can safely reach, disconnect the duct from the dryer and inspect for kinks, crushed areas, and loose connections. Use a flashlight to look inside for lint buildup.
Tip: Only disconnect ducts you can access safely; if unsure, skip to step 6. - 5
Vacuum and brush the duct
Use the vacuum with a long attachment or a duct brush to remove lint inside the run. Work from the dryer toward the exterior to prevent lint from migrating back into the appliance.
Tip: Wear a mask if dust levels are high. - 6
Reconnect and seal joints
Reattach the duct securely and seal joints with clamp ties or metal duct tape if appropriate. Ensure there are no gaps allowing backdrafts.
Tip: Avoid vent tape inside the duct; use proper clamps. - 7
Test airflow and cycle
Plug the dryer back in and run a short cycle to confirm good airflow and lint collection. Listen for unusual noises and watch for any excess heat coming from the vent area.
Tip: If airflow seems weak, repeat cleaning or call a pro for a deeper inspection. - 8
Document and schedule next check
Record the date of maintenance and set reminders for 6–12 month checks depending on usage. A simple log keeps you accountable and helps extend the dryer's life.
Tip: Keep a photo record of the vent exterior for comparison over time.
Common Questions
How often should I clean my dryer's vent?
Most homes benefit from vent cleaning every 6–12 months, depending on usage and dryer type. Heavier or more frequent use may require more frequent checks.
Most homes should clean the vent every six to twelve months, depending on use. If you notice longer drying times, inspect the vent sooner.
Can I clean the vent myself or should I hire a pro?
You can perform basic lint trap and exterior vent checks yourself. For long duct runs, complex layouts, or if you’re uncomfortable, hire a certified vent cleaning specialist.
You can do basic checks yourself, but for long or complex vents consider a professional.
What are signs of a clogged vent?
Longer drying times, heat smells, and a hot dryer exterior are common signs. Visible lint buildup around the vent area is another indicator.
If clothes take longer than usual to dry or you feel heat near the vent, clean the vent or call a pro.
Is it safe to use a dryer with a damaged duct?
No. A damaged or crushed duct can trap lint and heat, increasing fire risk. Stop using the dryer and repair or replace the duct.
No—don’t use it until the duct is repaired or replaced.
What kind of duct material is recommended?
Rigid metal ducts are preferred for safety and efficiency. Avoid foil or plastic ducts which can sag, leak lint, and trap heat.
Use rigid metal ducts for safety and better airflow.
Do I need to hire a professional for every issue?
Not every issue requires a pro, but complex layouts, long runs, or smells of burning warrant expert inspection to prevent hazards.
For complex vents or signs of danger, hire a professional.
Watch Video
Key Points
- Keep lint traps clean after every load.
- Prioritize straight, short vent runs with metal ducts.
- Schedule regular vent and duct cleaning to prevent fires.
- Document maintenance to track progress and safety.