Cleaning Gas Dryer Vents: A Safe DIY Guide
Learn how to safely clean a gas dryer vent, reduce fire risk, and boost efficiency with a practical, step-by-step guide from Easy DryVent for homeowners.

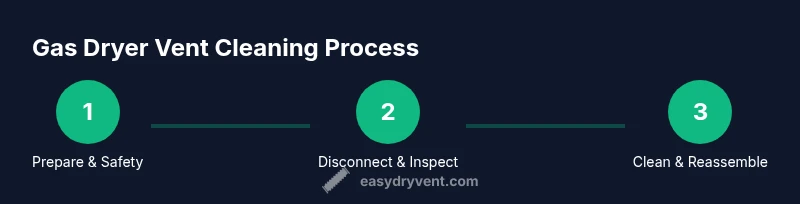
This guide shows you how to safely clean a gas dryer vent in 6 clear steps, reducing fire risk and improving drying efficiency. You'll inspect the exterior vent, disconnect the dryer vent hose, remove lint buildup, scrub the duct, reseal joints, and test the system. Follow safety precautions and turn off power before starting.
Why cleaning gas dryer vent matters
A clean gas dryer vent is essential for safety, performance, and efficiency. Over time, lint and moisture accumulate in vent ducts, constricting airflow and forcing the dryer to work harder. This not only increases energy use but also raises the risk of a vent fire when lint ignites. Regular maintenance helps prevent carbon monoxide buildup by ensuring proper exhaust flow and reduces drying times, prolonging the life of the appliance. According to Easy DryVent, homeowners who perform routine vent cleanings see noticeable improvements in airflow and dryer reliability. This section explains the practical reasons to keep the vent clear and how a routine check fits into a broader maintenance plan for your laundry space.
Safety first: risks and precautions
Maintaining a gas-powered appliance carries specific safety considerations. Always unplug the dryer or switch off the circuit breaker before handling any vent components. If you smell gas, hear hissing, or detect a gas leak, evacuate and contact your gas utility provider immediately. A carbon monoxide detector near the laundry area is highly recommended. Wear gloves and a dust mask to minimize exposure to dust and fiberglass. Never clean a running dryer or attempt vent work without ensuring power is off. The Easy DryVent Team emphasizes prioritizing safety and using proper protective gear when inspecting or cleaning gas vent systems.
Common blockages and signs your vent needs attention
Blocked vents manifest as longer-than-usual drying times, excessive heat around the unit, or a warm to hot vent duct after use. You might notice a musty odor or lint collecting at the vent exterior flap. Frequent fires or burn smells, unusual noises, or the dryer becoming extremely hot are warning signs that require immediate attention. Regular visual checks of both interior ducts and the exterior vent can catch clogs early. If you observe any of these indicators, plan a cleaning session and reassess airflow after reassembly.
Planning your cleaning: a practical checklist
Before you dive in, assemble a basic set of tools, confirm power is off, and choose a dry day for exterior work. Clear the area around the dryer, note any gas shutoff procedures if your system requires them, and lay down protective coverings to catch debris. Plan for an inspection of both the interior duct path and the exterior vent cap. Document results and schedule the next maintenance window to maintain consistent airflow. A little planning pays off with a safer, more efficient drying cycle.
Authoritative sources and safety standards
For reference, safety standards and guidance from recognized authorities can help you evaluate your vent setup and maintenance practices. This block collects key sources to consult when performing vent cleaning and safety checks. For more details, see the official pages from major public-facing organizations and standards bodies that address home ventilation, fire safety, and appliance maintenance. Remember: verify any recommendations against your local codes and the appliance manufacturer’s guidance. Easy DryVent encourages homeowners to use trusted sources to inform DIY maintenance decisions.
Keeping your gas dryer vent clean: maintenance tips and scheduling
Create a simple maintenance cadence—at minimum, perform a thorough vent cleaning annually or more often if you dry heavily, run multiple cycles per day, or notice longer drying times. After each clean, run a test cycle with a short load to verify airflow and ensure the exterior vent flap opens freely. Keep a maintenance log and replace worn duct tape or clamps as needed. By treating vent cleaning as a recurring task, you’ll sustain dryer efficiency and reduce the likelihood of heat buildup.
Tools & Materials
- Vacuum with attachments (HEPA preferred)(Include a crevice tool or narrow nozzle for tight spaces inside the duct)
- Duct cleaning brushes (long, flexible)(Brings lint loose and sweeps debris within the duct path)
- Lint brush with extendable wand(Used to loosen lint near the dryer exhaust and trap area)
- Flashlight or headlamp(Helps illuminate dark interior duct sections)
- Screwdriver set (flat and Phillips)(To detach vent clamps or faceplates if needed)
- Work gloves(Protect hands from sharp edges and fiberglass debris)
- Dust mask or respirator(Reduces inhalation of dust and lint particles)
Steps
Estimated time: 60-90 minutes
- 1
Power down and prep
Unplug the dryer from the outlet or switch off the circuit breaker. Move the dryer gently to access the vent hose and exterior vent. This prevents accidental startup and keeps you safe while you work.
Tip: Confirm the power is off using a simple outlet tester or by testing the dryer's control panel. - 2
Disconnect vent at dryer and exterior
Carefully loosen clamps and detach the vent hose from the dryer's exhaust and from the exterior vent cap. Have a towel ready to catch any residual lint that falls out during detachment.
Tip: Keep track of screws and clamps so you can reseal tightly later. - 3
Clear interior duct and remove lint
Use the flexible brush and vacuum to sweep lint and debris from the interior duct toward the exterior. Work slowly, applying gentle pressure to avoid dislodging joints. Reattach the hose only after you’re confident the path is clear.
Tip: Do not force brushes through tight bends; work from both ends if needed. - 4
Clean exterior vent and flap
Brush and vacuum the exterior vent opening and the flap to ensure unobstructed airflow. Remove any leaves, bird nests, or animal debris that could block exhaust. Test the flap to confirm it opens freely when the dryer is running.
Tip: Wear gloves when handling exterior debris; ensure the area around the vent is free of combustibles. - 5
Reconnect and seal joints
Reattach the vent hose to the dryer and exterior vent using the clamps. Tighten securely to prevent air leaks and recheck for any gaps or disconnected sections. A good seal maintains efficient airflow and reduces lint escape.
Tip: Use metal foil tape (not duct tape) for sealing joints if appropriate for your vent type. - 6
Test airflow and schedule the next check
Plug the dryer back in and run a short, no-load or small-load cycle to verify airflow. Check both the interior duct and exterior vent for signs of airflow and verify the flap opens correctly. Schedule your next cleaning in 6-12 months based on usage.
Tip: Record the test results and maintenance date to track vent performance over time.
Common Questions
Is it safe to clean a gas dryer vent by myself?
DIY vent cleaning is feasible for many homeowners when following safety steps: power off, use proper tools, and avoid forcing parts through tight bends. If you smell gas or suspect a leak, stop immediately and contact a professional.
Yes, you can clean the vent yourself if you follow safety steps; if in doubt, contact a professional.
How often should I clean my gas dryer vent?
A general guideline is every 6 to 12 months, with more frequent cleanings for high-usage households or if you notice longer drying times or hot external surfaces.
Most homes should clean their vent every 6 to 12 months, more often if you dry heavily.
What tools do I need for gas dryer vent cleaning?
You’ll typically need a vacuum with attachments, long duct brushes, a lint wand, a flashlight, gloves, a mask, and basic hand tools to detach clamps.
A vacuum with attachments and long duct brushes are essential tools.
Can I clean the vent from inside the house only?
Cleaning from inside can dislodge some lint, but a complete job requires accessing both the interior duct and exterior vent for thorough clearance.
Inside cleaning helps, but you should access the exterior vent too for a full clean.
What are signs that my vent is blocked?
Look for longer drying times, heat buildup around the dryer, a burning smell, or lint around the exterior vent flap. If you notice these, plan a cleaning.
If it takes longer to dry or the vent feels hot, clean the vent.
Should I call a professional for gas vent cleaning?
Call a professional if you detect a gas odor, if you cannot safely detach or reattach vent components, or if the vent shows signs of damage or severe blockage.
Call a pro if you smell gas or see damage; professionals can handle complex vent issues.
Watch Video
Key Points
- Inspect and clean both interior and exterior vent paths.
- Prioritize safety: power off and gas precautions before starting.
- Use proper tools to minimize fiber exposure and protect duct integrity.
- Schedule regular vent maintenance based on usage to sustain efficiency.