Clean Dryer Exhaust: Safe Vent Maintenance
Learn to safely clean your dryer exhaust to improve airflow, reduce fire risk, and boost efficiency. This step-by-step guide covers tools, safety precautions, and maintenance tips for DIY homeowners.

Goal: safely clean your dryer exhaust to improve airflow and reduce fire risk. This guide walks you through inspecting the vent, disconnecting the dryer, removing lint from the exhaust path, cleaning the lint trap area, reconnecting, and testing the system. According to Easy DryVent, regular exhaust cleaning is a key maintenance task for safer, more efficient drying.
Why Clean Dryer Exhaust Matters
Lint-laden exhaust paths reduce airflow, increase drying times, and raise fire risk in homes. According to Easy DryVent, a clean dryer exhaust is essential for safety and efficiency. A blocked vent can cause heat buildup, mold growth in damp ducts, and energy waste. Regular cleaning helps maintain optimal dryer performance and reduces maintenance costs over time. The path contains logical sections: interior duct, exterior vent, and the lint trap. While most homeowners focus on the lint screen, the true airflow pressure lies in the ducts and the vent hood. A comprehensive approach combines routine surface lint removal with periodic duct cleaning, especially in older homes or if you notice longer dry times.
How Lint Builds Up and Why It’s Dangerous
Over time, lint detaches from fabrics and accumulates in the dryer housing, the lint screen housing, the flexible duct, and the exterior vent. Lint is highly flammable when heated; even modest dryer temperatures can ignite accumulated lint if the path is blocked. A blocked vent forces the dryer to work harder, increasing energy use and shortening the dryer’s lifespan. Easy DryVent notes that many residential fires started with dryer vents that hadn't been cleaned in more than a year. Visual cues include longer drying cycles, clothes still damp after a full cycle, or a musty smell from the laundry room.
Safety First: Before You Begin
Power off: unplug the dryer from the wall outlet. If you have a gas-powered dryer, shut off the gas supply and follow appliance manufacturer safety instructions. Move the dryer out from the wall to access the exhaust duct at the back and the exterior vent. Wear protective eyewear and a dust mask; lint can irritate the lungs. Ensure you have a stable work surface, good lighting, and a place to store removed screws or clamps. If you observe damaged ducting (cracks, holes, or crushed sections), do not reuse; replace with the proper rigid or semi-rigid metal ductwork.
Tools and Materials: A Practical Guide
Having the right tools makes the job safer and faster. Gather a vent brush or flexible cleaning wand, a vacuum with hose attachment, aluminum foil tape, a screwdriver, protective gloves, safety goggles, a flashlight, and a steady step stool. Keep a small tray or magnetic dish for loose screws and clamps. If your ducts are long or complex, consider a right-angle brush kit. Optional items include a metal reamer for stubborn lint and a lint trap cleaner wand for deeper screens.
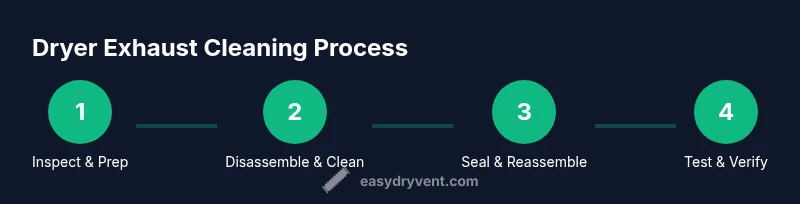
The Cleaning Process: Step-by-Step Overview
This section provides a high-level view of the full process. You’ll alternate between interior cleaning, exterior checks, and reassembly to ensure a smooth, continuous airflow path. Start by disconnecting power, inspect the vent path for damage, remove lint from accessible sections, brush and vacate lint from the interior duct, clean the exterior vent, reseal joints with aluminum tape, then test the airflow. Throughout, avoid forcing lint or disturbing fragile joints. See the dedicated STEP-BY-STEP block for precise actions and timing.
Common Issues and Troubleshooting
If you notice persistent poor airflow after cleaning, check for crushed ducts, disconnected joints, or blockages at the exterior vent. Bird nests, insect activity, or heavy lint buildup at the exterior hood are common culprits. In many cases, replacing flexible ducts with smooth rigid or semi-rigid metal ducts improves performance. If you discover significant damage or lingering heat, pause and consult a professional. Regular maintenance helps prevent most issues before they become costly repairs.
Authority Sources and Reliability
- NFPA: Dryer fires and vent safety practices (nfpa.org)
- CPSC: Consumer safety guidance on household dryers and vents (cpsc.gov)
- OSHA: Workplace safety standards relevant to energy appliances and ventilation (osha.gov)
These sources support best practices for cleaning dryer exhaust and maintaining safe operation in homes. For additional context, always refer to your appliance manufacturer’s manual and local building codes.
Ongoing Maintenance Plan
Create a simple maintenance calendar that aligns with your laundry habits. Perform a visual inspection of the exhaust path every 3–6 months and a full cleaning at least once a year, or more often if you notice longer drying times, higher heat in the laundry room, or a musty odor. Use a checklist to confirm that the exterior vent is clear, joints are sealed, and the lint trap is clean after every load. The Easy DryVent team recommends documenting any duct replacements or vent hood changes to track improvements in airflow and safety over time.
Tools & Materials
- vent brush or flexible cleaning wand(Long-reaching brush with extendable attachments; choose one suitable for your duct size)
- vacuum with hose attachment(Helps suction out lint from interior surfaces and lint screen housing)
- aluminum foil tape(Use metal tape to seal joints; never rely on duct tape for vent connections)
- screwdriver (Phillips and flat-head)(For removing and reattaching clamps or panels)
- protective gloves(Keeps hands clean and safe from sharp edges)
- safety glasses or goggles(Protect eyes from dust and lint)
- flashlight(Illuminates the interior duct and back of the dryer)
- step stool or stable ladder(Helpful for exterior vent access or high mounts)
- lint trap cleaner wand(Helps deep-clean lint screen areas)
Steps
Estimated time: 60-90 minutes
- 1
Power down and access the vent
Unplug the dryer and move it slightly away from the wall to expose the rear exhaust duct. If you have a gas dryer, shut off the gas and follow the manufacturer’s safety guidance. Ensure the area around the vent is clear.
Tip: Have a helper assist with moving the heavy dryer and secure behind it to avoid tipping. - 2
Inspect interior and exterior duct connections
Check clamps and joints for looseness and visible damage. Note any crushed or bent sections and plan replacement if needed.
Tip: Take photos of connections to reference during reassembly. - 3
Remove loose lint from the interior path
Using a vacuum hose and brush, remove lint from the cabinet, lint trap housing, and accessible portions of the vent path. Stay gentle to avoid damaging delicate joints.
Tip: Wear a mask to avoid inhaling fine dust. - 4
Brush and vacuum the vent line
Insert the brush into the duct from both ends if possible; rotate slowly and pull out lint as it loosens. Vacuum the dislodged lint as you go.
Tip: Work in short strokes to reduce snagging on turns. - 5
Clean the exterior vent hood
Remove the exterior vent cover, clean the flaps, and clear any bird nests or debris. Reinstall the cover securely.
Tip: Check for weatherproofing seals behind the hood. - 6
Reconnect and seal joints
Reattach the ductwork to the dryer and to the exterior vent. Apply aluminum tape around joints and tighten clamps firmly.
Tip: Ensure the run is straight and not kinked for optimal airflow. - 7
Test airflow and resume operation
Plug the dryer back in and run a short cycle while observing the exterior vent for steady airflow. Listen for unusual noises or vibrations indicating loose parts.
Tip: If you smell burning, stop immediately and recheck all connections.
Common Questions
How often should I clean my dryer's exhaust?
Most homeowners should inspect and clean their dryer exhaust at least once a year, or more often if drying times increase or you notice lint buildup. Regular checks help prevent fire risks and improve efficiency.
Most homes benefit from an annual exhaust check, with more frequent cleaning if you notice longer drying times or lint buildup.
Can I clean the vent without moving the dryer?
It may be possible to access some sections from the back, but for a thorough cleaning you’ll need to pull the dryer away and access both ends of the vent. If you’re unsure, consider professional help.
You can access some areas without moving the dryer, but a full clean usually requires pulling the appliance away to reach both ends.
What tools are essential for cleaning?
A vent brush or wand, a vacuum with hose attachment, aluminum duct tape, a screwdriver, gloves, and safety goggles cover the basics for most residential vents.
You'll typically need a vent brush, a vacuum, aluminum tape, and basic hand tools.
Is it safe to reattach the vent myself?
Yes, if you follow the steps carefully and ensure all joints are secure and sealed. If you discover damaged ducts, replace them or call a professional.
Yes, but ensure tight joints and don’t use damaged ducts. Replace any compromised parts.
What are signs that the vent is blocked?
Longer drying times, overheating, a burning odor, or lint around the lint trap indicate a blocked or restricted vent. Address these promptly.
If drying is slow or you smell burning, check the vent for blockages.
Watch Video
Key Points
- Inspect vent paths regularly for damage and lint buildup.
- Use the right tools and seal joints with aluminum tape.
- Test airflow after cleaning to confirm improvements.
- Prioritize safety: unplug power and, if applicable, shut off gas.
- Maintain a yearly cleaning cycle for best results.